How can we help?
Integration with MoySklad
- Registration in Teletype App
- Creating a WhatsApp Channel
- Connecting a WhatsApp Channel
- Creating and Connecting a Telegram Channel
- Connecting the Teletype Widget in MoySklad
- Creating a Template
- Editing a Template
- Deleting a Template
Registration in Teletype App
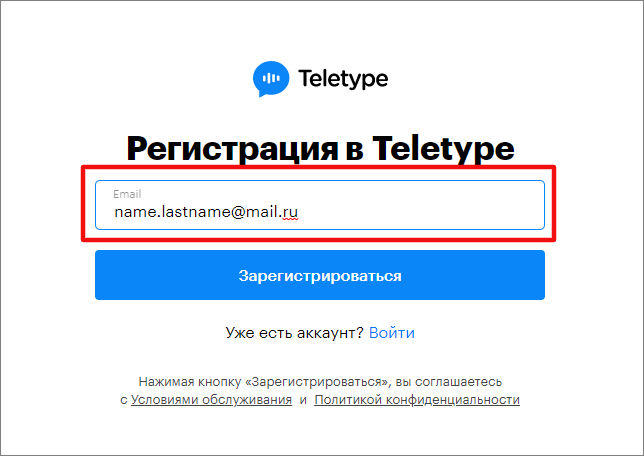
To get started, you need to register in Teletype. You should:
- Go to the website https://teletype.app
- Click the “Register” button on the homepage and enter the email address to which your account will be linked in the pop-up window.
3. Click “Register”, set a password, re-enter the password for confirmation, and specify the project name.
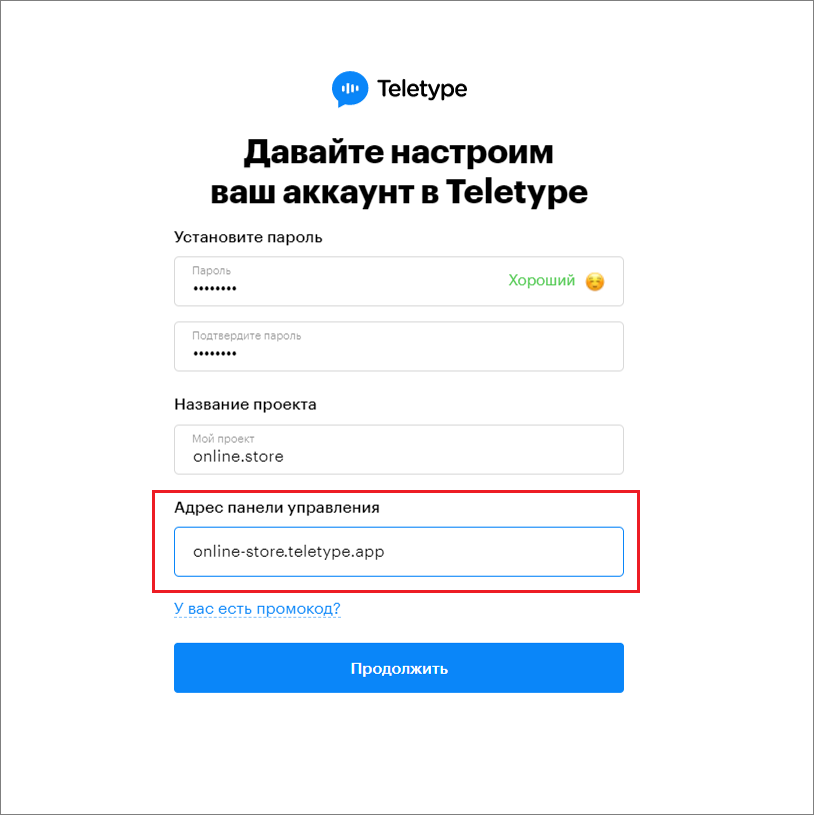
4. Change the control panel address if necessary. The control panel address is generated automatically using the formula: projectname.teletype.app.
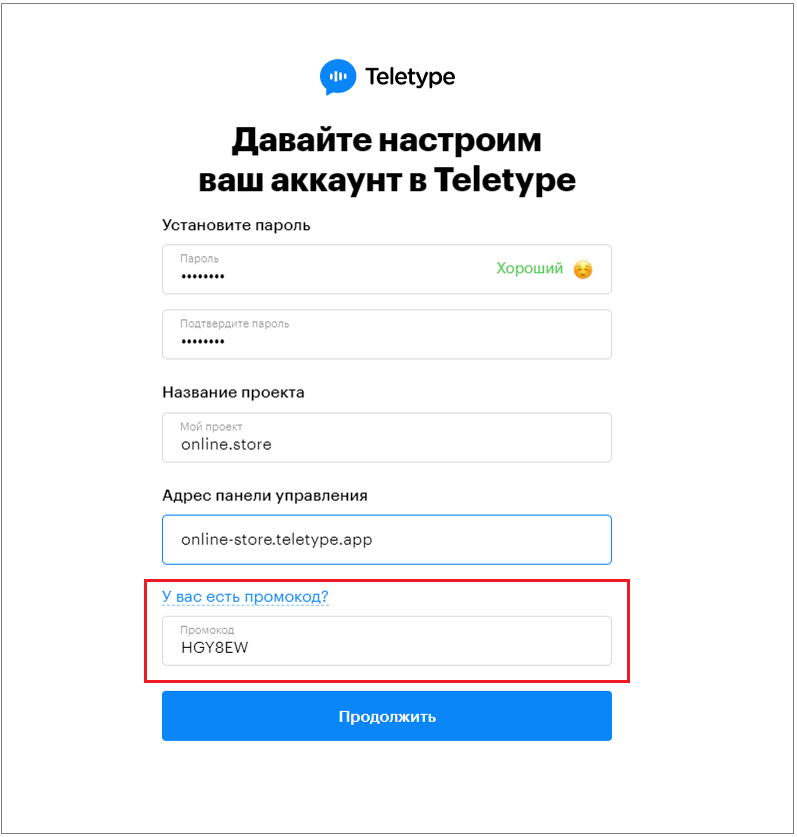
5. If you have a promo code, click on “Do you have a promo code?” and enter it in the corresponding field.
6. Click “Log In” and on the next page fill in the account owner’s name, phone number, and company website (if available).
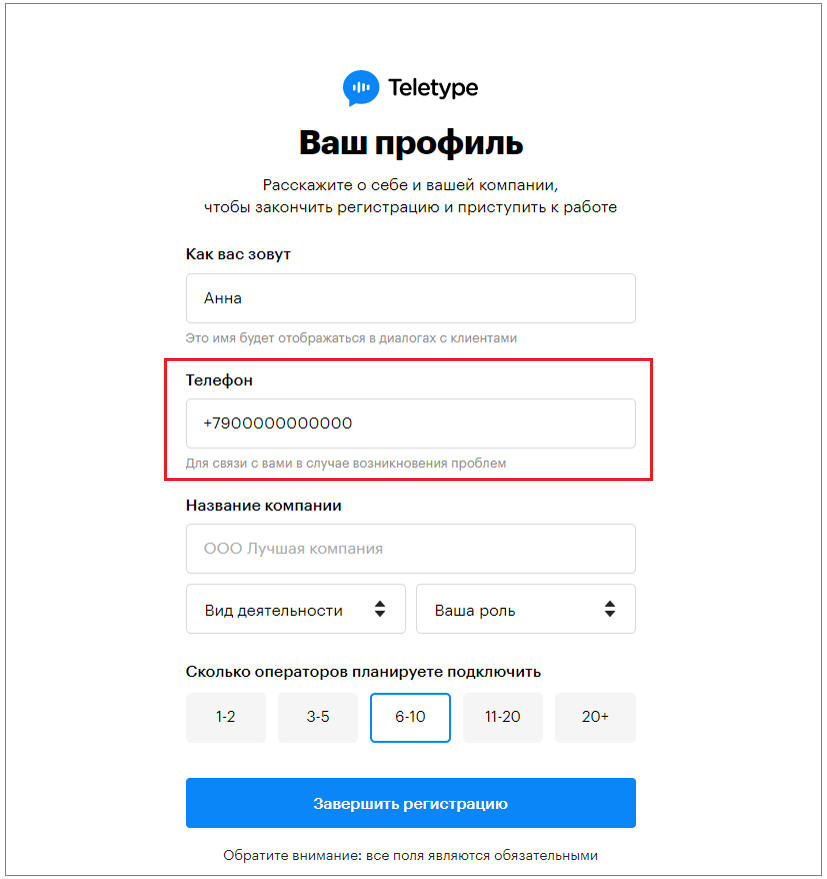
7. Click “Complete Registration.”
Next, you need to create a WhatsApp or Telegram channel.
Creating a WhatsApp Channel
Before integrating WhatsApp with Teletype, you need to close all other WhatsApp Web sessions.
To do this:
- Open the WhatsApp app on your phone
- Tap the three vertical dots in the top right corner
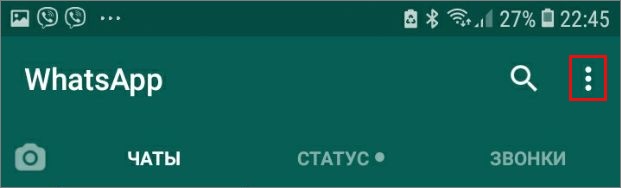
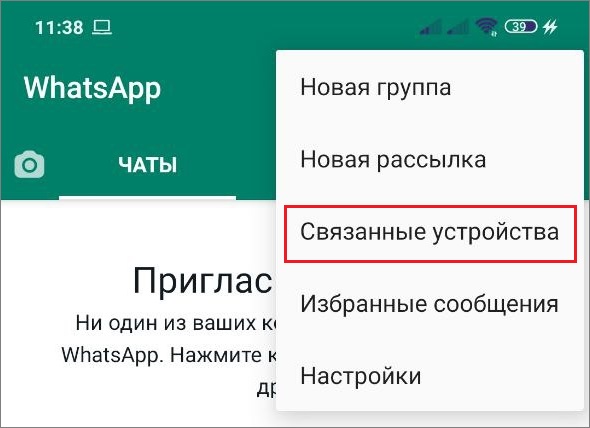
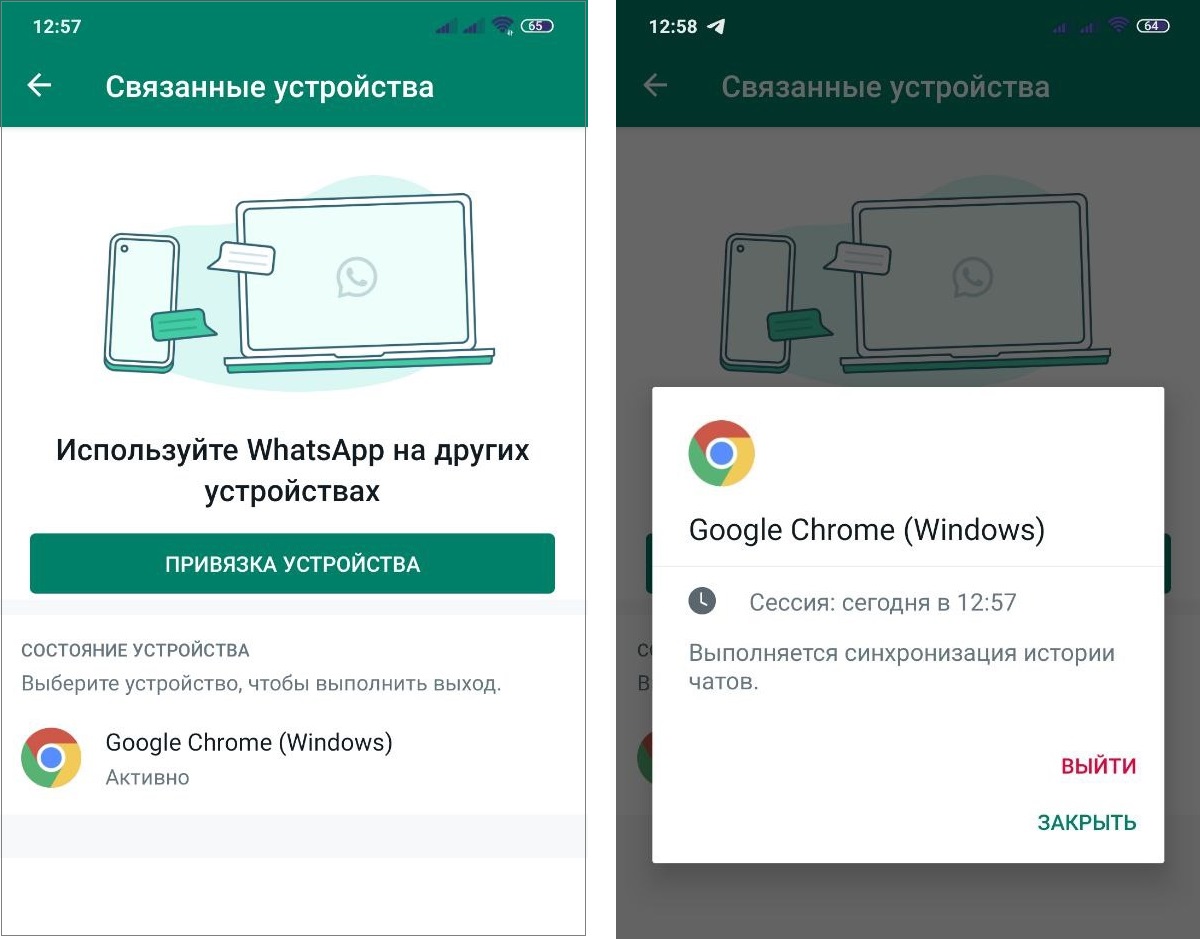
3. Tap “Linked Devices” — select the device and tap “Log out.”
You can connect an unlimited number of WhatsApp accounts to your Teletype project.
Connecting a WhatsApp Channel
In the Teletype panel, you will see a welcome window.
- Select “Connect WhatsApp”

2. Click “Continue”, scroll down, and you will see a window with a QR code.
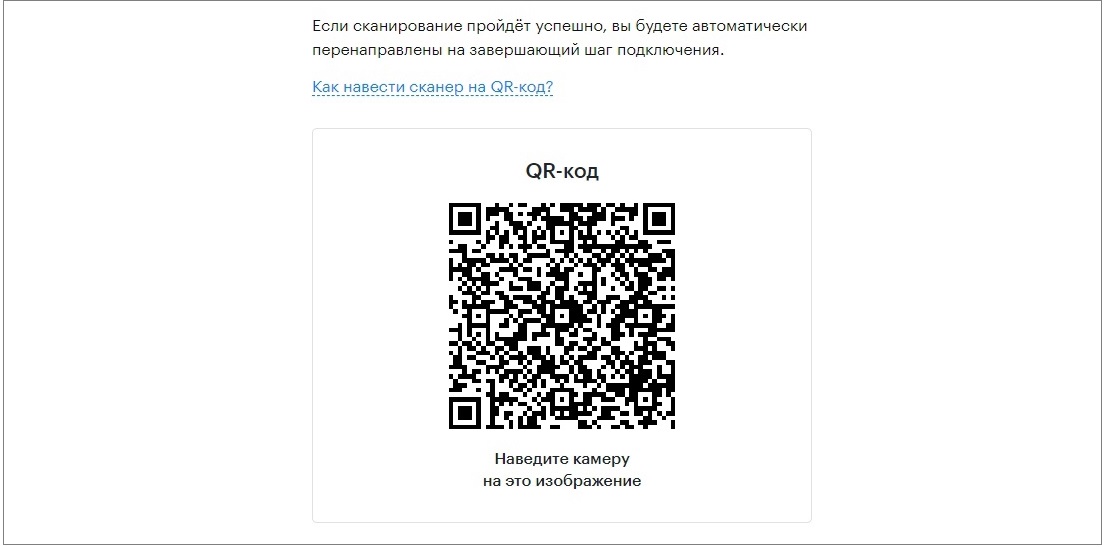
3. Then on your phone, tap “Link a Device.”
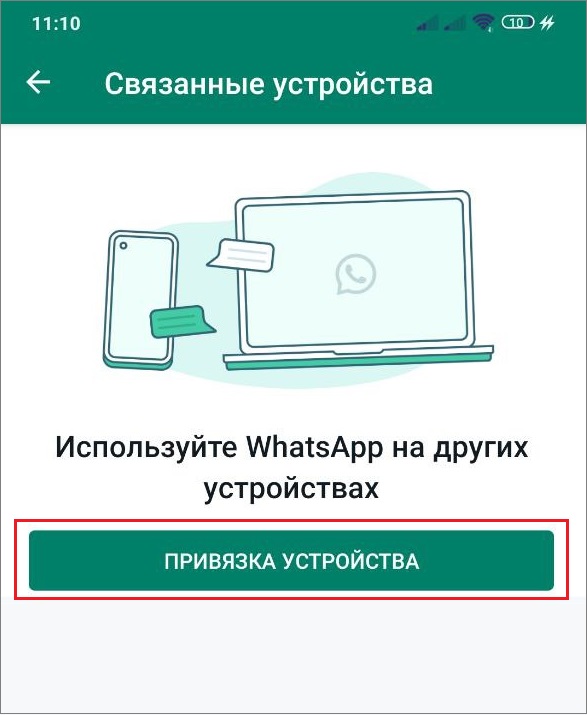
4. The camera will open with a window to scan the QR code. Point your phone’s camera at the QR code displayed on your computer screen.
5. If necessary, change the channel name and click “Complete Connection.”
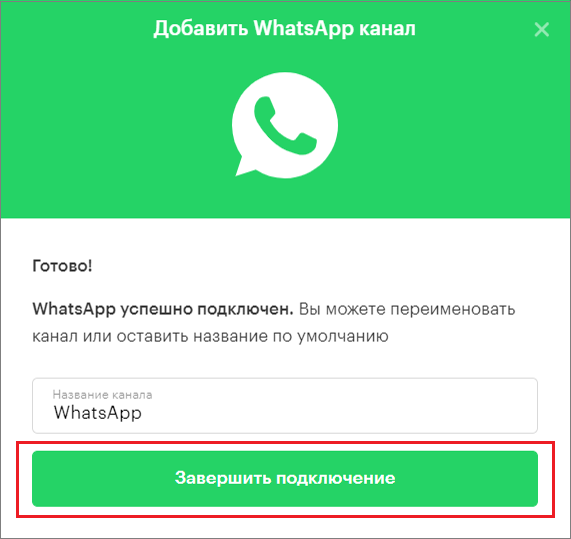
If done correctly, the “Channels” section will show that your WhatsApp channel is connected.
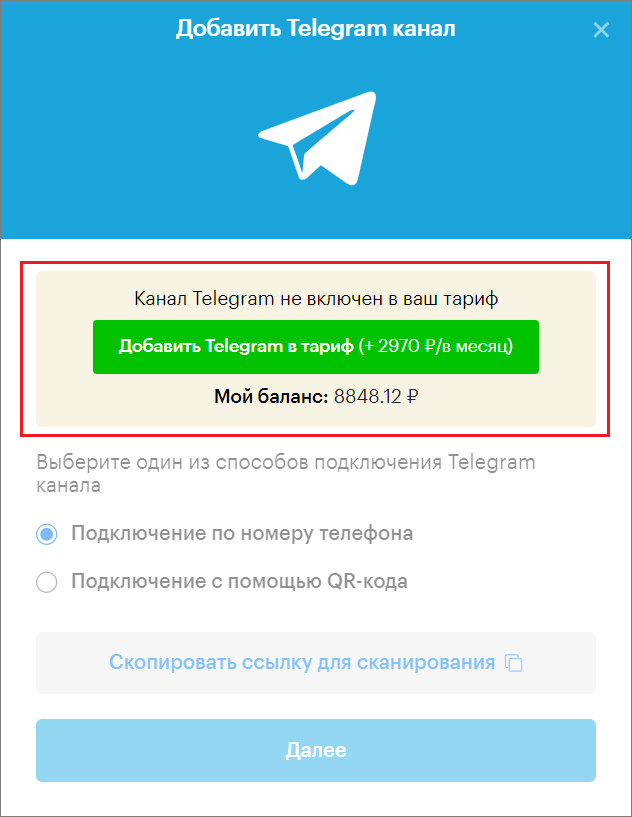
Creating and Connecting a Telegram Channel
To create a Telegram channel by phone number, you need to:
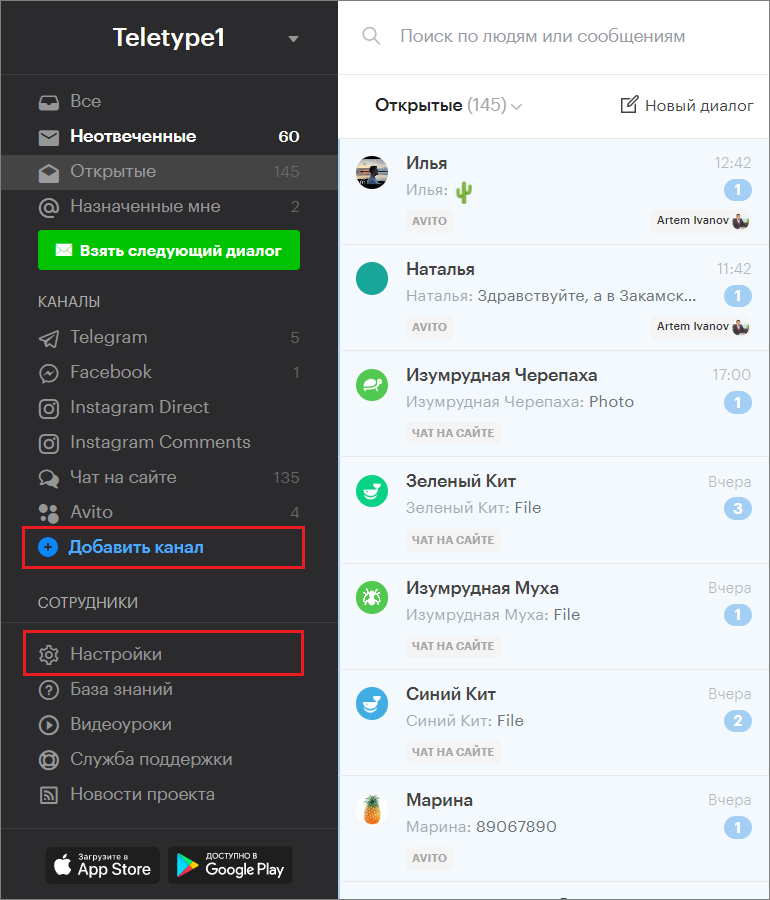
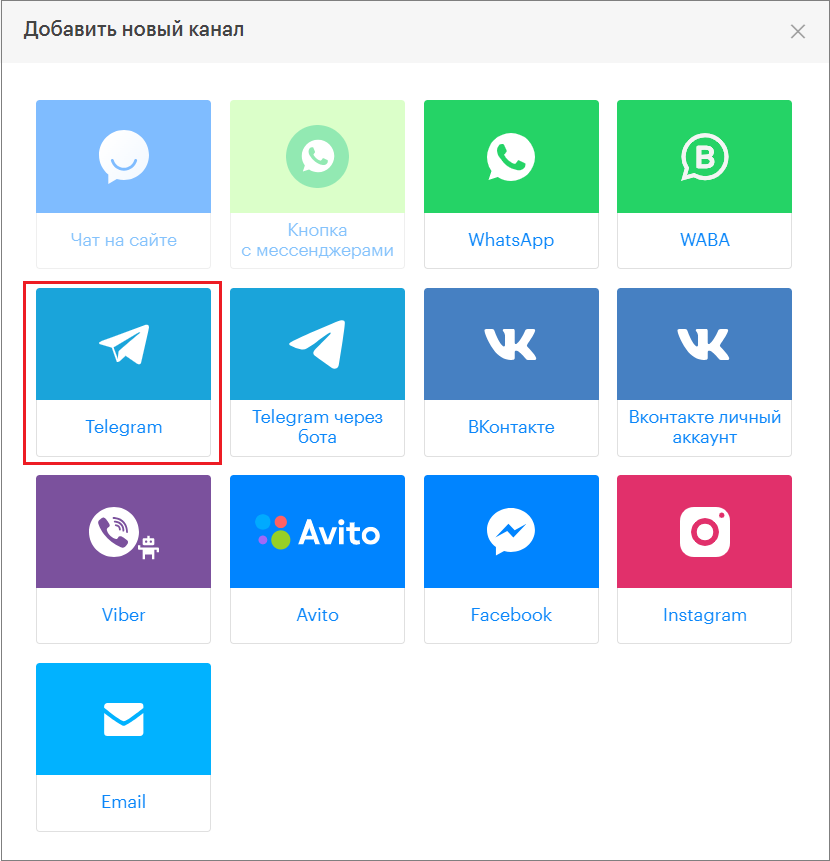
- Go to the “Add Channel” section in the left menu of the Teletype panel or in the project settings.
2. In the pop-up window, select the “Telegram” block.
3. Click “Add Telegram to Plan.”
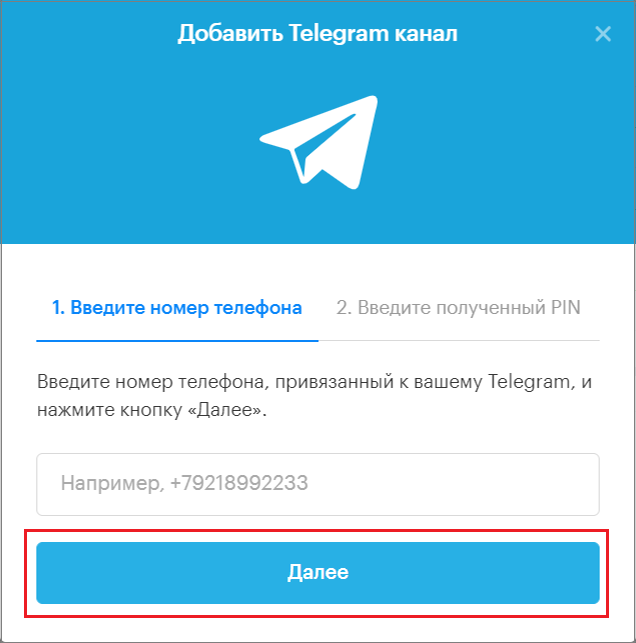
4. Enter the phone number.
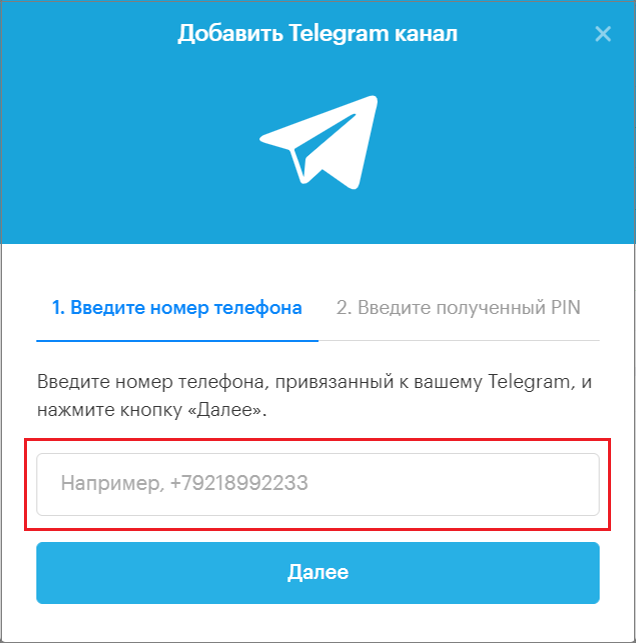
5. Click “Next.”
6. Wait for the PIN code sent to your Telegram and enter it in the field.
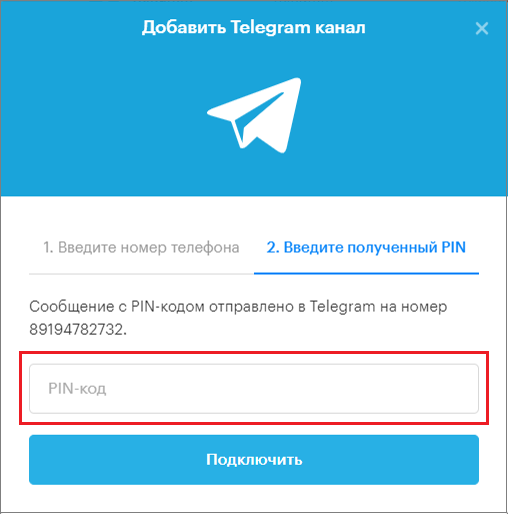
7. Click the “Connect” button.
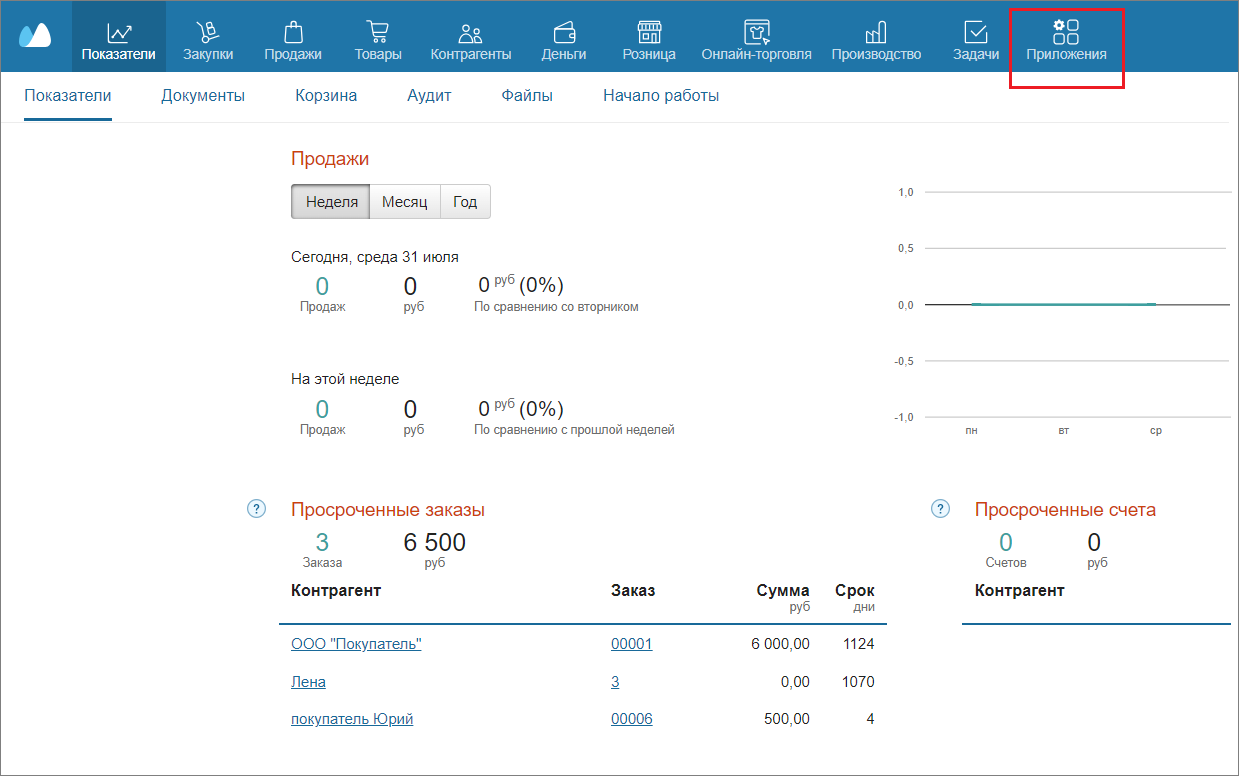
Connecting the Teletype Widget in MoySklad
To connect the Teletype widget to MoySklad, you need to:
1. Log in to your MoySklad personal account.
2. In the top menu bar of MoySklad, click “Applications.”
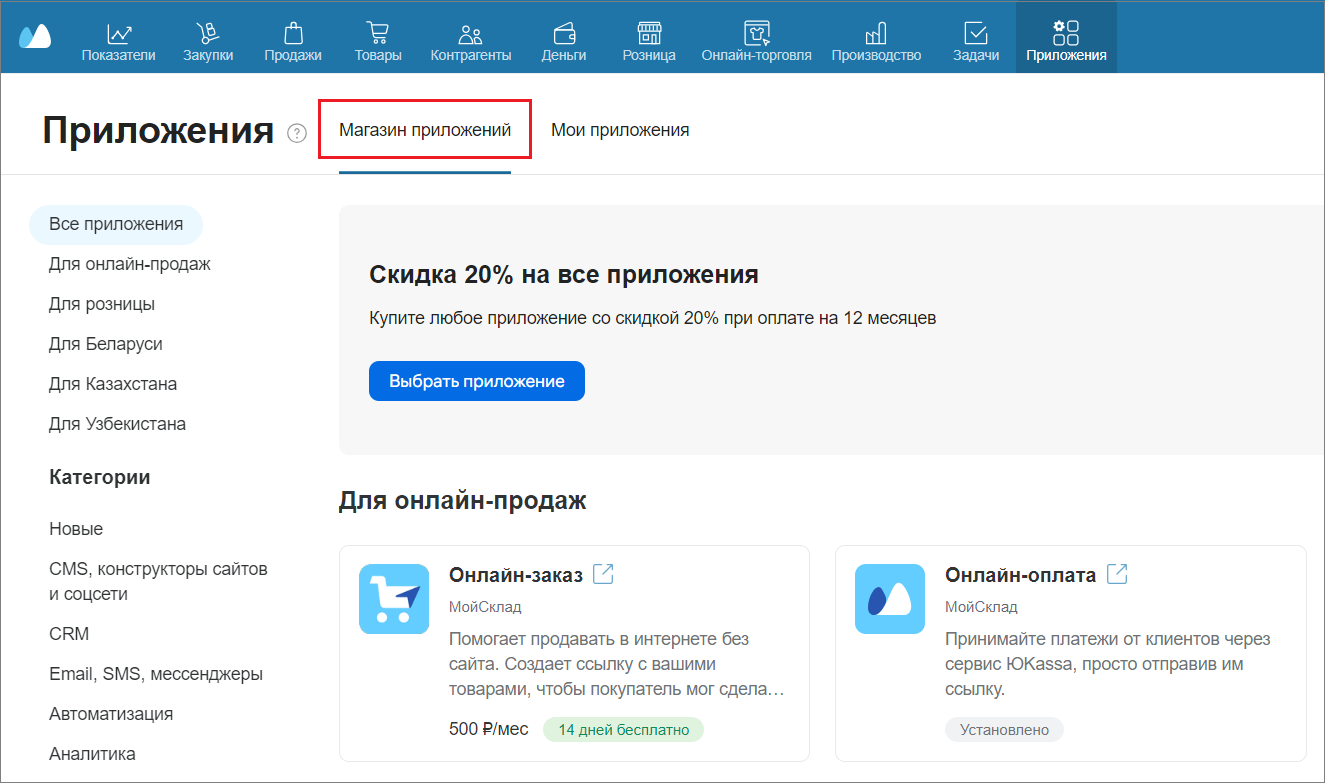
3. Then go to the “App Store.”
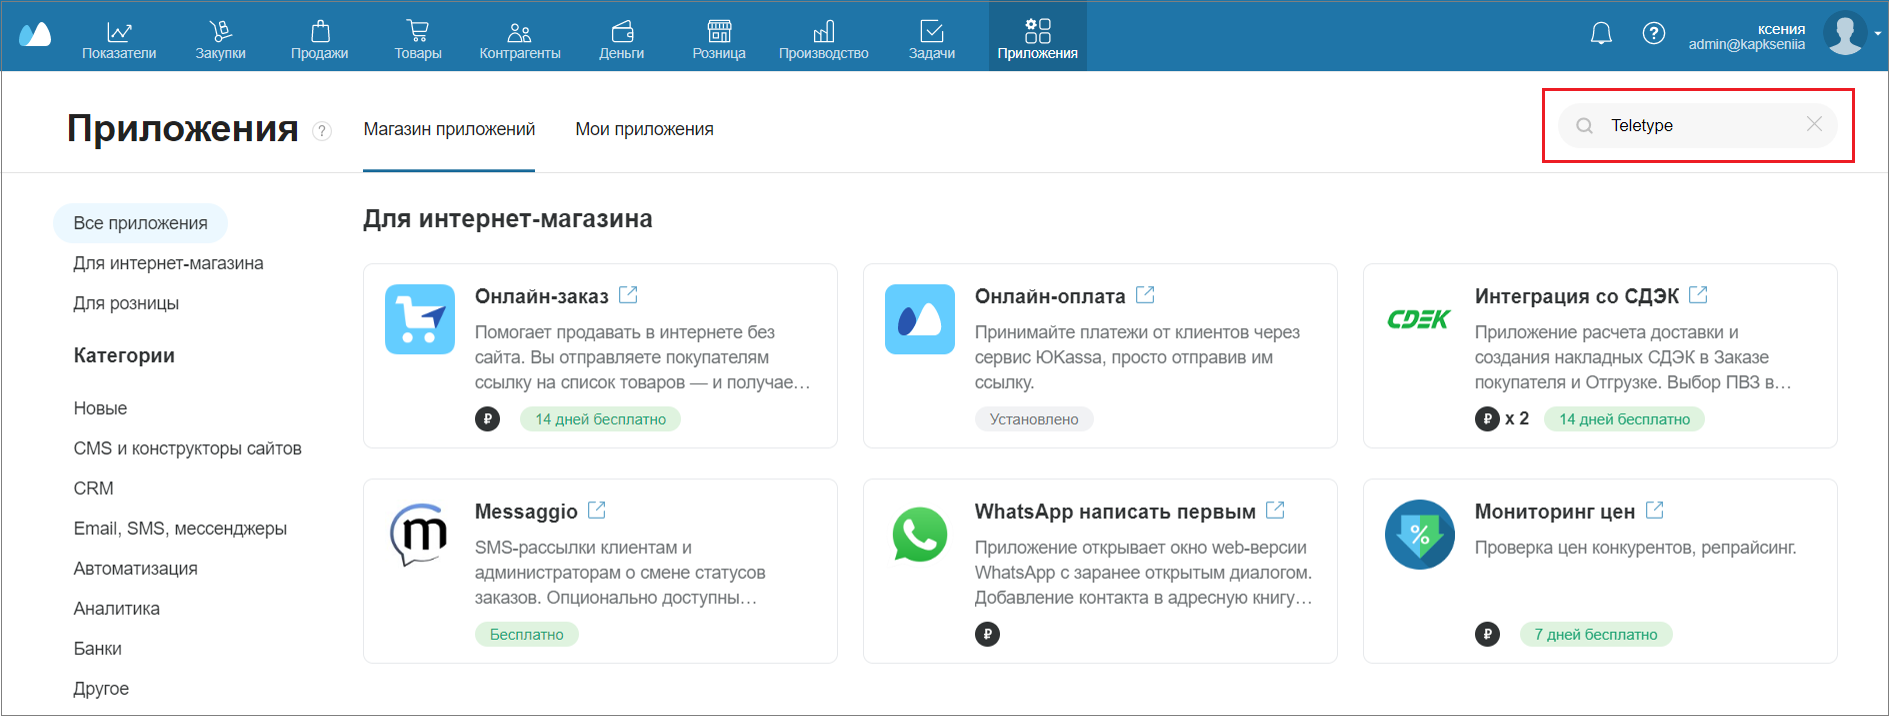
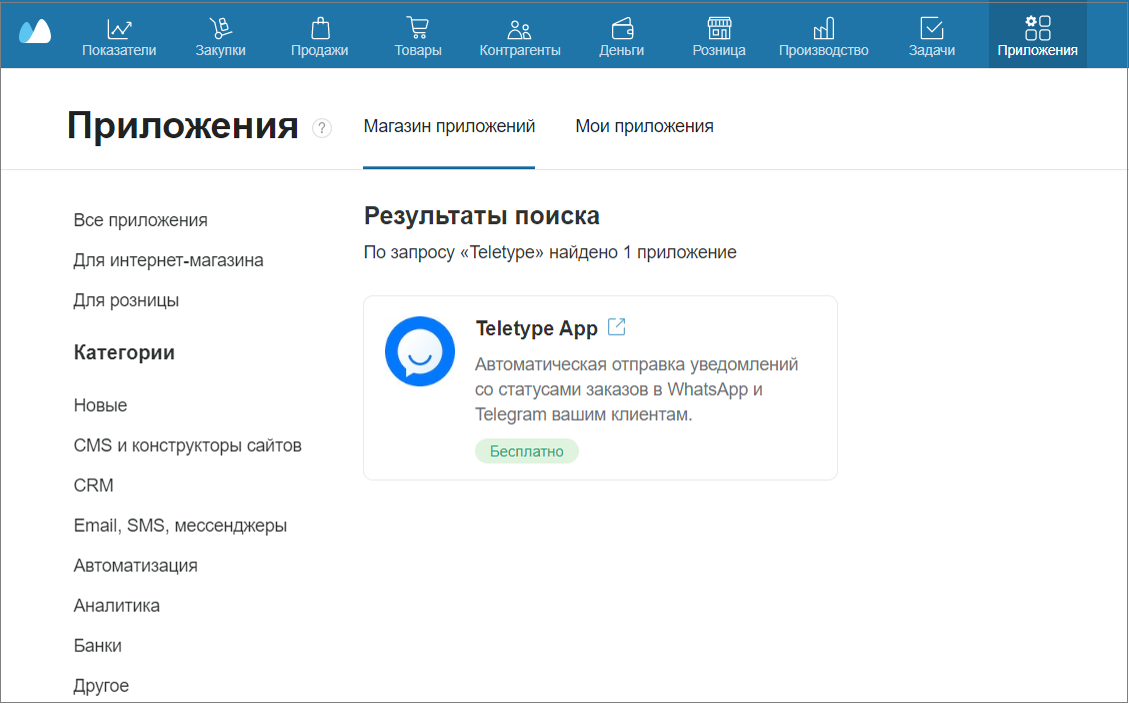
4. In the App Store, use the search window to find the Teletype app.
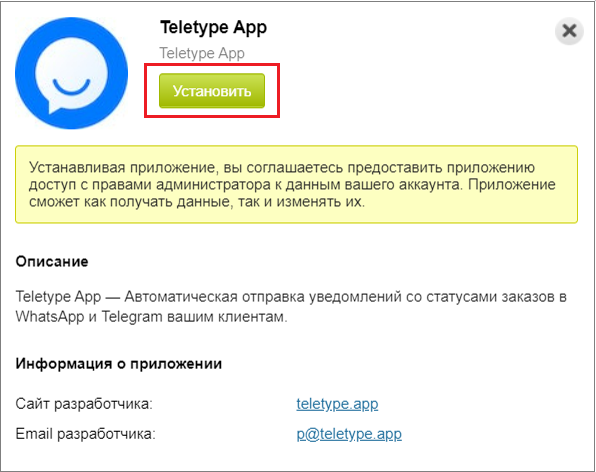
5. Click on the Teletype App.
6. In the pop-up window, click “Install.”
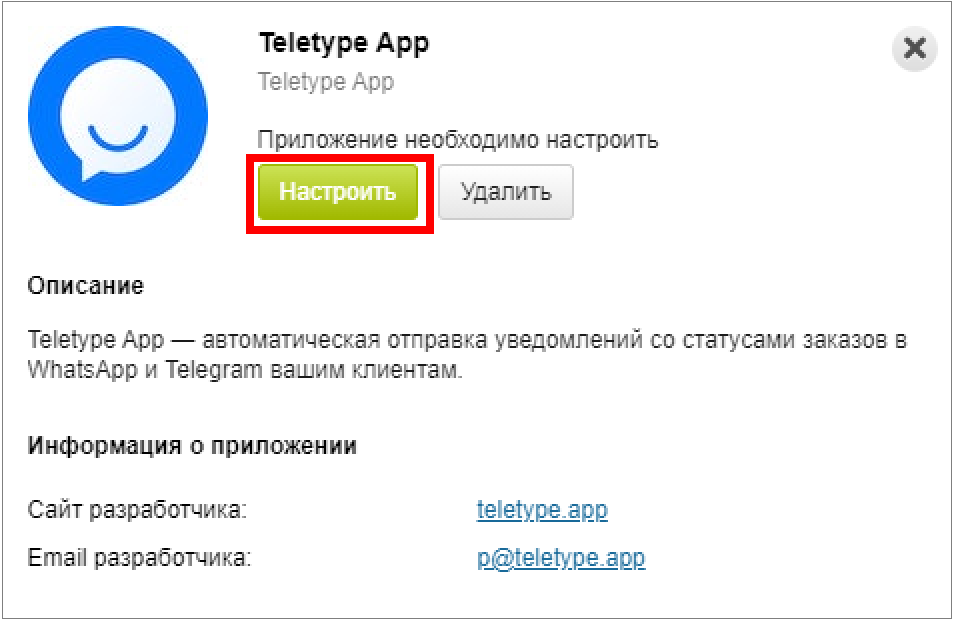
7. Click the “Configure” button.
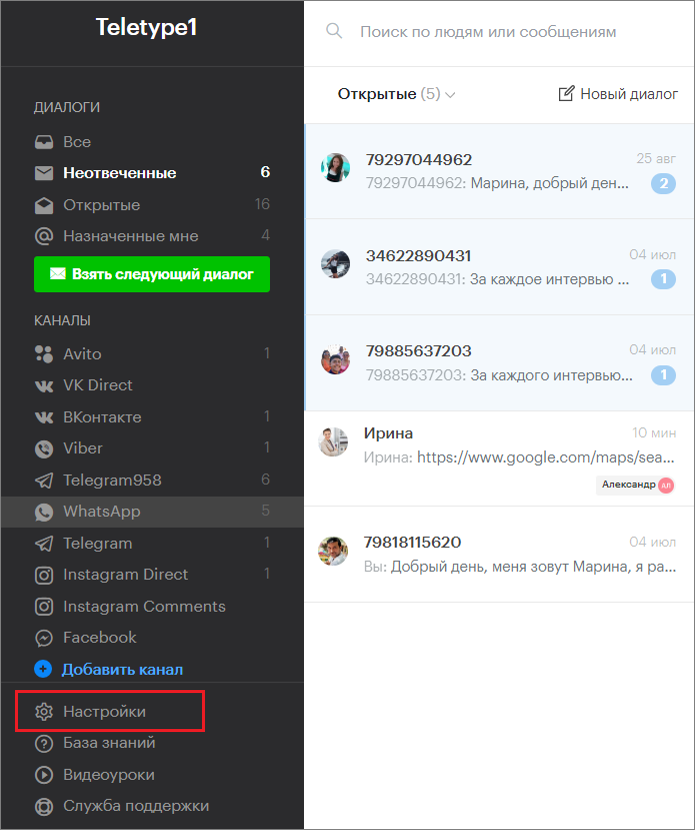
8. Next, you need to get a token. To do this, go to the settings in the Teletype panel.
9. Click on “Public API.”
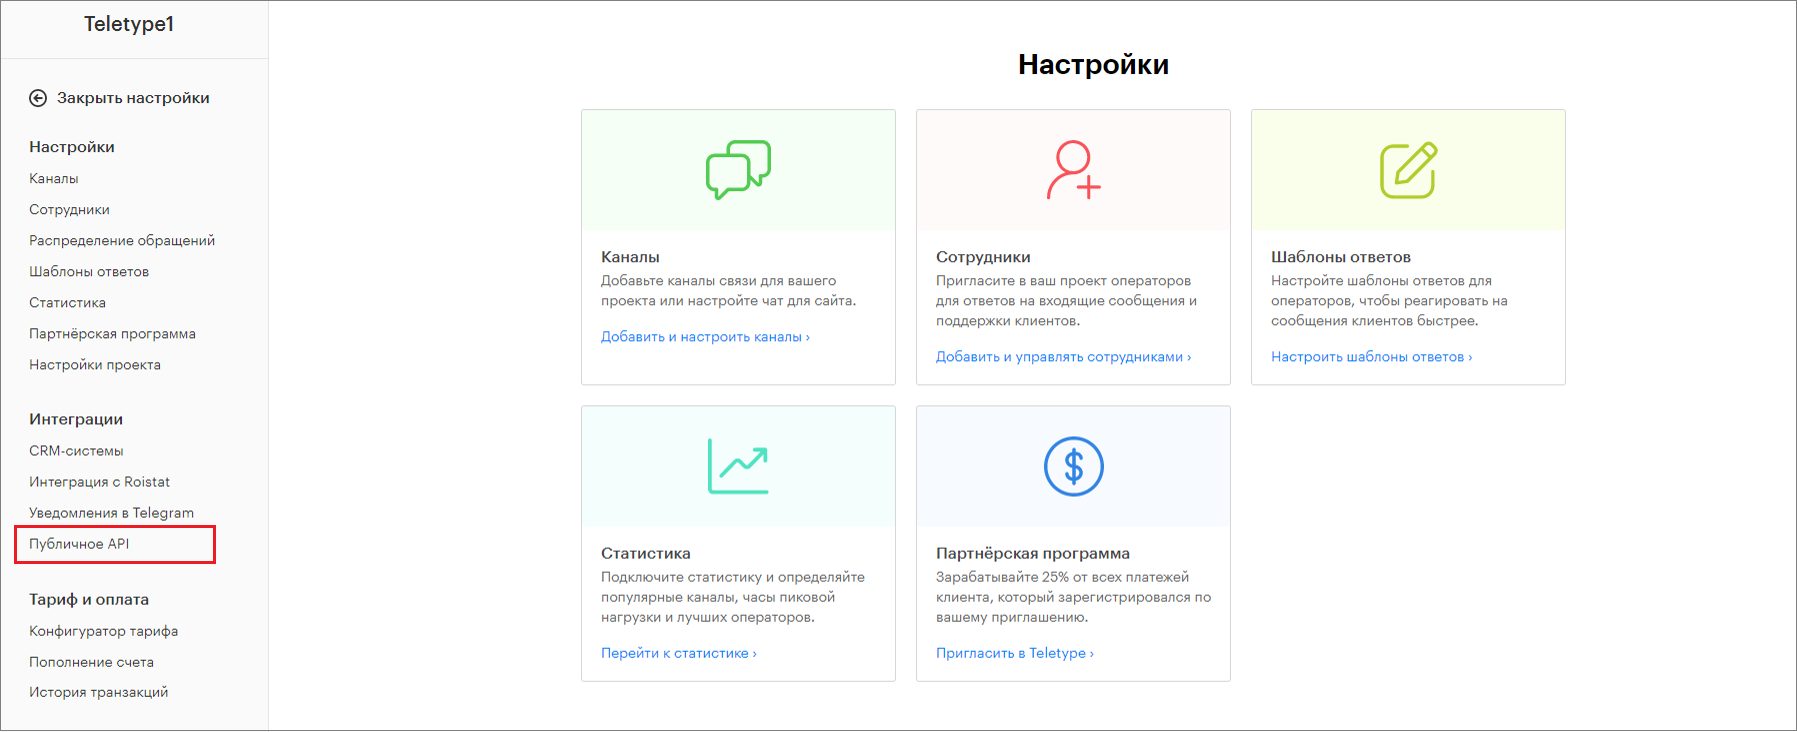
10. Click “Add to Plan.”
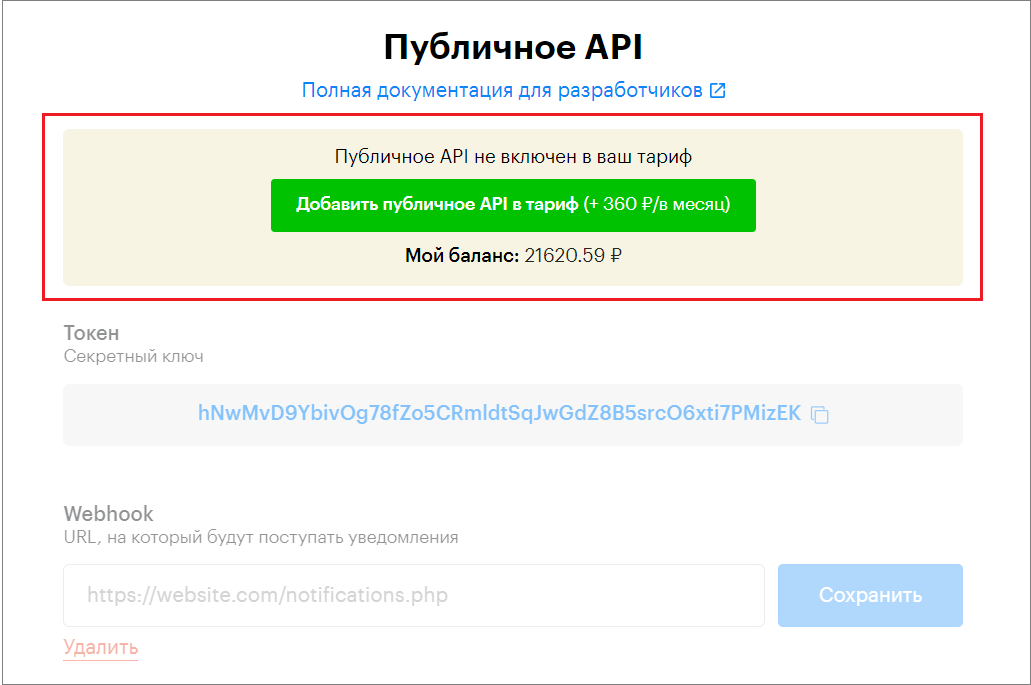
11. Copy your token from the field.
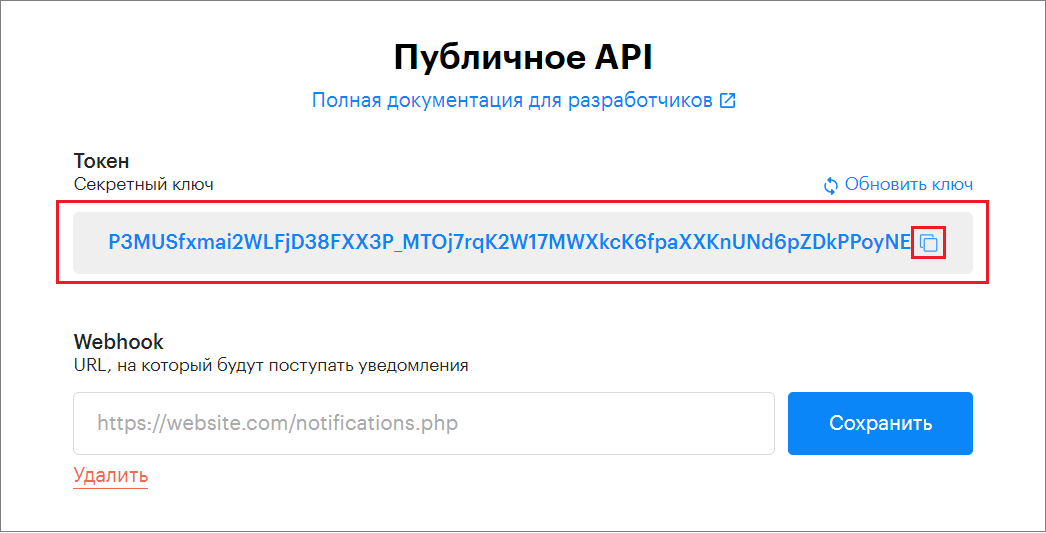
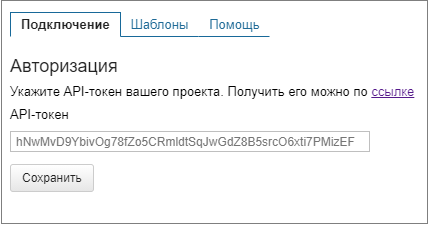
12. Return to the widget setup, paste the copied token into the field, and click “Save.”
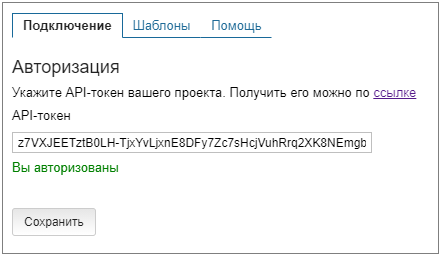
13. A notification about authorization will appear.
IMPORTANT! The Teletype integration with MoySklad only works on the paid MoySklad service plan.
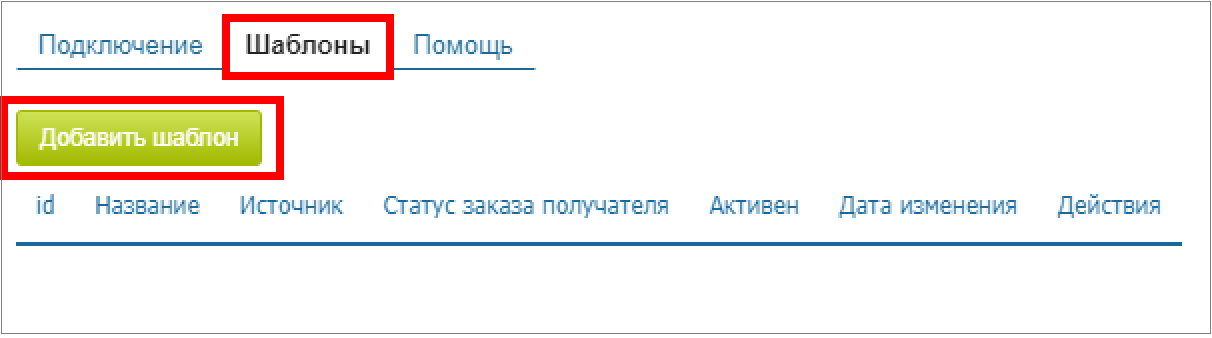
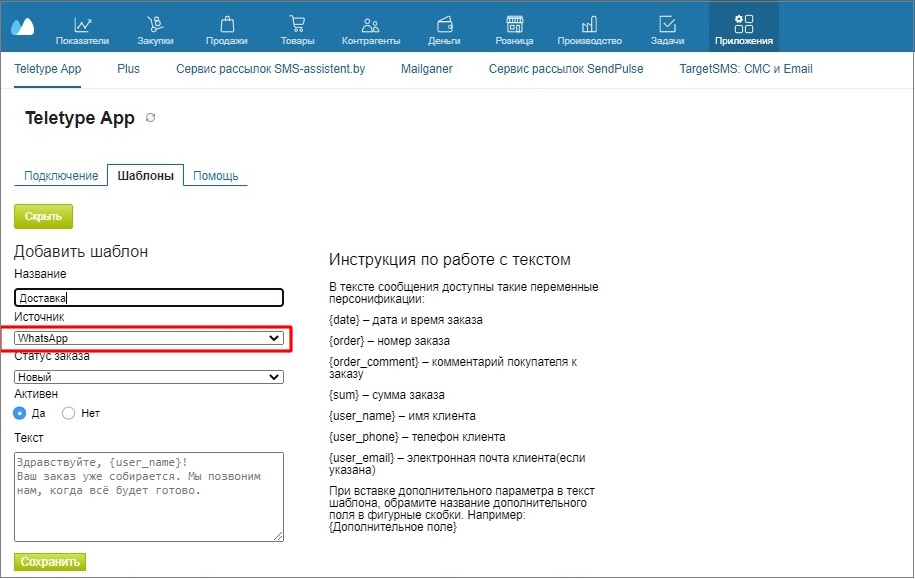
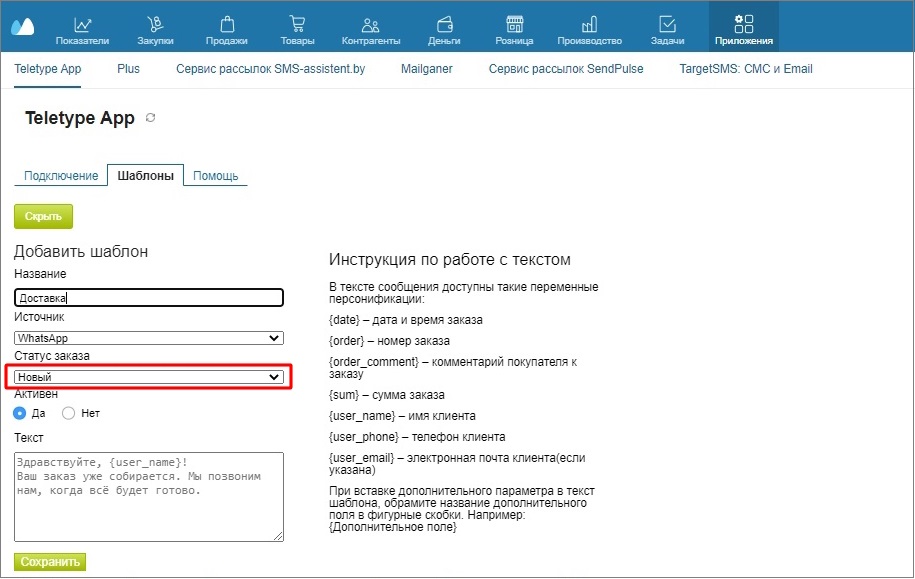
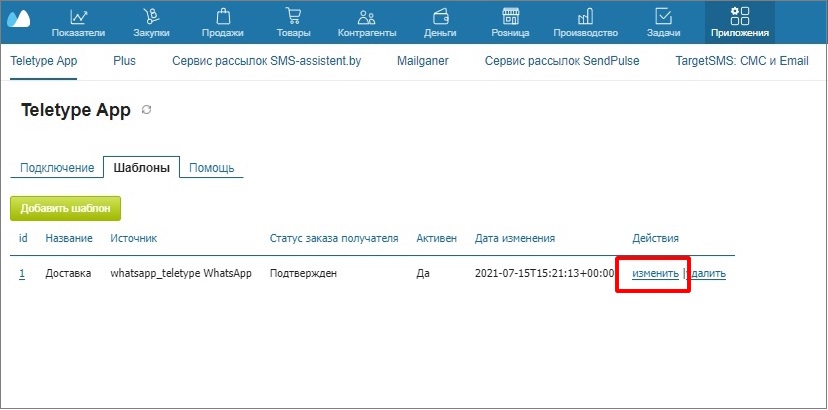
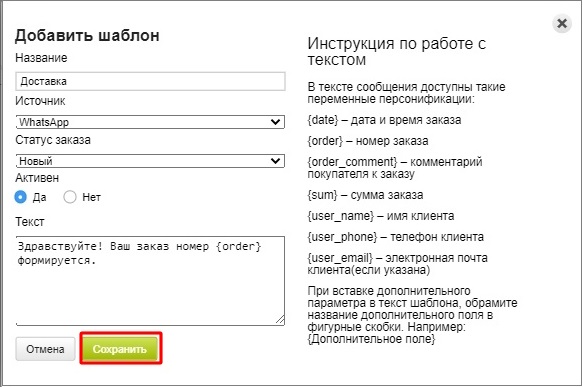
Creating a Template
- Now go to the “Templates” tab and click the “Add Template” button.
2. Enter the template name.
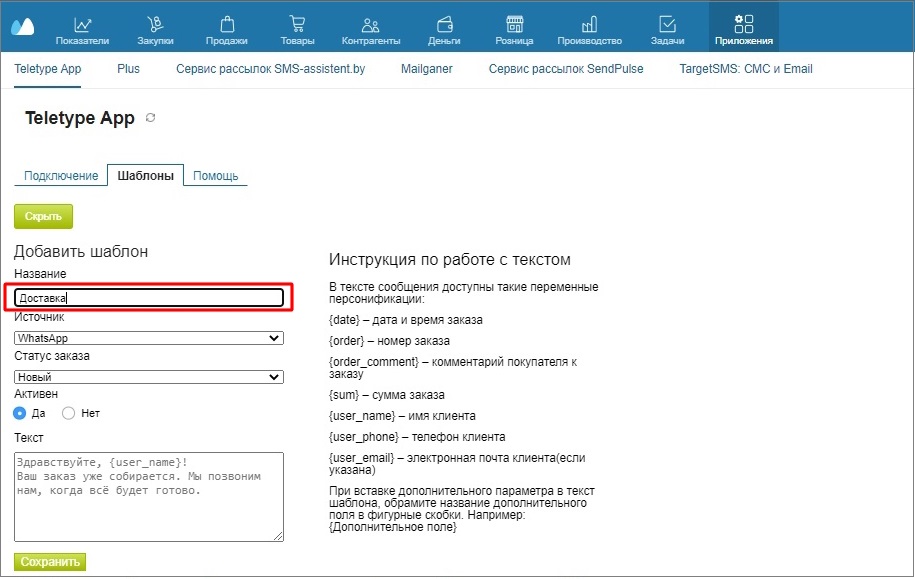
3. Select the source.
The source is the communication channel (for example, WhatsApp or Telegram) through which the message will be sent to the client’s phone number.
4. Select the order status. The status indicates the state of the order (for example, whether it is new or already delivered). When a certain status is reached, a message will be automatically sent to the client.
5. Specify whether it is active or not. If active, an automatic message will be sent when the order status changes; if not active, no message will be sent.
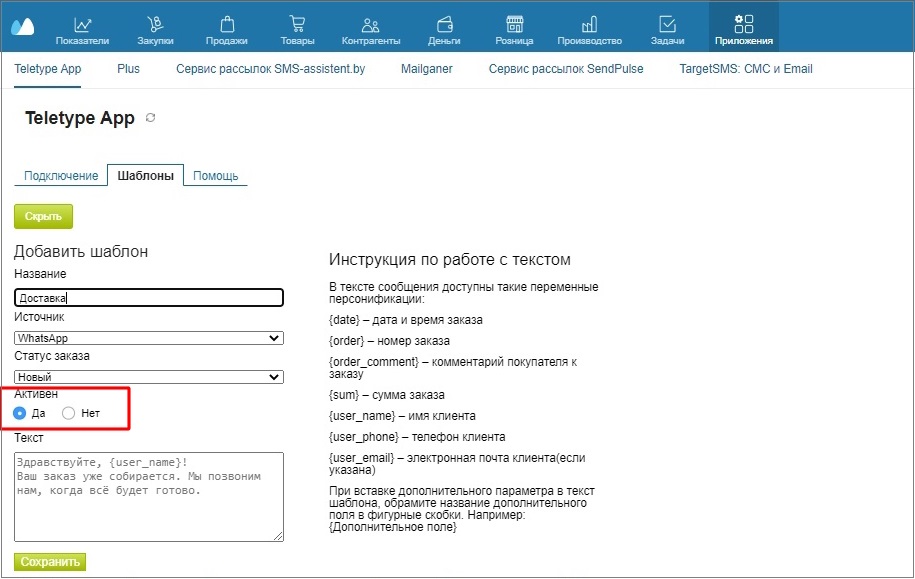
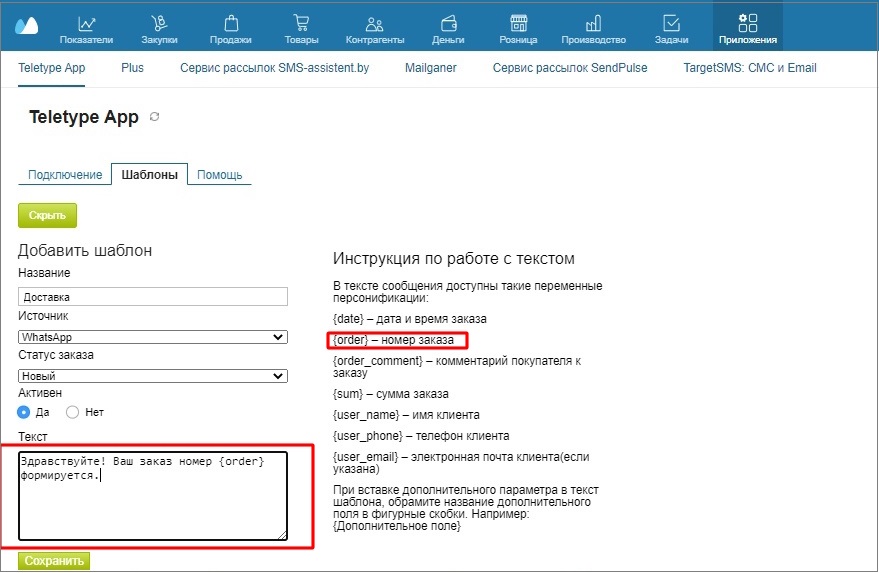
6. Enter the message text.
You can use variables by simply inserting them into the text.
7. Click “Save.”
Variable “Additional Field”
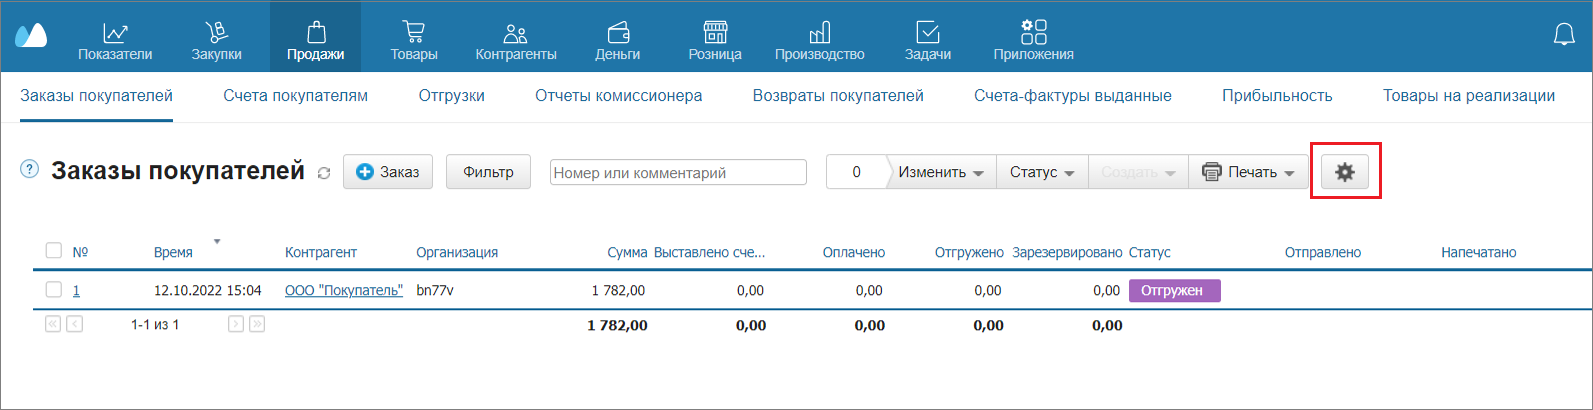
The additional field is created in the Customer Orders window. You can create multiple additional fields.
- Go to Customer Orders and click the ⚙ icon.
2. In the pop-up window, click +Field.
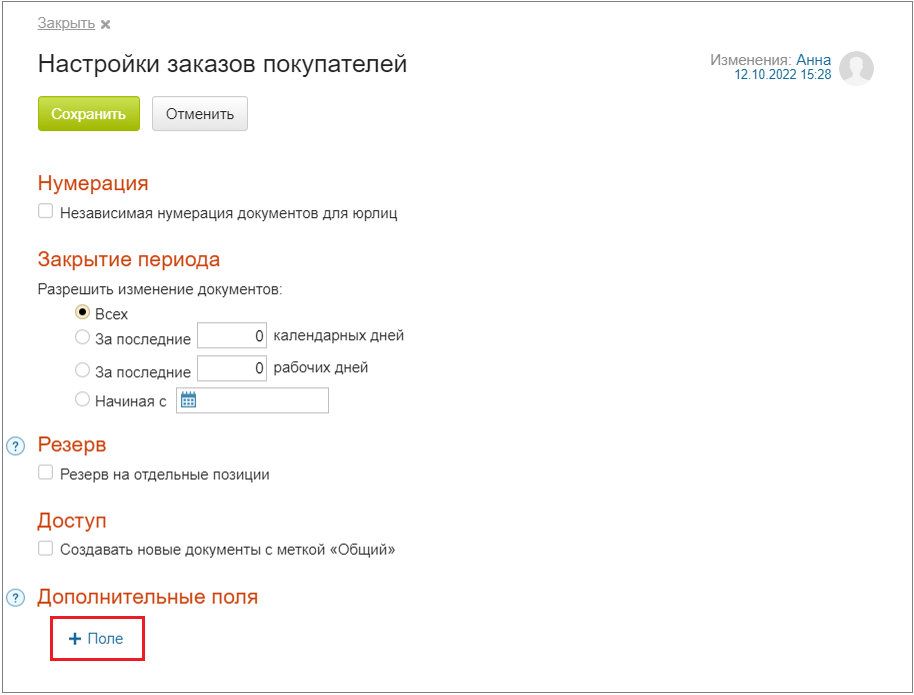
3. Fill in the Field parameters.
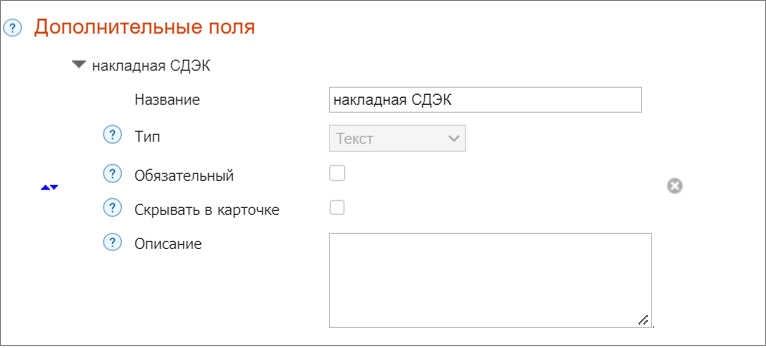
4. After filling in the Additional Field parameters, click “Save.”
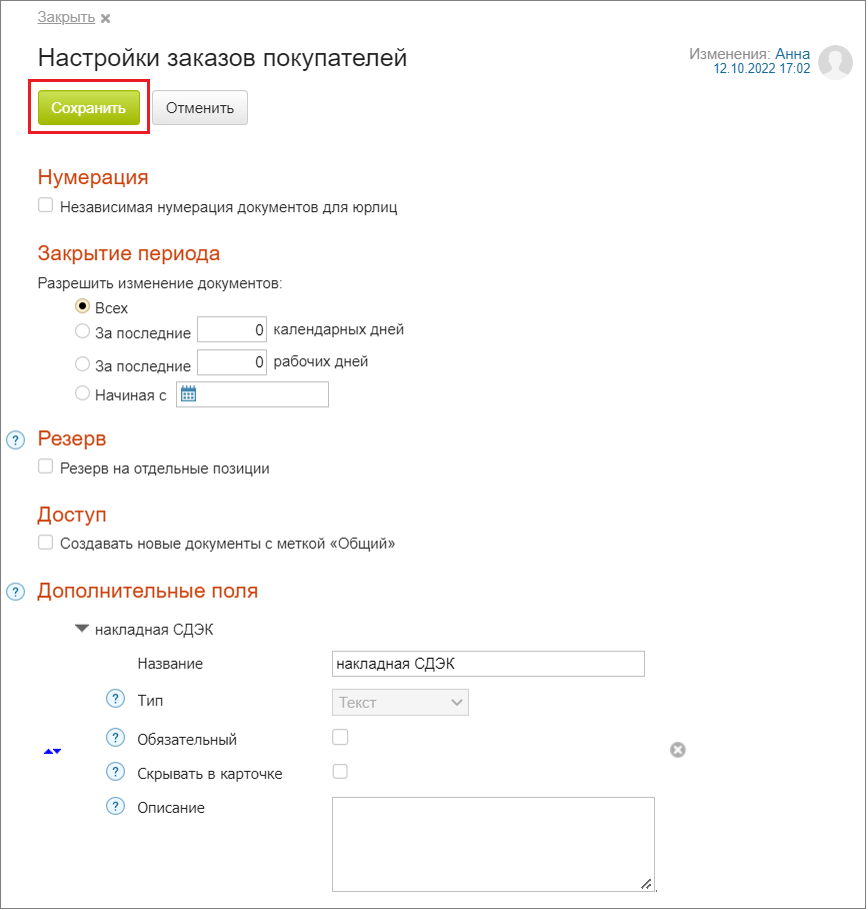
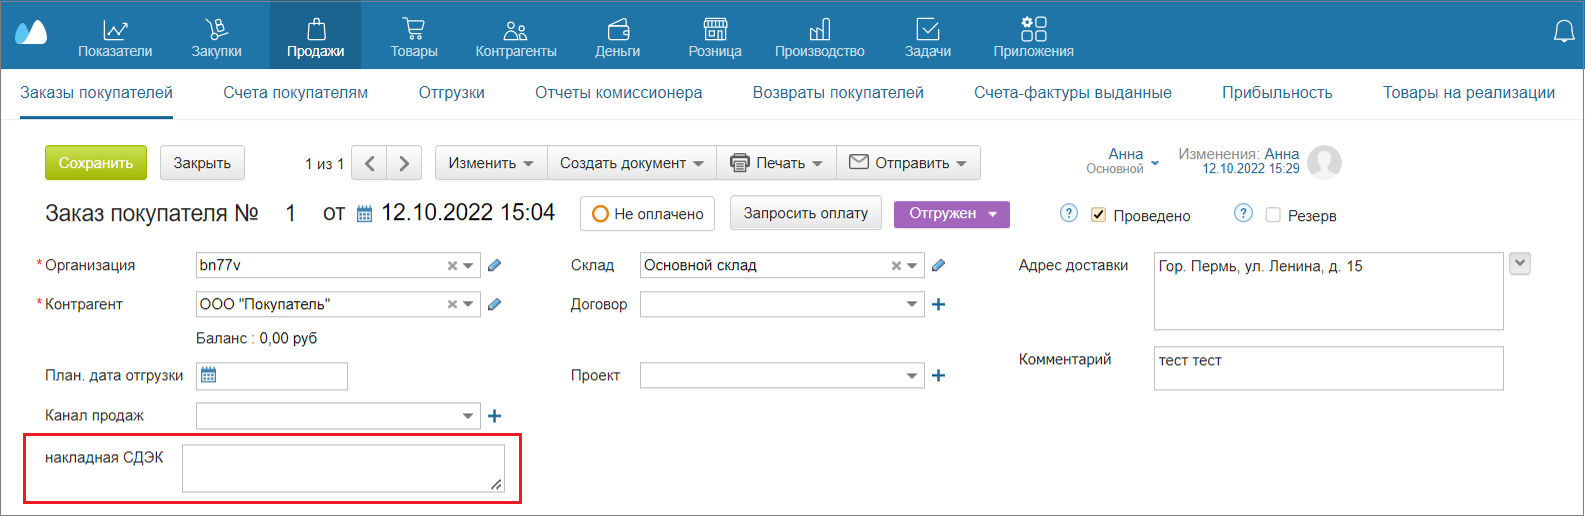
5. After that, the additional field will appear in Customer Orders.
6. When inserting the additional parameter into the template text, enclose the additional field name in curly braces. For example: {Additional Field}, where Additional Field is the name you specified in its settings.
IMPORTANT! If an order first moves to a certain status that triggers an automatic message to the client, and then the operator reverts the order to a previous status, the automatic message will not be sent again when the order returns to that status.
If you want a message to be automatically sent to the client when a new order is created, you need to create a template with that message using the status “New.”
If you delete channels (Telegram or WhatsApp) in the Teletype project that are linked to templates, the templates will also be deleted.
Editing a Template
- Select the template you want to edit and click “Edit.”
2. In the pop-up window, fill in the fields according to the changes you want to make.
3. Click “Save” if you are satisfied with the changes.
Deleting a Template
- If you want to delete a template, click “Delete” next to the desired template.
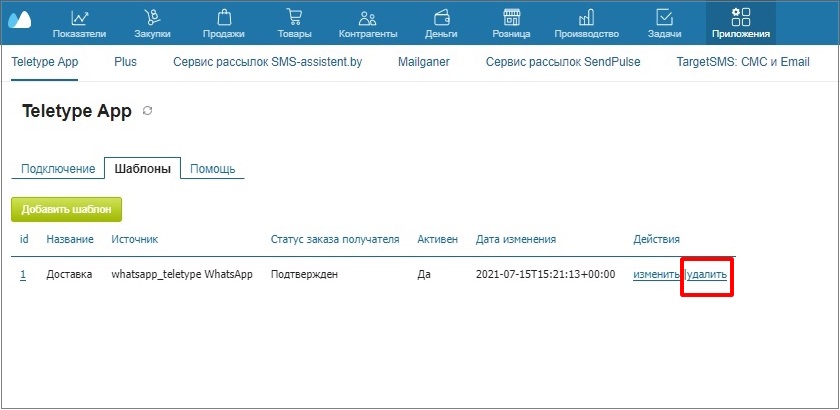
2. In the pop-up window, confirm the deletion by clicking “Delete” or cancel the deletion.
