How can we help?
Creating a Script for a Chatbot
A scenario is a set of blocks that define the chatbot’s actions during a conversation with a client.
To create a scenario, blocks are used, which the user assembles like building blocks to form the logic of their conversational solution. The blocks specify the bot’s actions and the expected user responses, all connected in the required sequence.
“Add Blocks”
Blocks can be added by clicking on the desired block in the menu on the left sidebar.

Alternatively, you can right-click in the right panel to open the command menu for the chatbot.
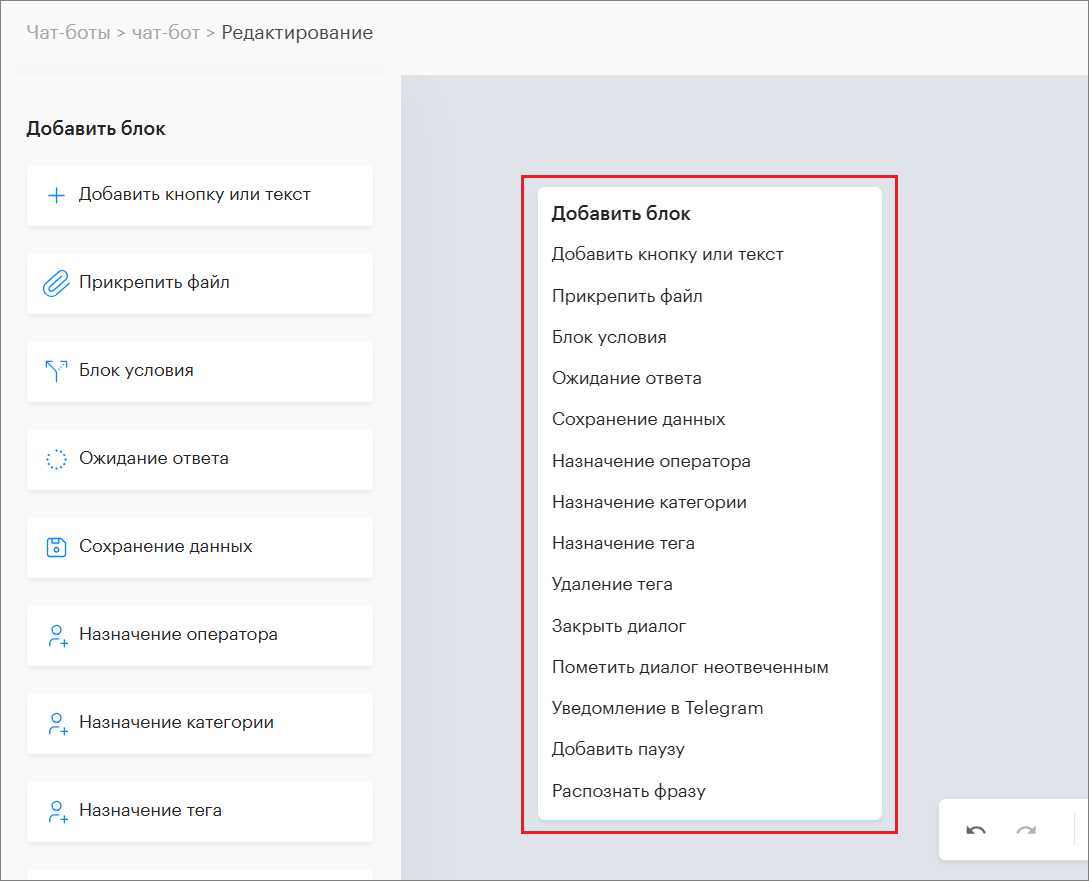
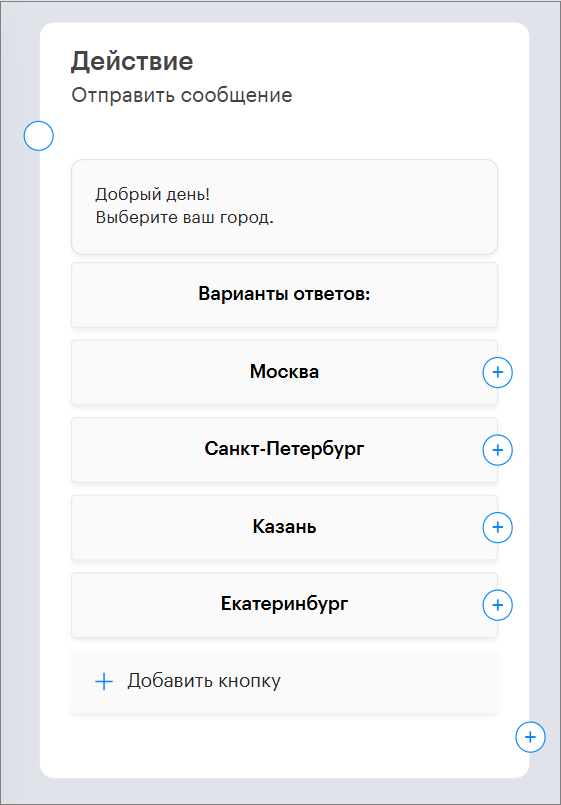
“Add Button or Text”
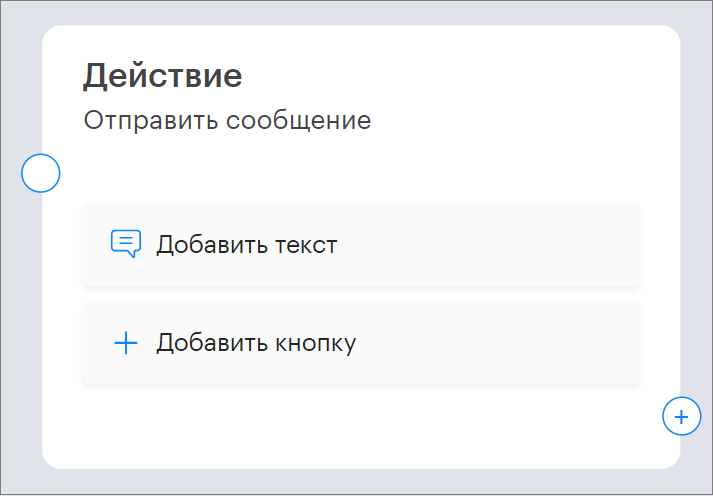
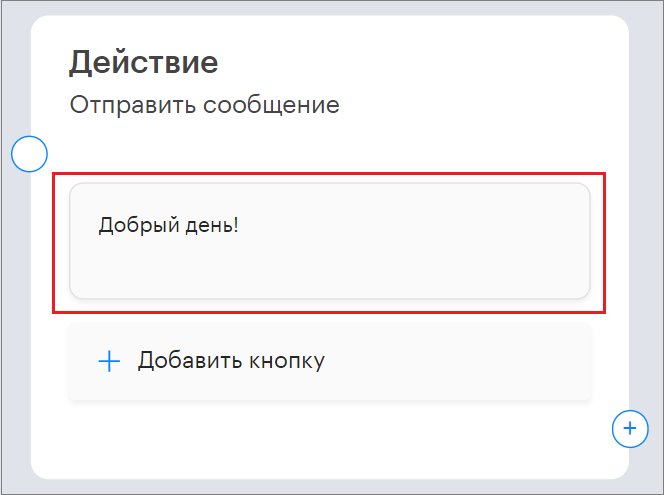
Here you need to enter the text that will be sent to the client.
For example, if you enter “Good afternoon!”, the client will receive “Good afternoon”.
You can also add buttons here for chatbot navigation.
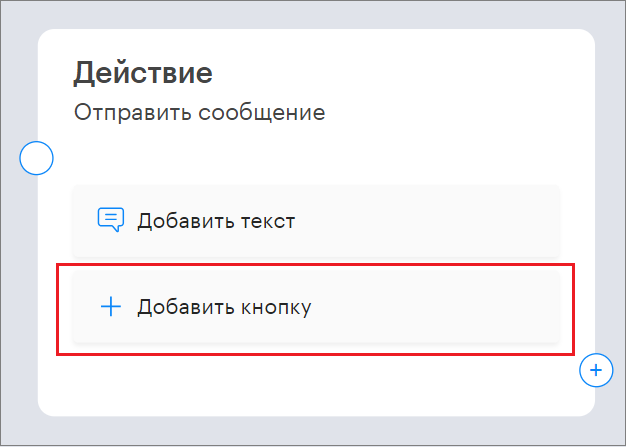
For example, “City Selection”.
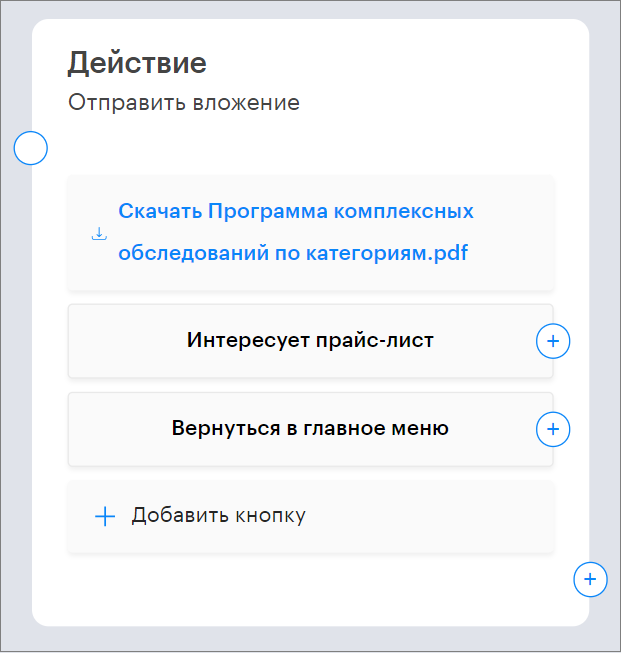
“Attach File”
In this block, you can attach a file that will be sent to the client.
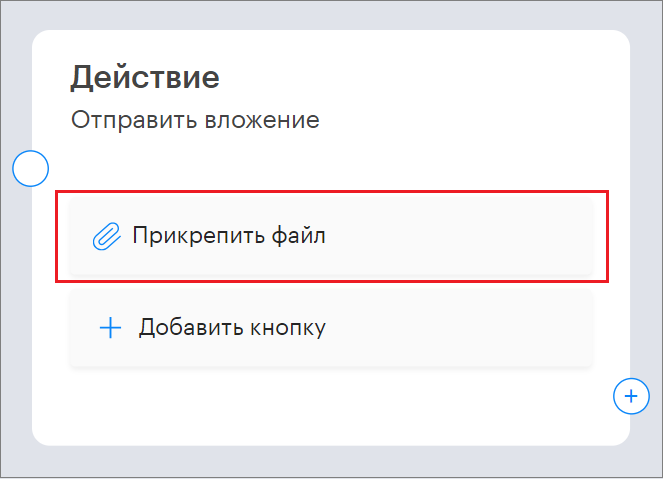
For example, a product catalog, price list, contract, etc.
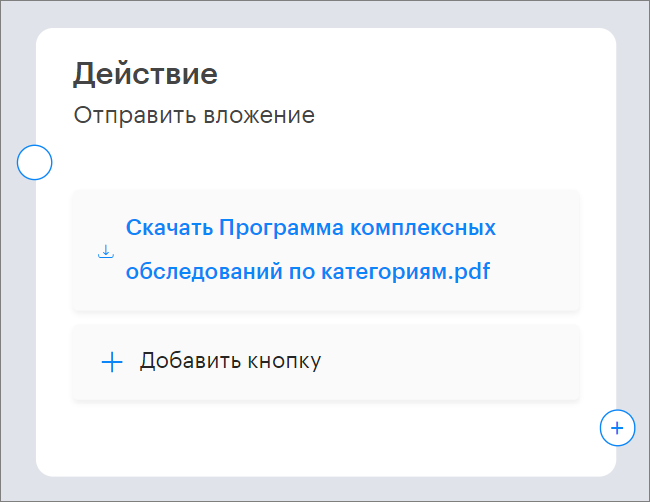
You can also add buttons here for navigation.
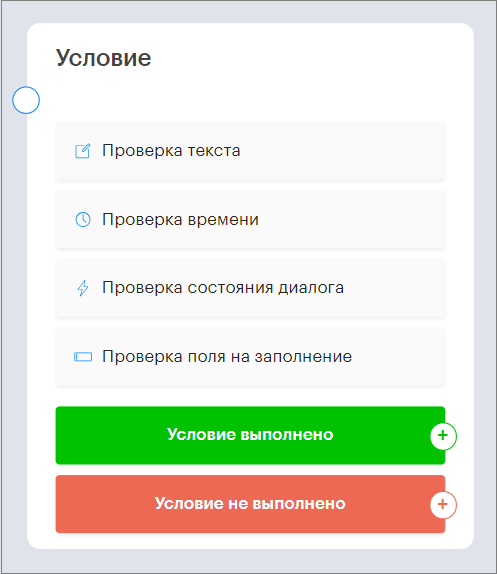
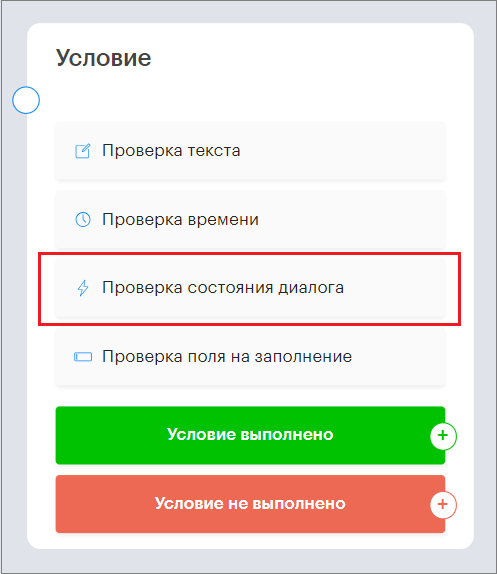
“Condition Block”
This block allows you to add condition checks for the chatbot:
- Text check
- Time check
- Dialog state check
- Field completion check
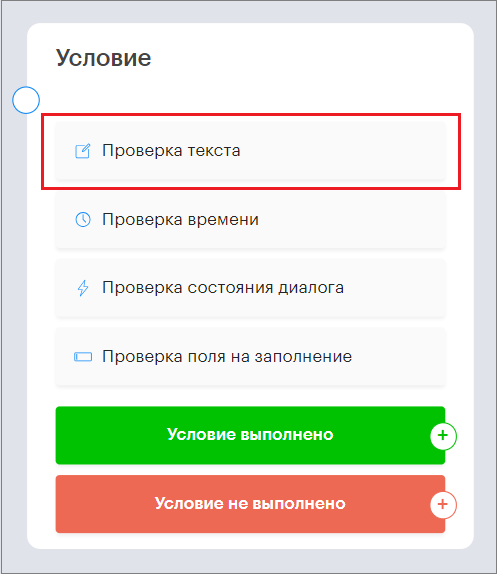
Condition “Text Check”
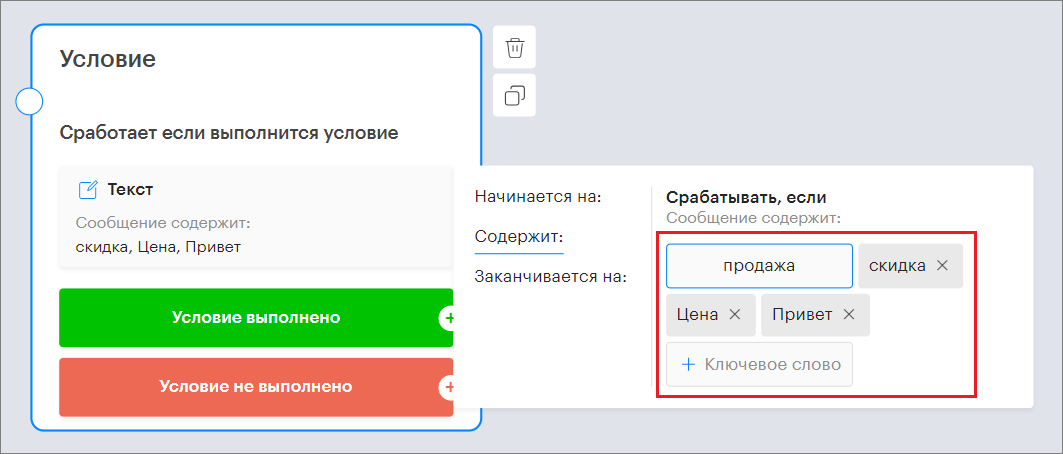
In this block, you can add keywords from the client’s message.
Keywords are trigger words that activate the chatbot to follow a specific scenario.
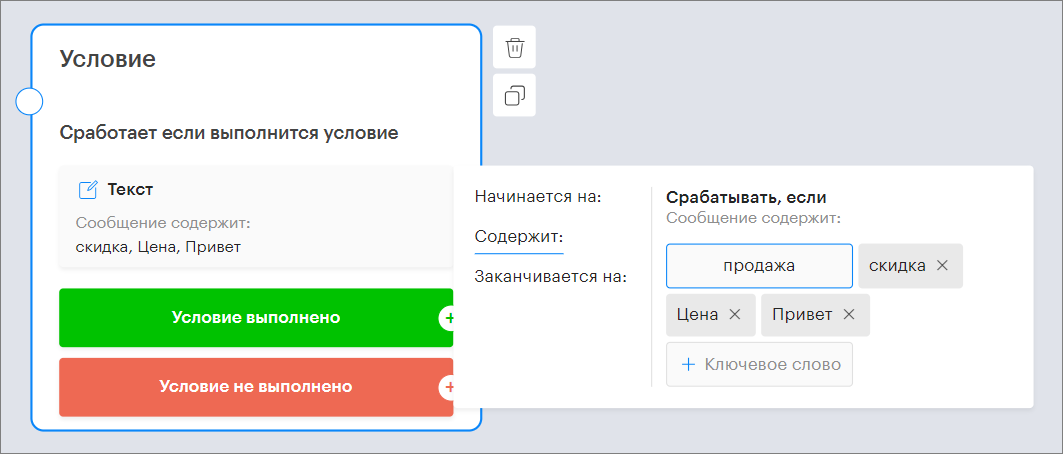
First, select where the keywords will be located: “Starts with”; “Contains”; “Ends with”.
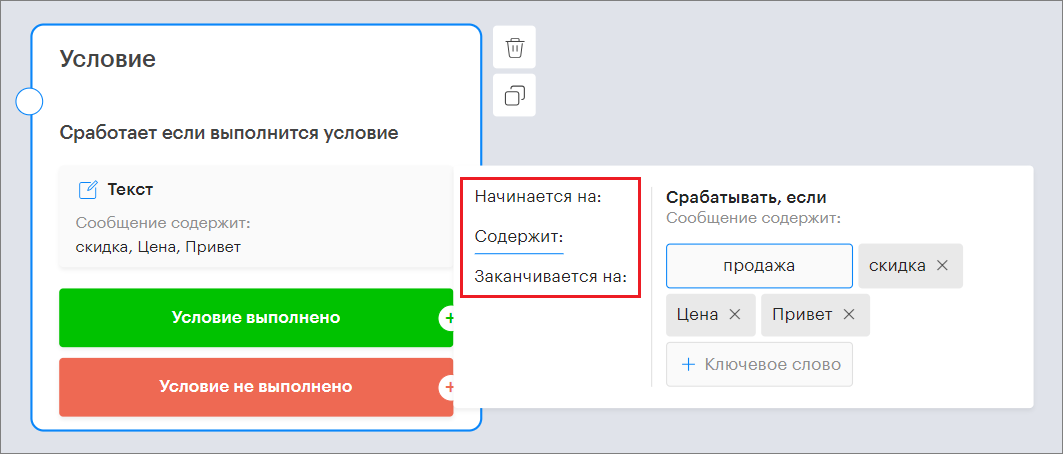
Then enter the keywords in the message input field.
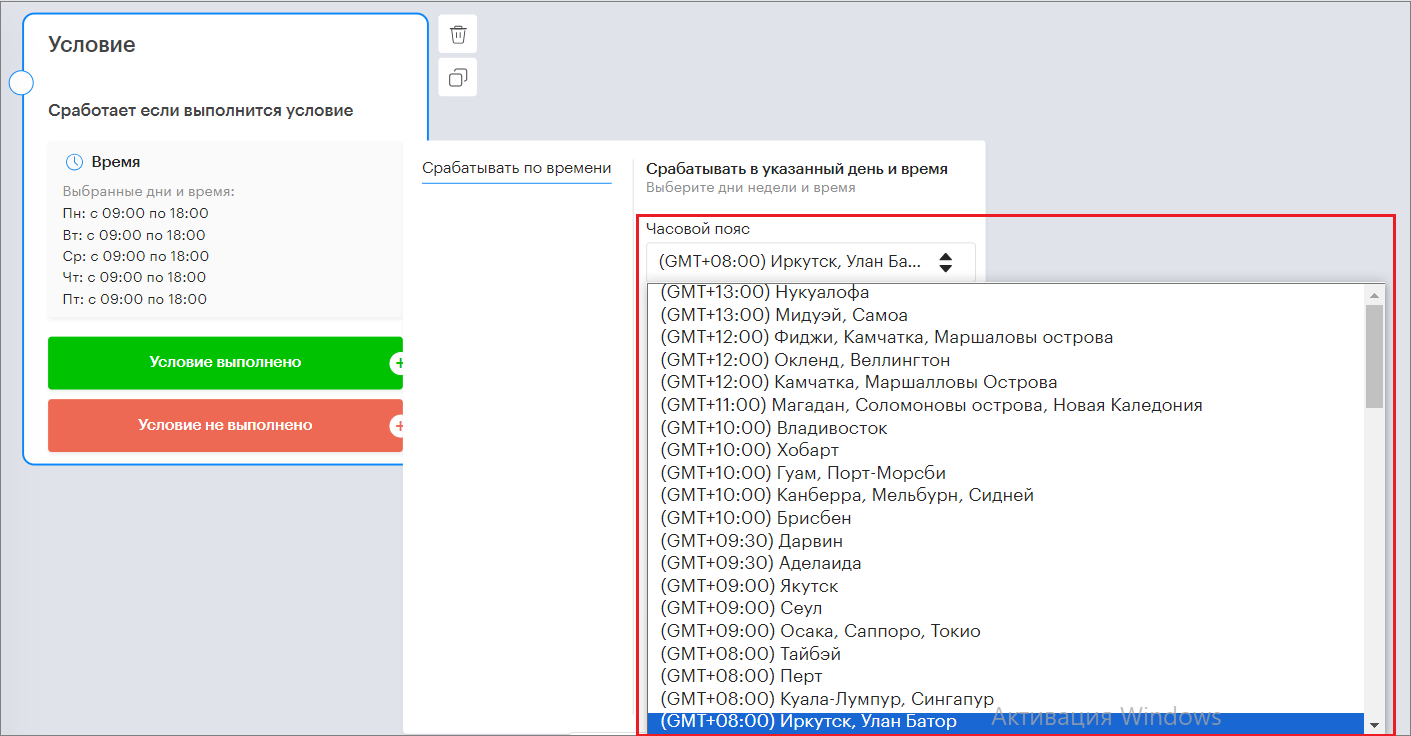
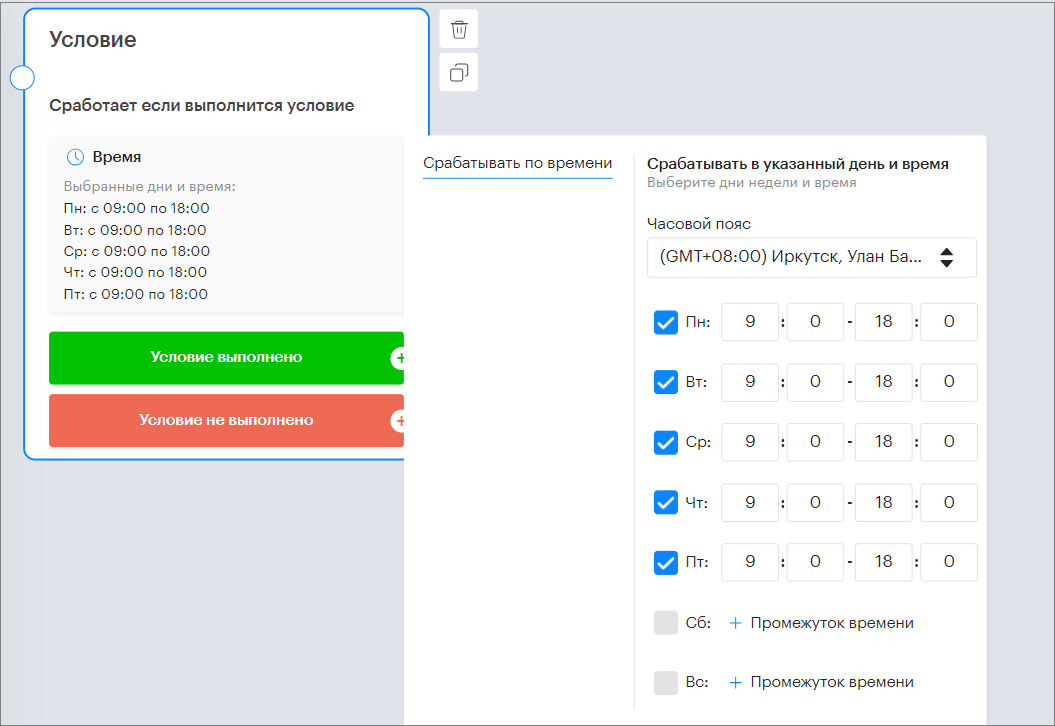
Condition “Time Check”
In this block, you can set the chatbot’s working schedule by days of the week and time, as well as select the time zone.

To do this, click on “Trigger by time”.
A window will open to configure the bot’s working schedule.
In the “Time Zone” section, select the desired time zone from the dropdown list.
Next, select the working days of the week and time.
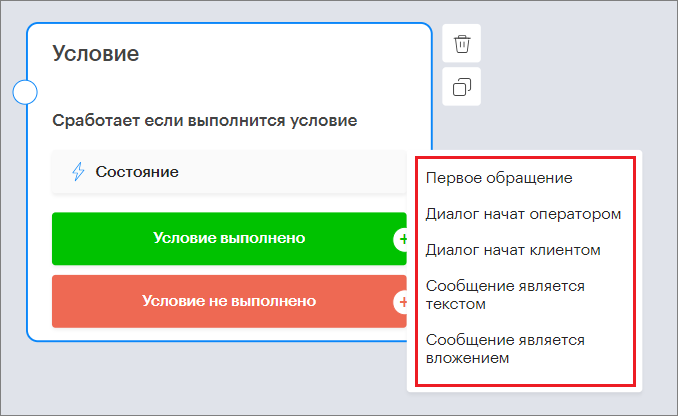
Condition “Dialog State Check”
Here you can configure a check for the dialog state.
To do this, select the dialog initiator: “First contact”; “Dialog started by operator”; “Dialog started by client”; “Message is text”; “Message is attachment”.
Trigger on “First contact” state.
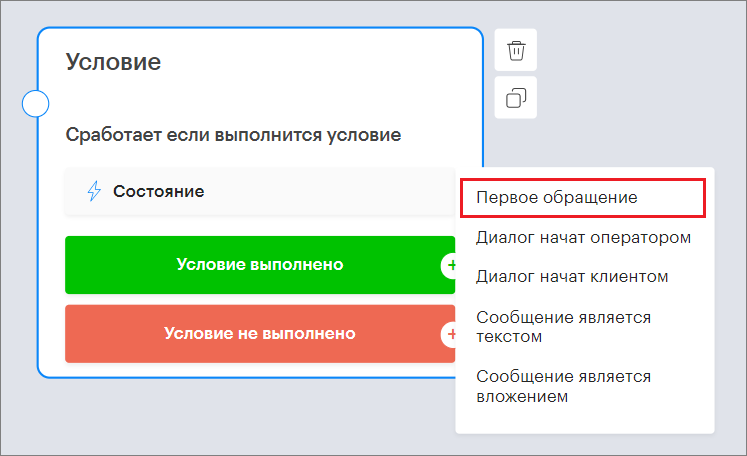
In this case, the chatbot triggers if the client writes for the first time or the operator starts a dialog from the panel with a client who has never had a dialog before.
Trigger on “Dialog started by operator” state.
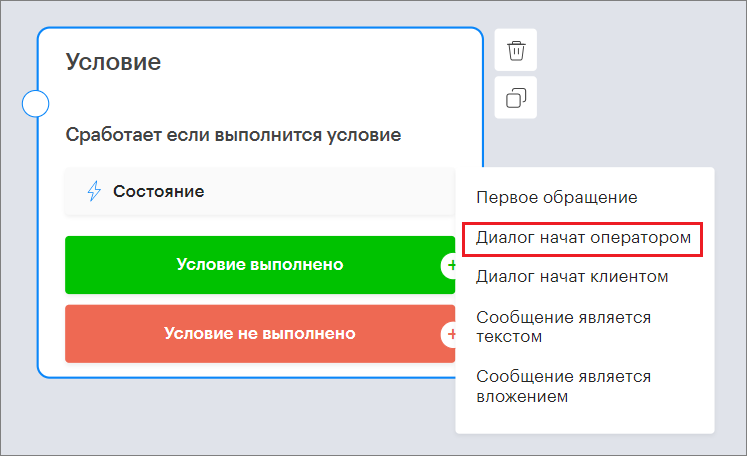
In this case, the chatbot triggers if the operator starts the dialog from the panel with the client.
Trigger on “Dialog started by client” state.
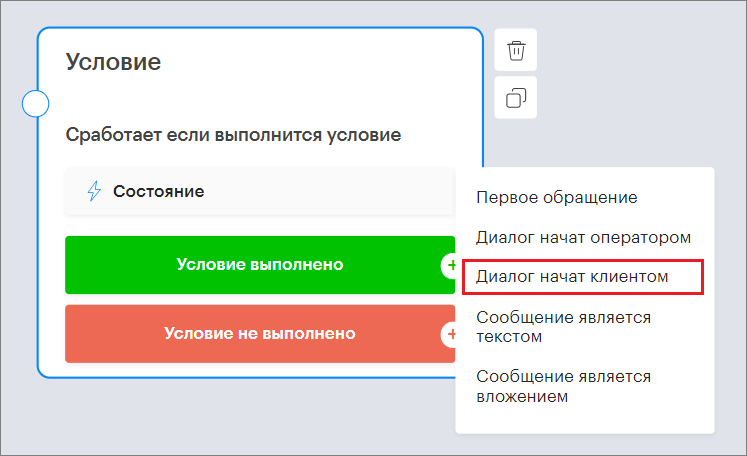
In this case, the chatbot triggers if the client writes first.
Trigger on “Message is text” state.

With this condition, the chatbot triggers if the client sent a text message.
Trigger on “Message is attachment” state.
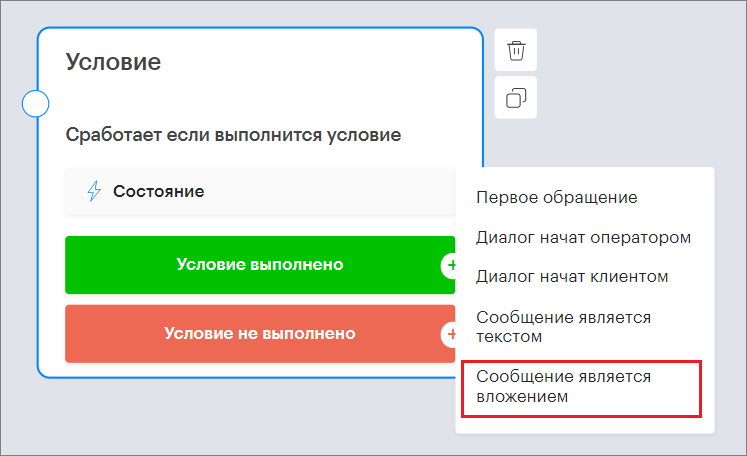
In this case, the chatbot triggers if the client sent an attachment, such as a photo, document, etc.
In the “Condition” block, you can combine multiple condition checks.
The “AND” mode requires all conditions to be met for the overall condition to be true.
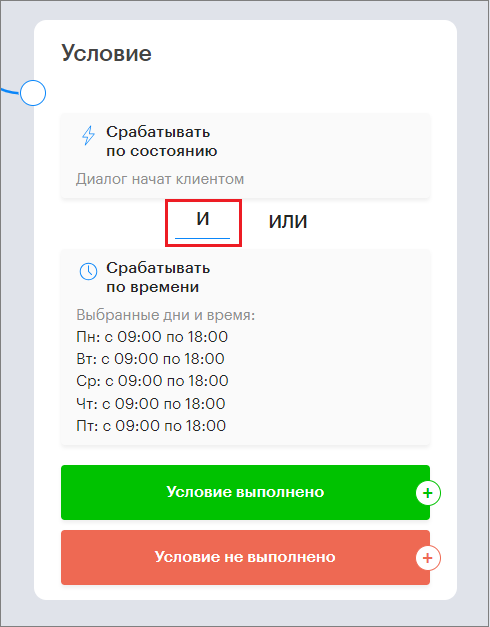
The “OR” mode requires at least one of the conditions to be met.
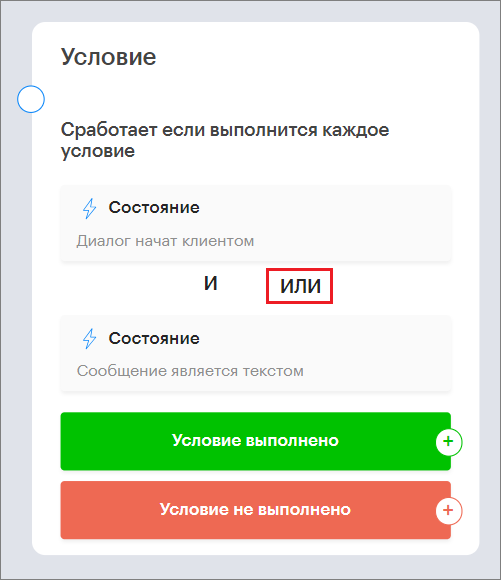
These modes apply to the entire block.
For creating complex conditions, you can use combinations of two or more condition blocks.
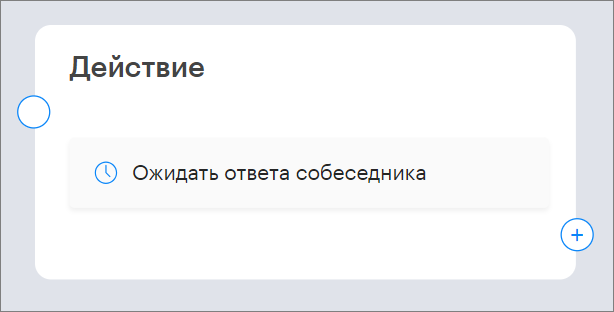
“Wait for Response”
This block makes the chatbot wait for the client’s response.
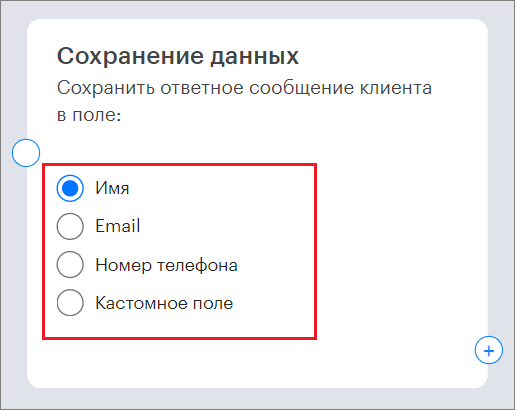
“Save Data”
This block allows you to save client data to the client’s card in the Teletype panel.
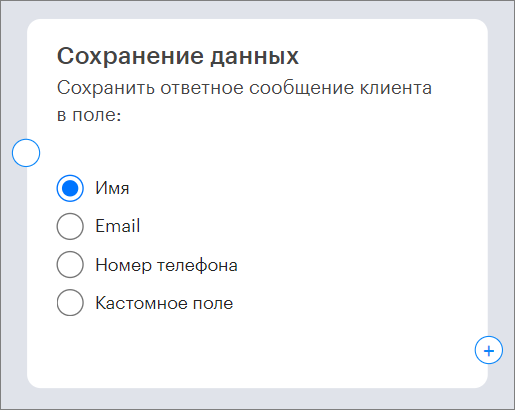
In the “Save Data” block, select which data to save: “Name”; “E-mail”; “Phone number”; “Custom field”.
For example, if the chatbot sends the message “Please provide your phone number for contact”, followed by the “Save Data” block set to “Phone number”, then if the client sends their phone number, it will be saved in the client’s card.
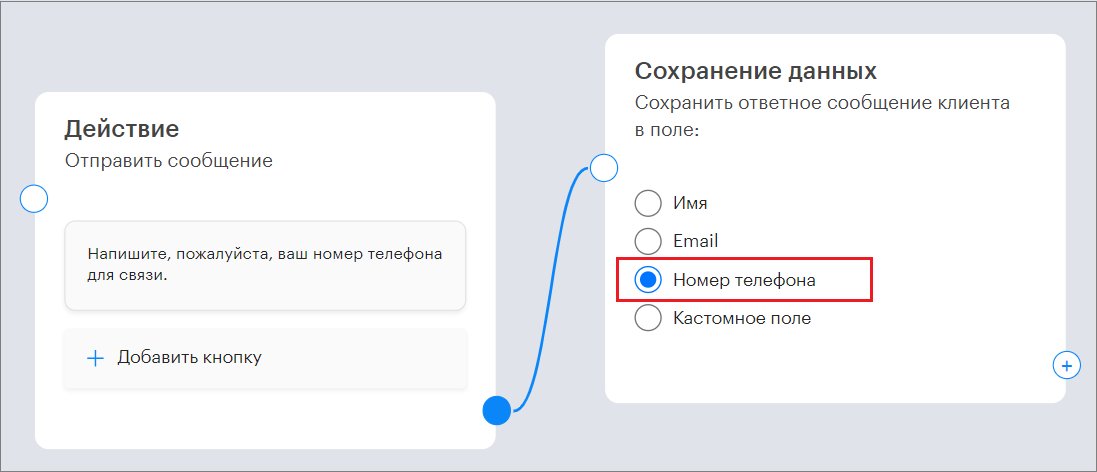
IMPORTANT! In channels like Telegram by phone number, WhatsApp, the “Phone” field in the client card is immutable.
If the client sends a different phone number, a system message will appear in the dialog thread: “It is not possible to change the existing phone number in this channel; you can manually save the user’s provided value in notes”.
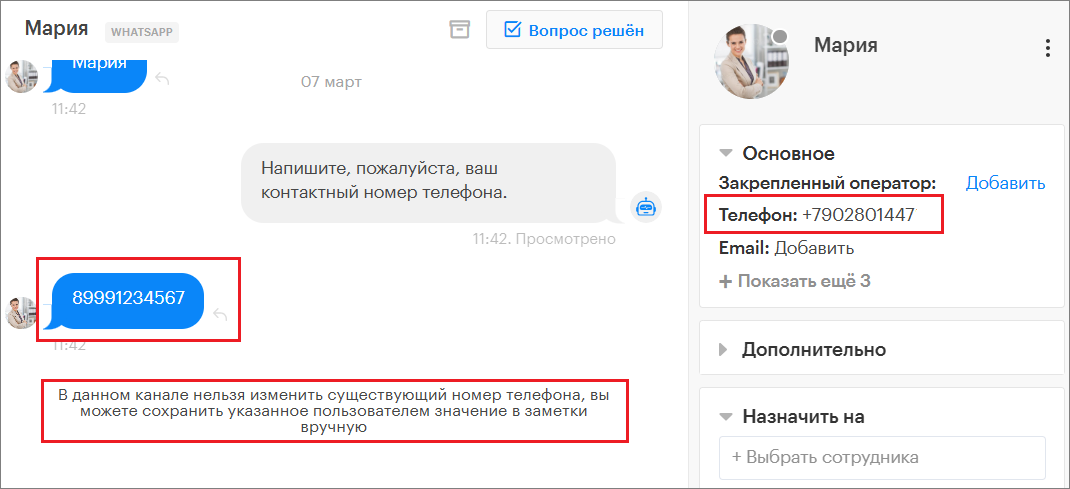
This contact number can be saved in notes.
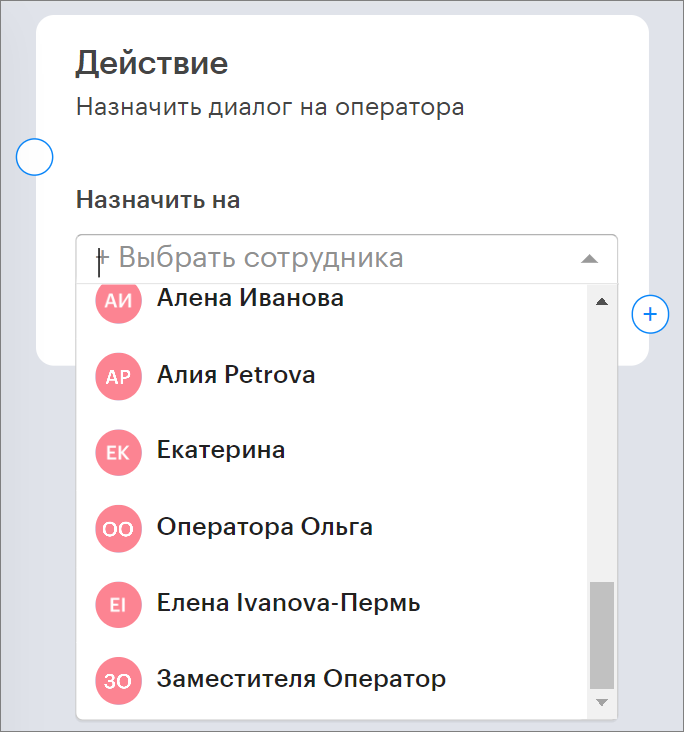
“Assign Operator”
This bot action assigns an operator to the dialog with the client.
To do this, click “+Select employee” and choose an operator from the dropdown list.
“Assign Category”
This block allows you to automatically assign a category to the dialog.
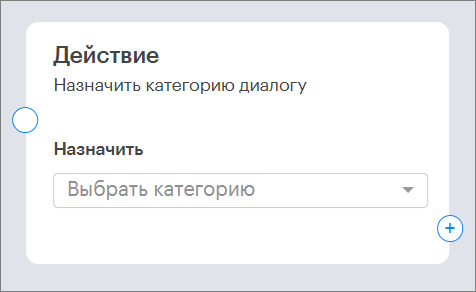
To do this, select the desired category from the dropdown list.
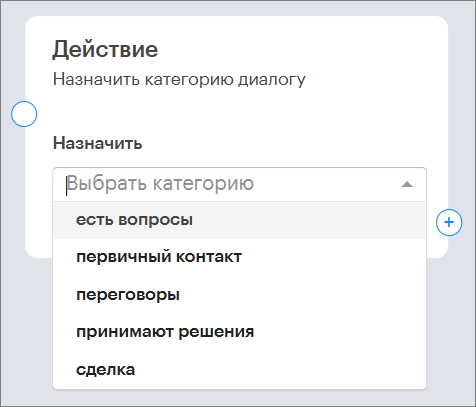
The selected category will be automatically assigned to the dialog during chatbot operation.
“Assign Tag”
This command allows the chatbot to automatically assign selected tags to the client.
You can assign from 1 to 5 tags at once.
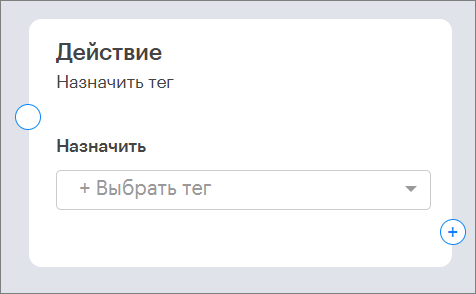
To do this, select the desired tags from the dropdown list.
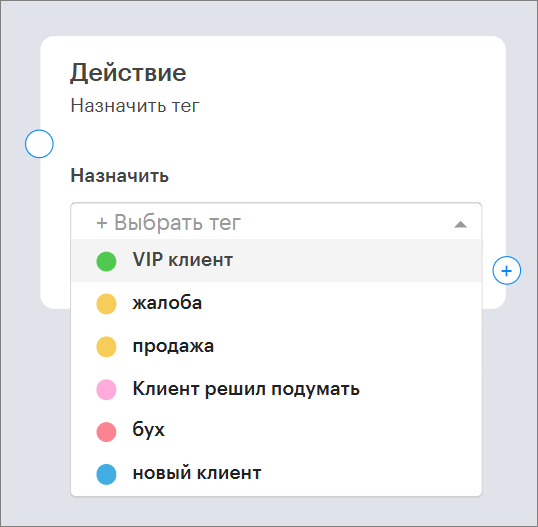
The selected tags will be assigned to the client automatically.
“Remove Tag”
This command allows the chatbot to automatically remove tags assigned to the client.
You can remove from 1 to 5 tags at once.
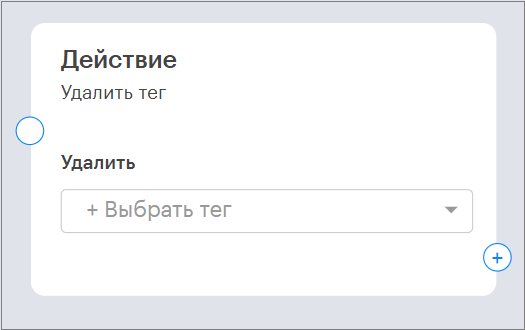
To do this, select the desired tags from the dropdown list.

The selected tags, if assigned to the client, will be removed automatically.
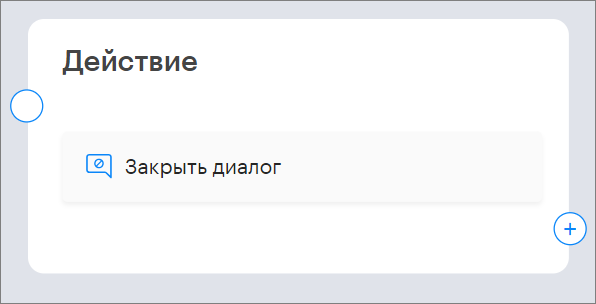
“Close Dialog”
This block allows you to automatically close the dialog with the client.
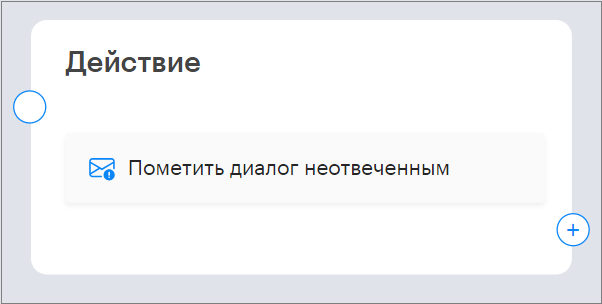
“Mark Dialog as Unanswered”
This chatbot action leaves the dialog with the client unanswered and saves it in the left sidebar of the Teletype panel under the Unanswered section.
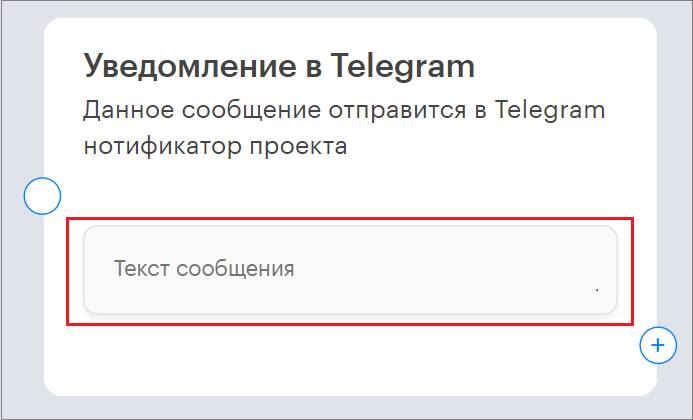
“Telegram Notification”
Here you can add a message that will be sent to the Telegram notifier.
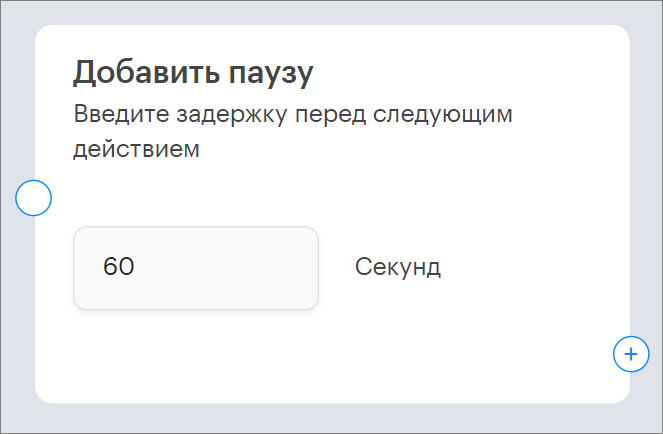
“Add Pause”
Here you can add a pause before the next bot action by specifying the duration in seconds.