How can we help?
Statuses
Custom statuses are a time tracker for operators that allows setting working and non-working statuses for operators.
When a working status is set, requests are distributed to the operator; when a non-working status is set, requests are not distributed to the operator if auto-distribution is enabled in the project.
To add Statuses to a project, you first need to add them to the tariff by following these steps:
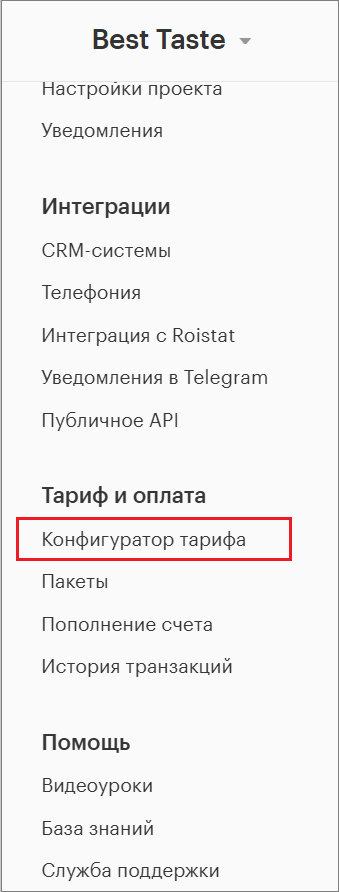
1. Go to the Tariff Configurator in the Teletype App settings.
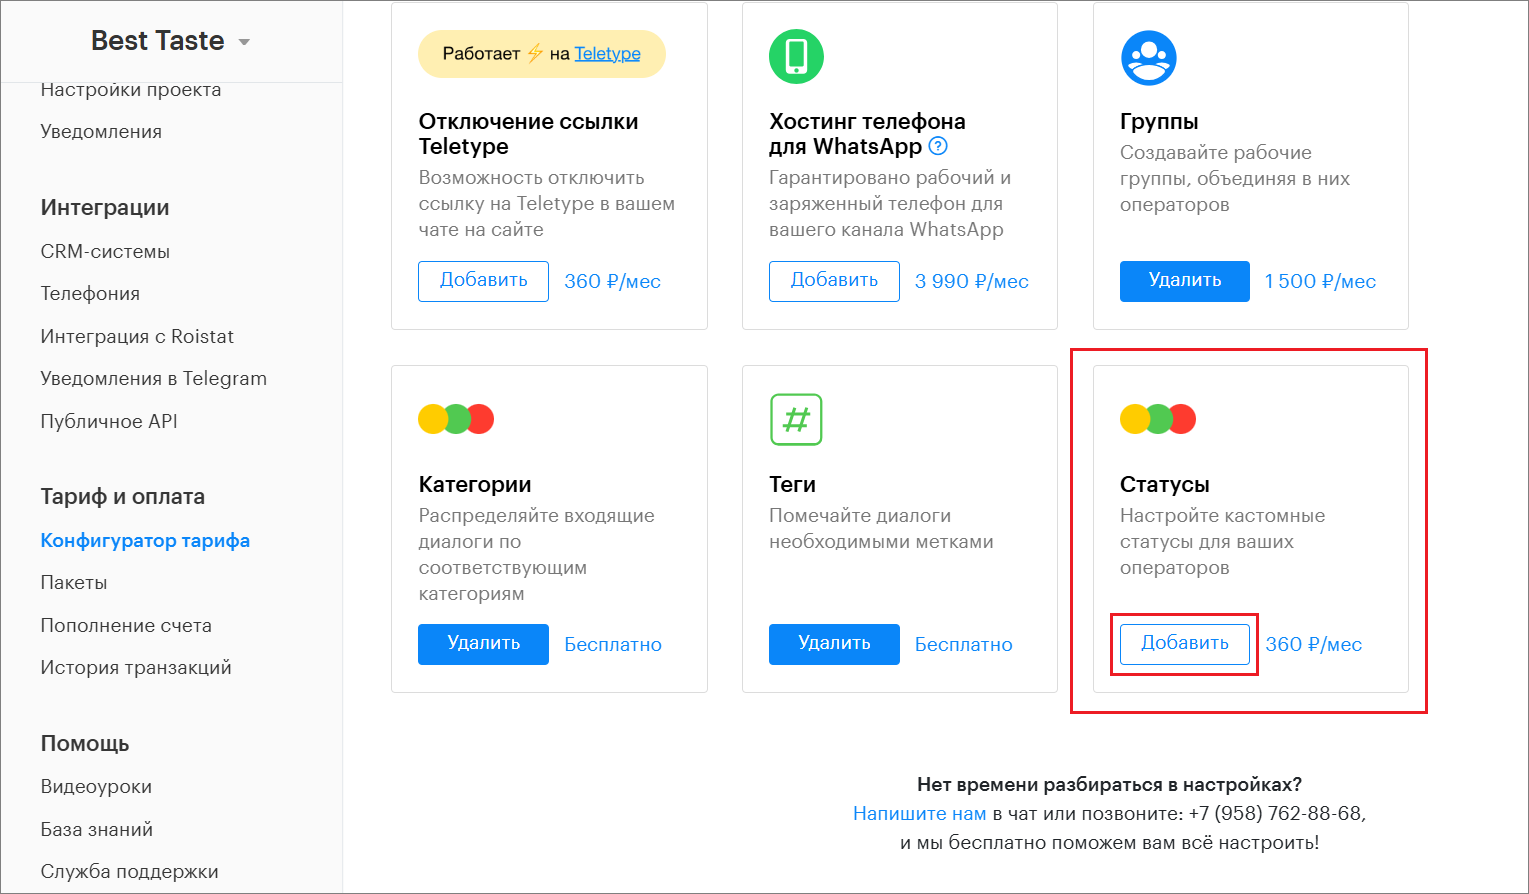
2. In the Tariff Configurator, add “Statuses” to the tariff under additional options.
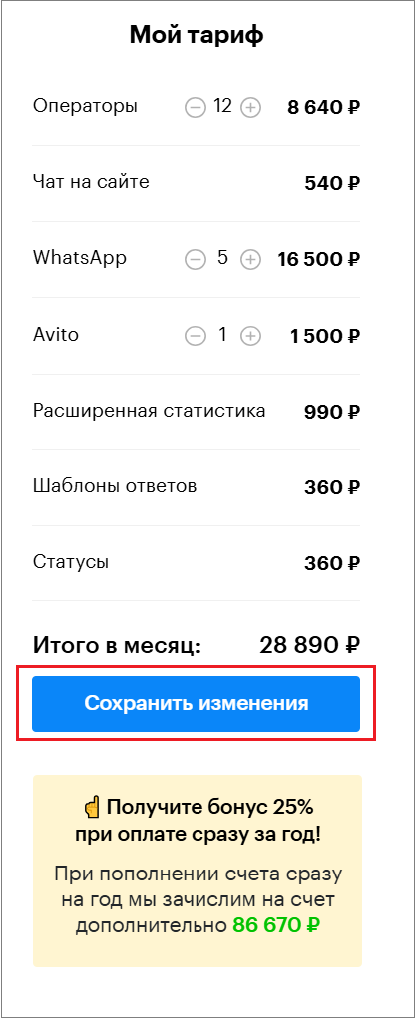
3. Save the changes in “My Tariff”.
4. After that, all operators in the project will see the status in the top right corner.
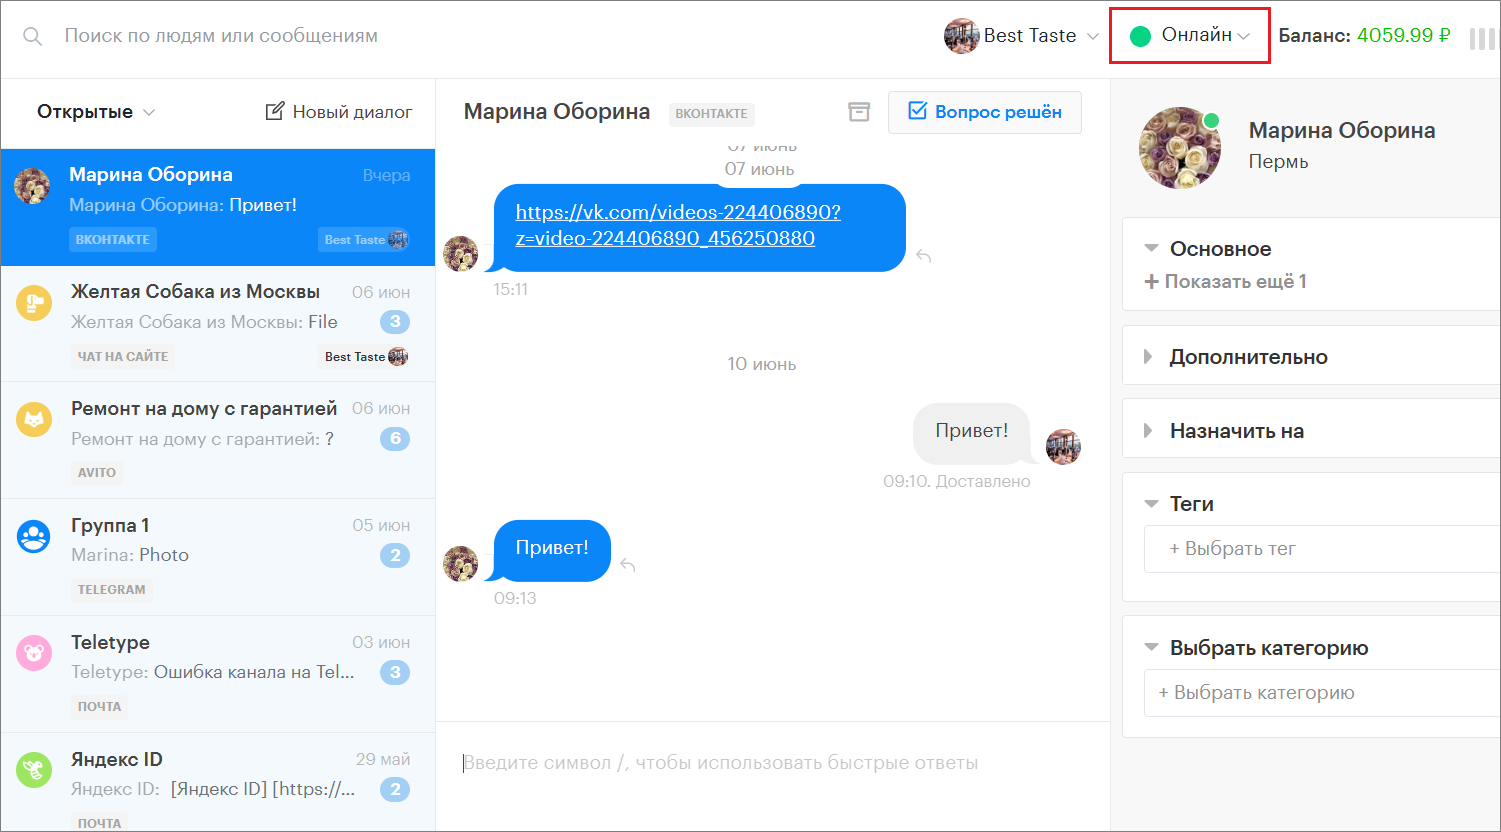
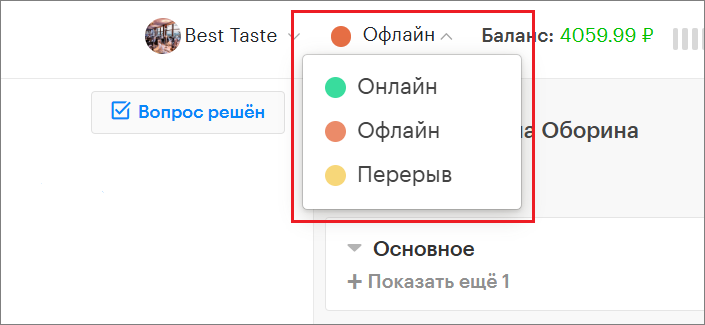
5. Here, the operator can change the status by selecting the desired one from the dropdown list.
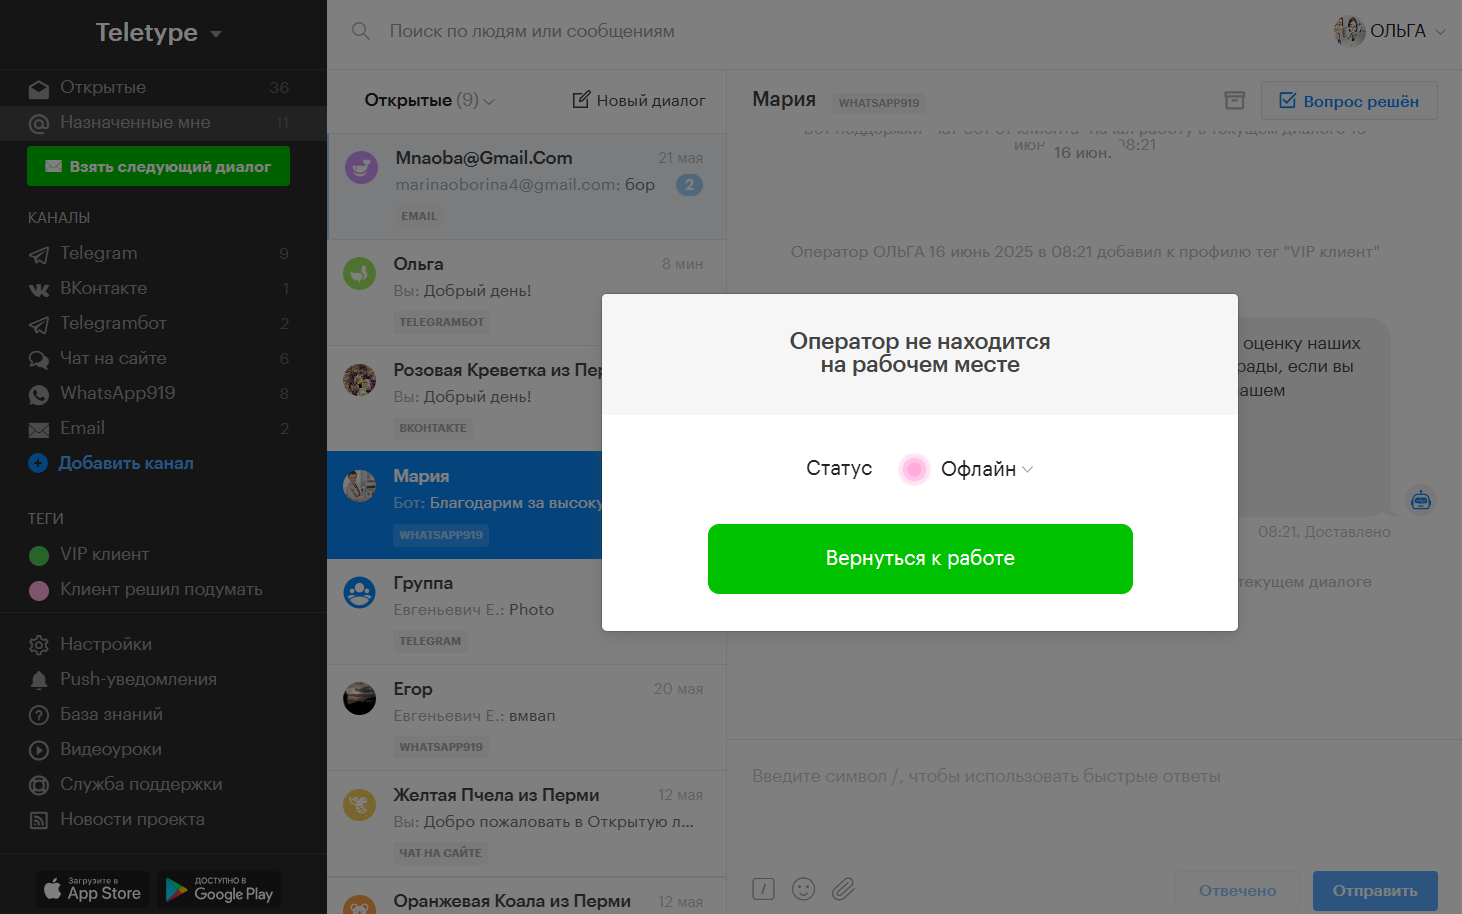
6. If the operator selects a non-working status, a window will appear with the message “Operator is not at the workplace”.
At the same time, the panel will be locked, and new requests will stop being distributed.
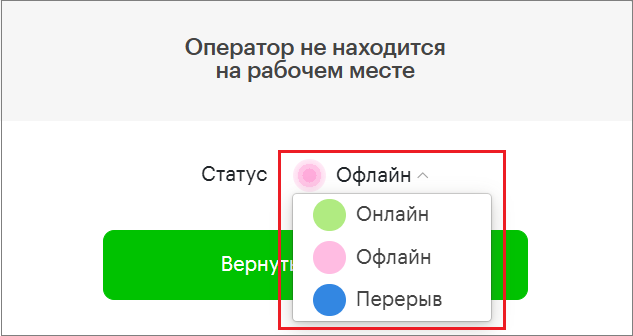
7. To change the status back to working, select the corresponding status from the dropdown list.
8. Click the “Return to work” button.

9. After that, the panel will unlock, and new requests will start being distributed again.
How to edit statuses
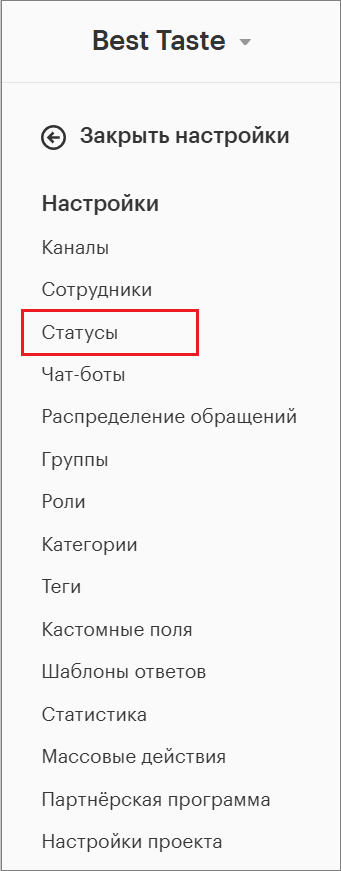
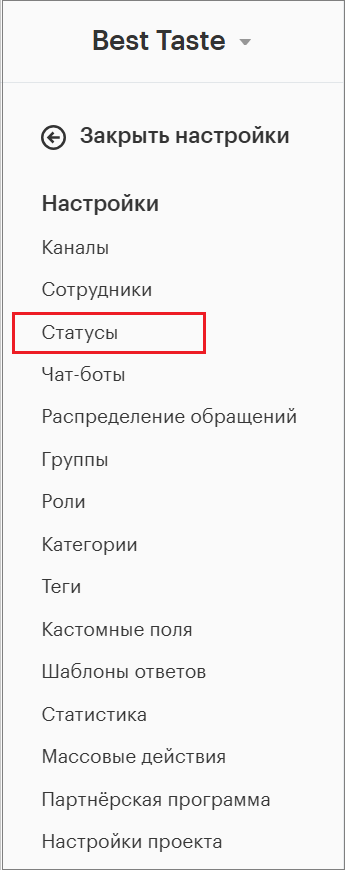
1. Go to the “Statuses” section in the project settings.
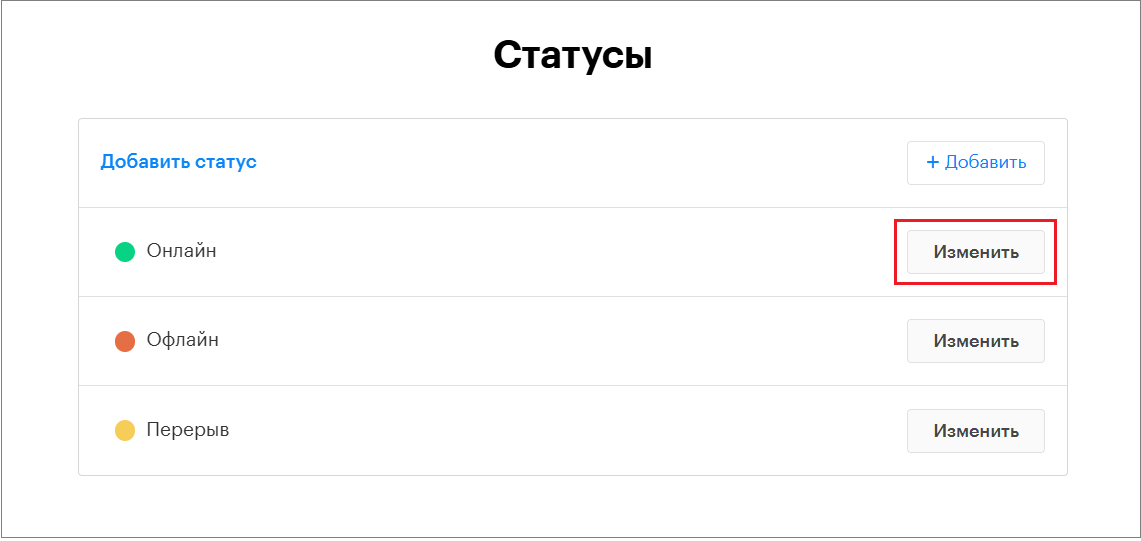
5. Select the status you want to edit and click the “Edit” button.
6. In the opened window, you can edit the status name.

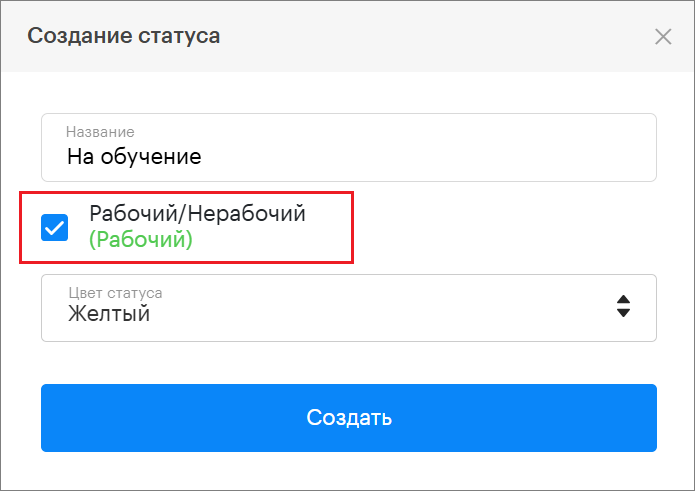
7. Choose whether the status is working or non-working by checking or unchecking the box.
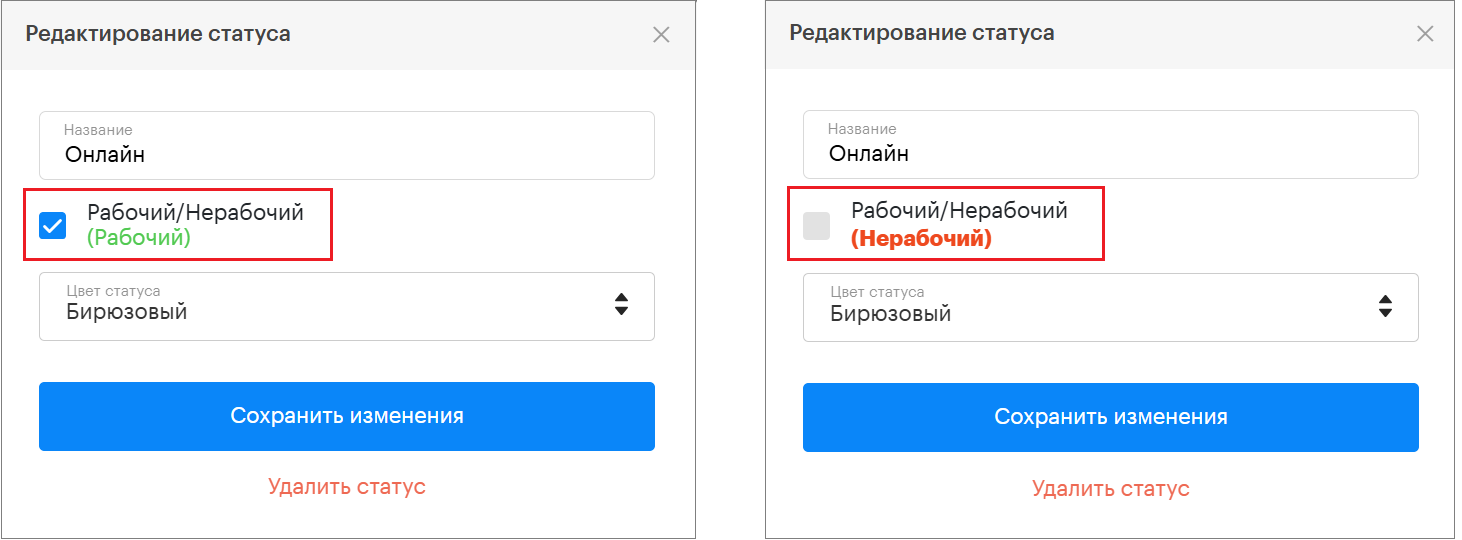
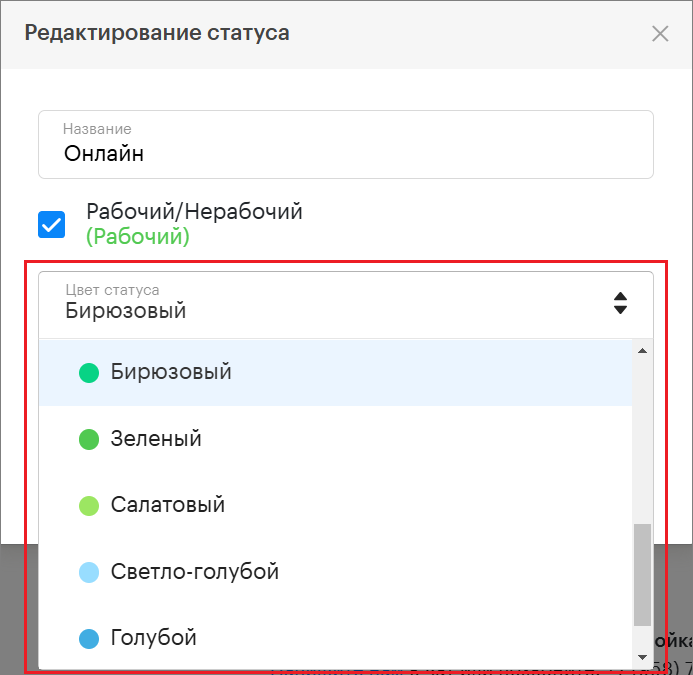
8. Change the status color.
9. After editing, click “Save changes”.

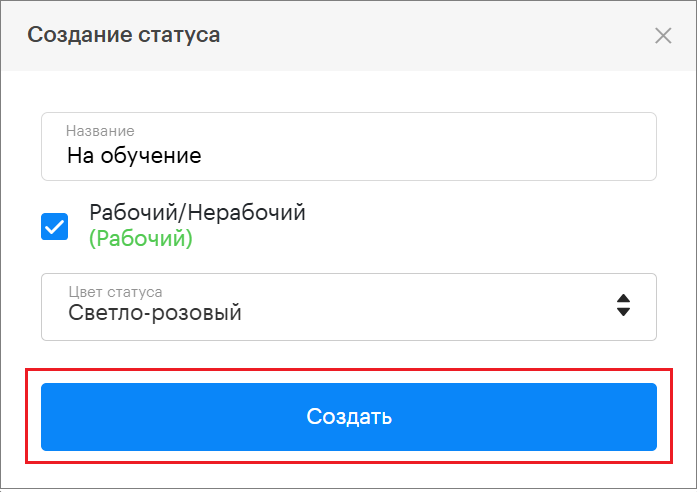
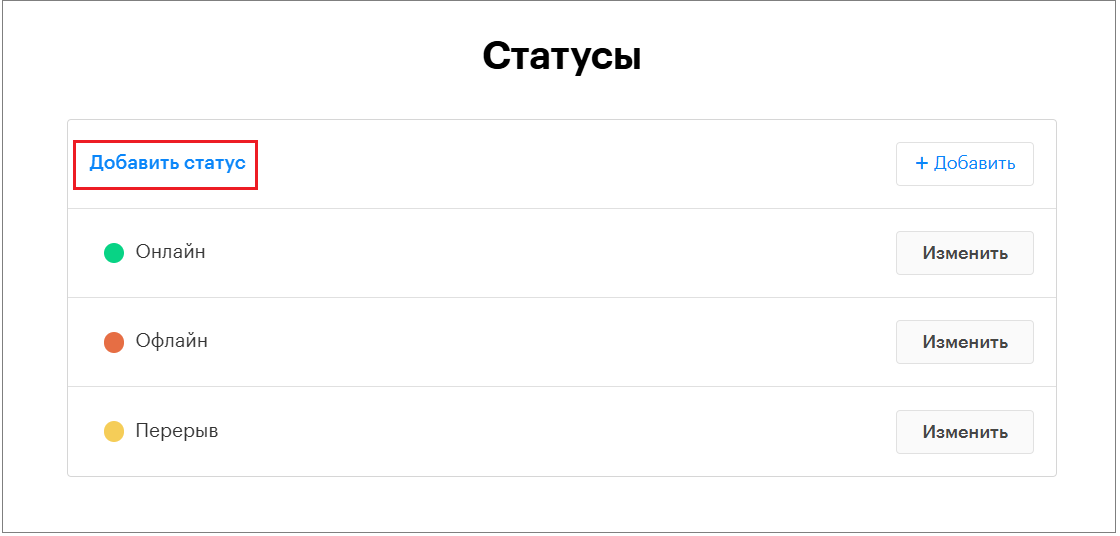
How to add a new status
1. Go to the “Statuses” section in the project settings.
2. Click “Add status”.
3. Enter a name for the status.
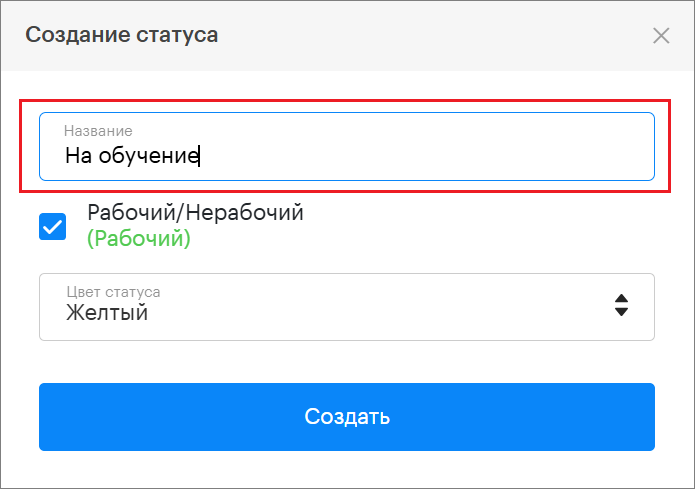
4. Choose whether the status is working or non-working (check or uncheck the box).
5. Select the color for the new status.
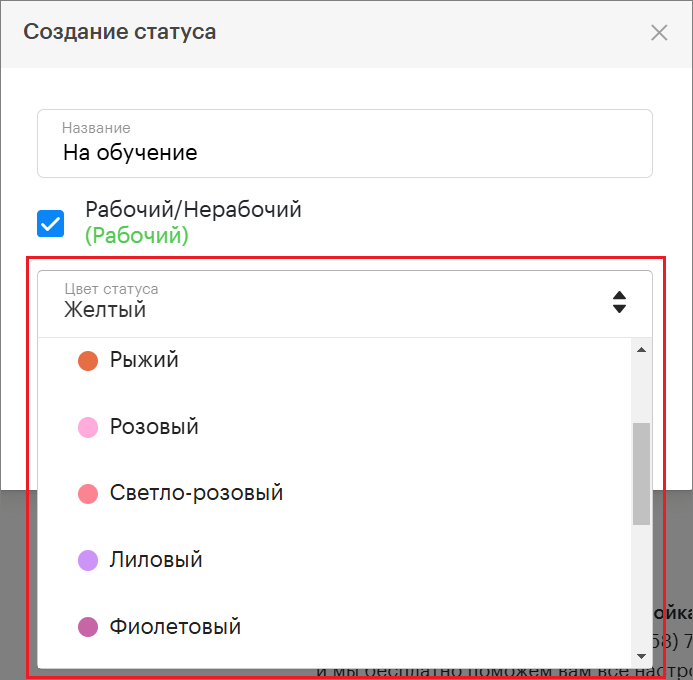
6. Click “Create”.