How can we help?
n8n Node Public API
Teletype Public API → n8n Community Nodes
A set of nodes for n8n that connects the Public API from the teletype.app service to work with messengers and social networks such as WhatsApp, WABA, Telegram, Max, Instagram, Facebook, Website Chat, VK, Avito, Viber, Email.
Features:
- ✅ Actions: Teletype API operations as n8n nodes
- 🔔 Trigger: receives events from Teletype via Webhook URL
- 🧩 Installed as Community Nodes
- 📝 Hints/descriptions in nodes — in Russian
Requirements:
- You must have access to n8n (self-hosted / corporate / Docker / server).
- You must have access to a Teletype project where you can enable the Public API and get the API Token.
- For Trigger: your n8n must be accessible from the internet (HTTPS, no basic-auth on the webhook, no blocking).

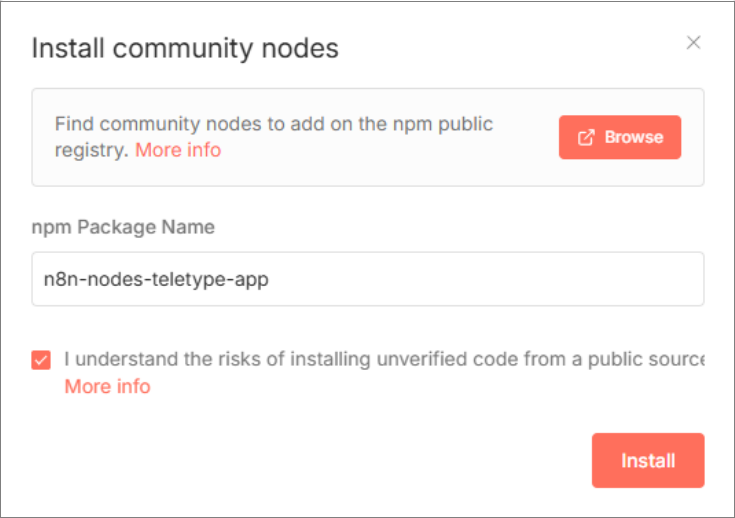
Installation (via n8n interface)
- Open Settings → Community Nodes
- Click Install
- Enter the package name:
n8n-nodes-teletype-app - Confirm the installation
- Restart n8n (if prompted)
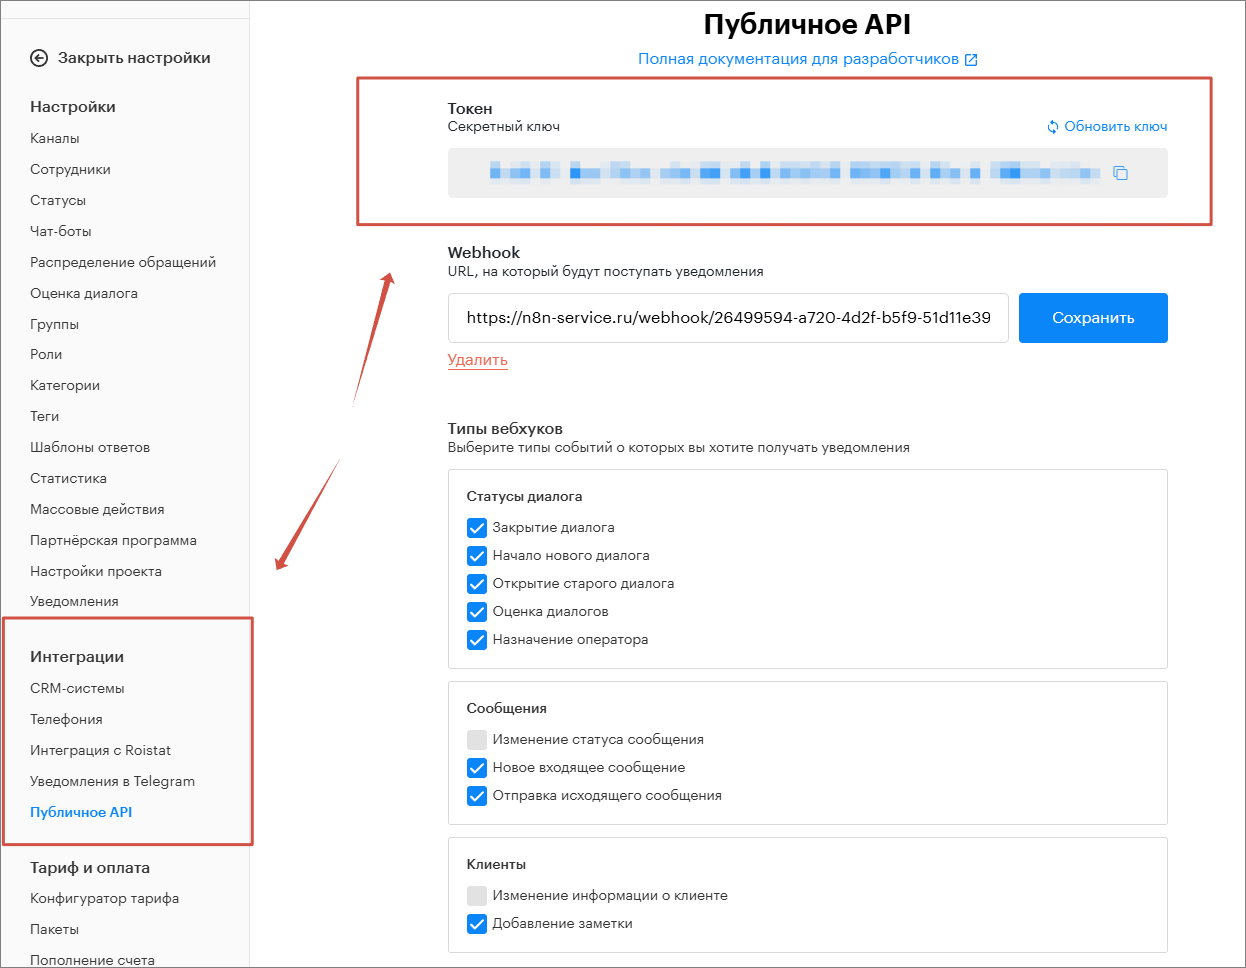
Configuration in Teletype (API Token + Webhook + events)
In Teletype you need to:
- Get the project’s API Token
- Specify the Webhook URL (for events)
- Enable the required events (checkboxes)
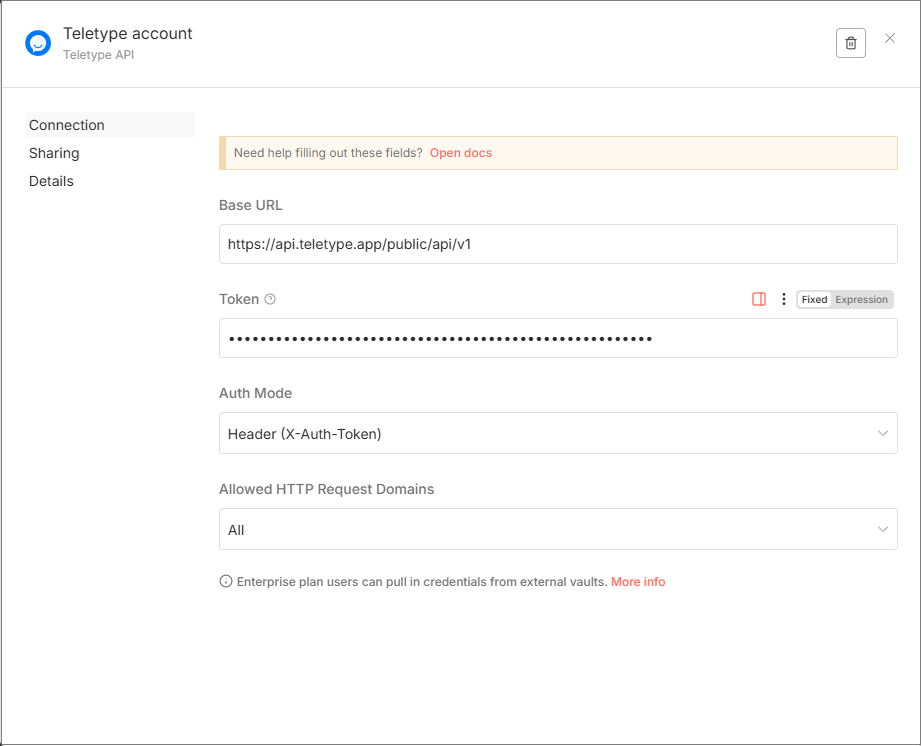
Authorization in n8n (Credentials)
- Inside any Teletype node, open Credentials
- Click Create new
- Select Teletype API
- Paste the API Token and save
Webhook URL in Teletype — one for all events (important)
In Teletype, all events are sent to a single Webhook URL (in the Public API settings).
This means:
- If you want to handle events in one workflow — just use a single Teletype Trigger.
- If you need to split processing into multiple scenarios — it’s better to create one entry workflow with the Trigger and then route events inside n8n (Switch/IF), or call other workflows via Execute Workflow.

Quick Start
1) Testing Actions (without trigger)
- Create Teletype API credentials
- Add a Teletype node
- Select the desired Resource and Operation
- Run the workflow
2) Connecting the Trigger (receiving events from Teletype)
- Add a Teletype Trigger in n8n
- Open the Trigger node and copy the Webhook URL:
- Test URL — suitable for testing when you click “Listen for test event” in the editor
- Production URL — used for real events when the workflow is activated (Activate)
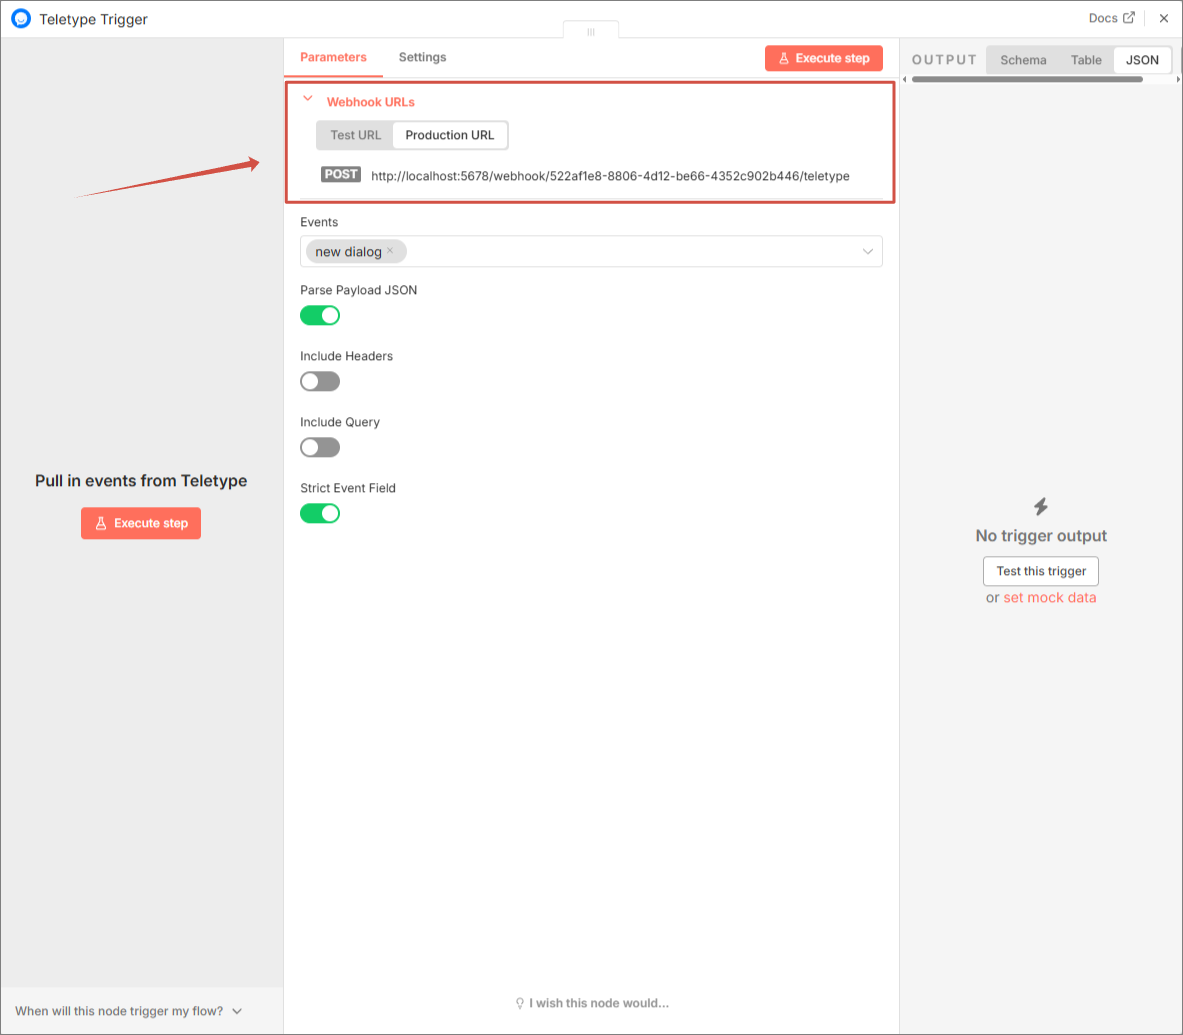
- Paste the appropriate URL into Teletype:
- for testing, you can use the Test URL
- for production, use the Production URL (and be sure to activate the workflow in n8n)
- Enable the required events in Teletype (checkboxes)
- Run the test:
- Test mode: in n8n, click “Listen for test event,” then send a message in the chat
- Production: click “Activate” on the workflow and send a message in the chat
Troubleshooting
Nodes did not appear after installation
- Restart n8n
- Check that community nodes installation is allowed in your build
- Check n8n logs: sometimes the reason why the package didn’t load is visible there
Trigger does not catch events
Check step-by-step:
- Check which URL you inserted in Teletype:
- if the workflow is NOT activated and you expect real events — the Production URL will not work as expected
- if the workflow is activated but the Test URL is set in Teletype — events will not arrive in production mode
- Webhook URL is configured in Teletype (the correct address from the Teletype Trigger is inserted)
- Required events are enabled in Teletype (checkboxes are set for the events you expect)
- The URL is accessible from the internet:
- HTTPS
- no proxy-level authorization / basic-auth
- no firewall blocking
- Open Executions in n8n and check if requests arrive at the webhook
- The workflow in n8n is activated (Activate) if you use the Production URL