
How can we help?
-
Getting Started
- Registration in the System
- Setting Up and Adding a New Project in Teletype App
- Removing the Teletype App Link
- Teletype App Affiliate Program
- What is the Teletype App?
- Terms in the Teletype App
- How to switch Teletype to English
- Switching the Panel to English
- Glossary Teletype App
- Registration in Teletype App via eLama
- Показать все статьи ( 2 ) Свернуть статьи
-
Adding Channels
- Connecting to Facebook
- Telegram bot
- Viber Bot
- VK Group
- Online Chat for Website
- Instagram Direct/Comments
- Button with Messengers
- Telegram by Phone Number
- Avito Personal Account
- VKontakte Personal Account
- Email Setup
- WhatsApp Business
- Connecting WhatsApp Without Authorization in the Panel via Link
- Connecting Telegram by Phone Number Without Authorization in the Panel via Link
- Connecting Max
- Connecting Max Bot
- SMS
- Показать все статьи ( 10 ) Свернуть статьи
-
Working with Dialogs
- Closing the Dialogue and the Answered Button
- Customer Information
- Working with Channel and Dialogue Filters
- Quick Reply Templates
- Message Read Status in WhatsApp and Viber
- Closing a Conversation in AmoCRM — Ending a Dialogue in the Teletype App
- Working with the Telegram Notifier
- Button ✉️ Take the next conversation
- Reassigning the Dialogue
- Hotkeys
- Sending Voice Messages on WhatsApp
- Categories for Dialogues in the Teletype App Panel
- Group Chats in WhatsApp
- Group Chats on Telegram by Number
- Tags
- Push Notifications
- Distribution of Requests
- Mass Actions
- Request Notifications
- Evaluation of Dialogues in Telegram and WhatsApp
- Personal Data
- Показать все статьи ( 13 ) Свернуть статьи
-
CRM Systems
-
Operators
-
Profile Editing
-
Additional Options
-
Online Chat Installation
- WordPress — Chat Code Installation
- Joomla — Chat Code Installation
- Bitrix — Chat Code Installation
- Opencart — Chat Code Installation
- WIX — Chat Code Installation
- MODx — Chat Code Installation
- Tilda — Installing Chat Code
- UMI.CMS — Chat Code Installation
- NetCat — Chat Code Installation
- PrestaShop — Chat Code Installation
- ImageCMS — Chat Code Installation
- PlatformaLP — Chat Code Installation
- LPmotor — Chat Code Installation
- A5.ru — Chat Code Installation
- Blogger — Chat Code Installation
- Canape CMS — Chat Code Installation
- CartEnergy — Chat Code Installation
- DIAFAN.CMS – Chat Code Installation
- DigiSt — Chat Code Installation
- Drupal — Chat Code Installation
- Flexbe — Chat Code Installation
- fo.ru — chat code installation
- Gophotoweb — Chat Code Installation
- io.ua — chat code installation
- IPBoard (Invision Power Board) — Chat Code Installation
- lact.ru — Chat Code Installation
- Magento — Chat Code Installation
- Показать все статьи ( 19 ) Свернуть статьи
-
Analytics
-
API
-
Billing
-
Telephony
-
Teletype Sender
-
Bot Builder
Teletype Sender
0 из 5 звезд
| 5 Звезд | 0% | |
| 4 Звезд | 0% | |
| 3 Звезд | 0% | |
| 2 Звезд | 0% | |
| 1 Звезд | 0% |
In Teletype Sender, you can create message campaigns to clients by phone number through WhatsApp, WABA, and Telegram channels.
How to Create a Campaign in Teletype Sender
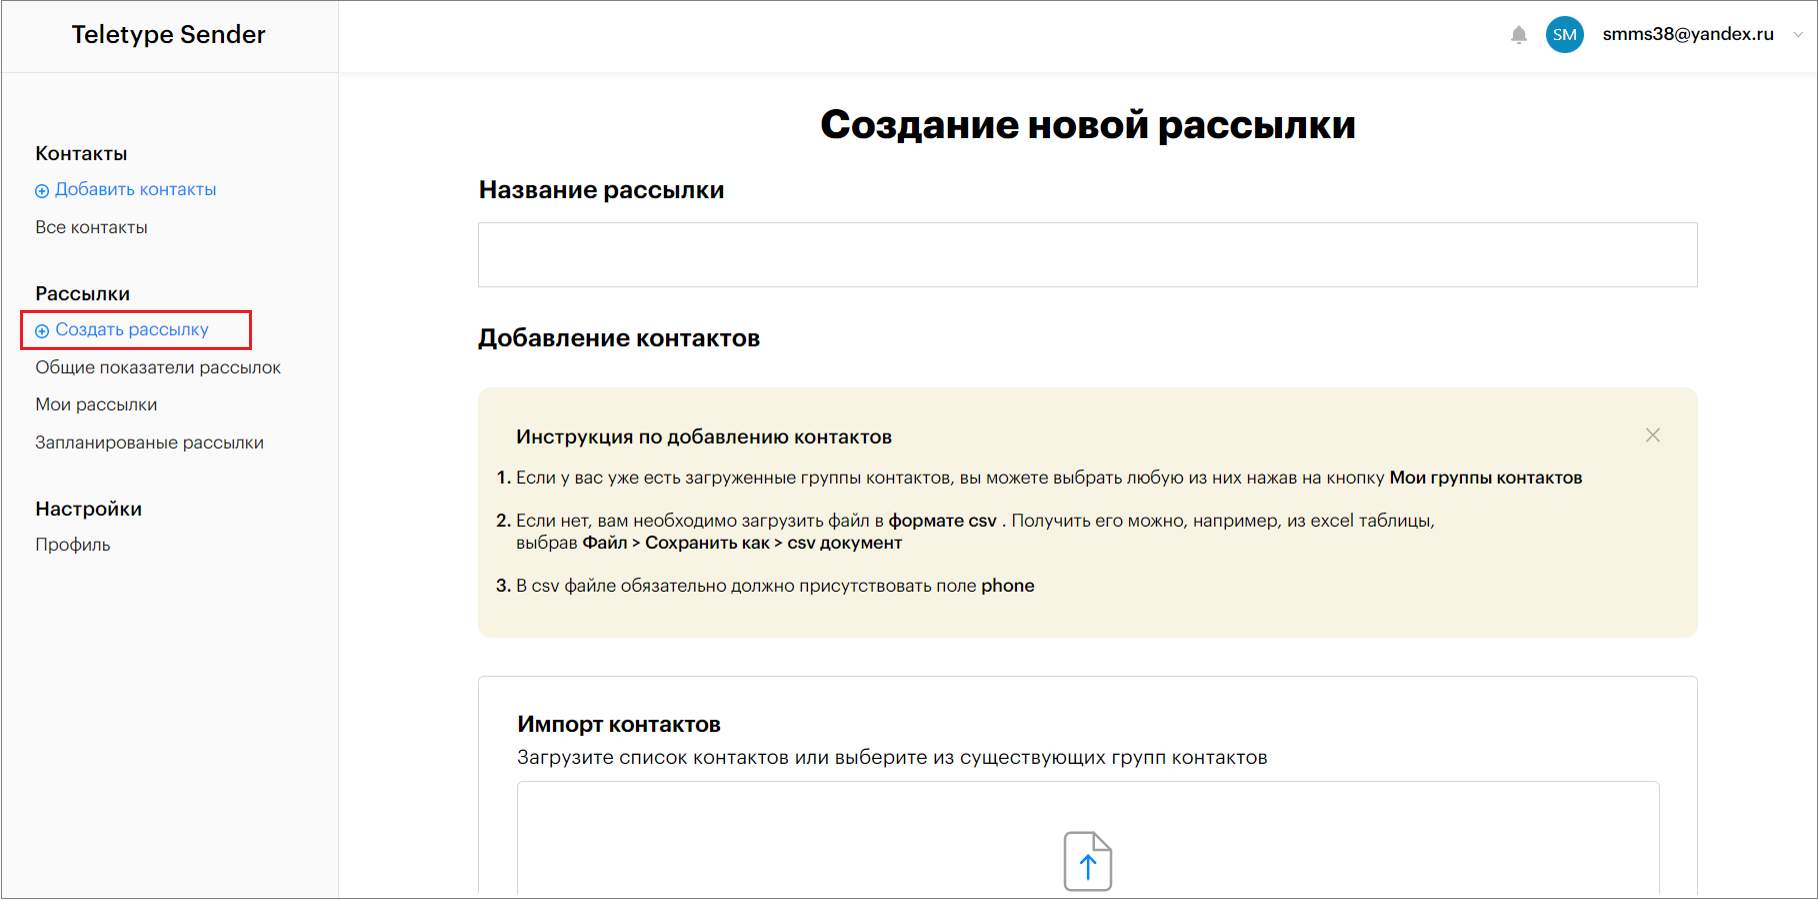
- Click “Create Campaign” in the left menu of the Teletype Sender panel.
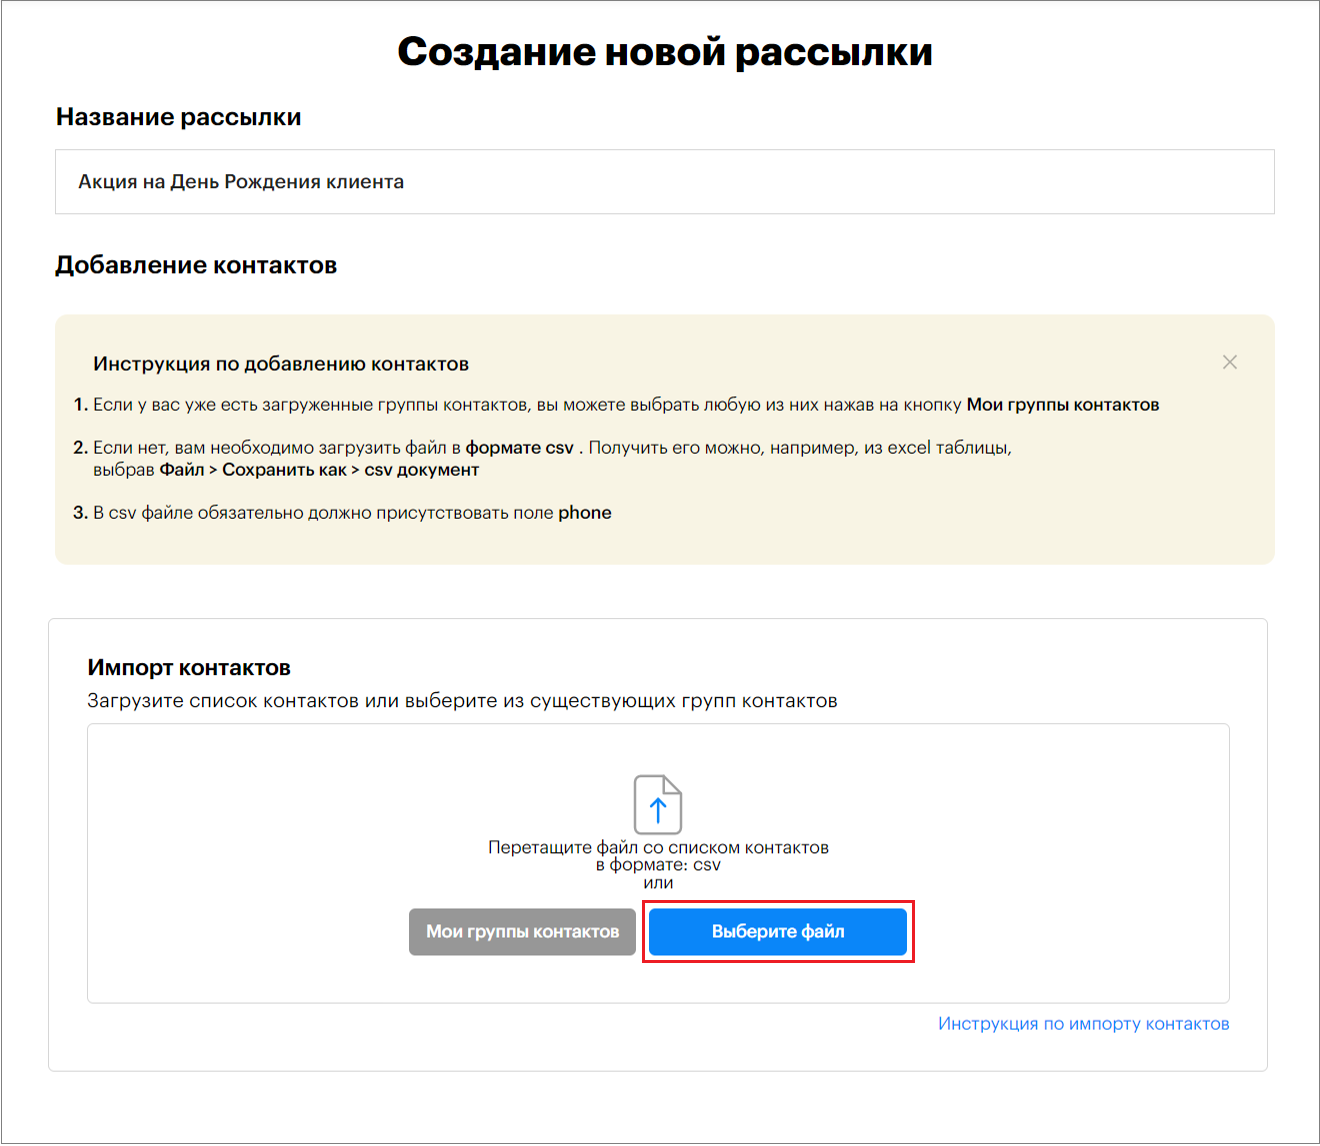
2. Enter the campaign name.
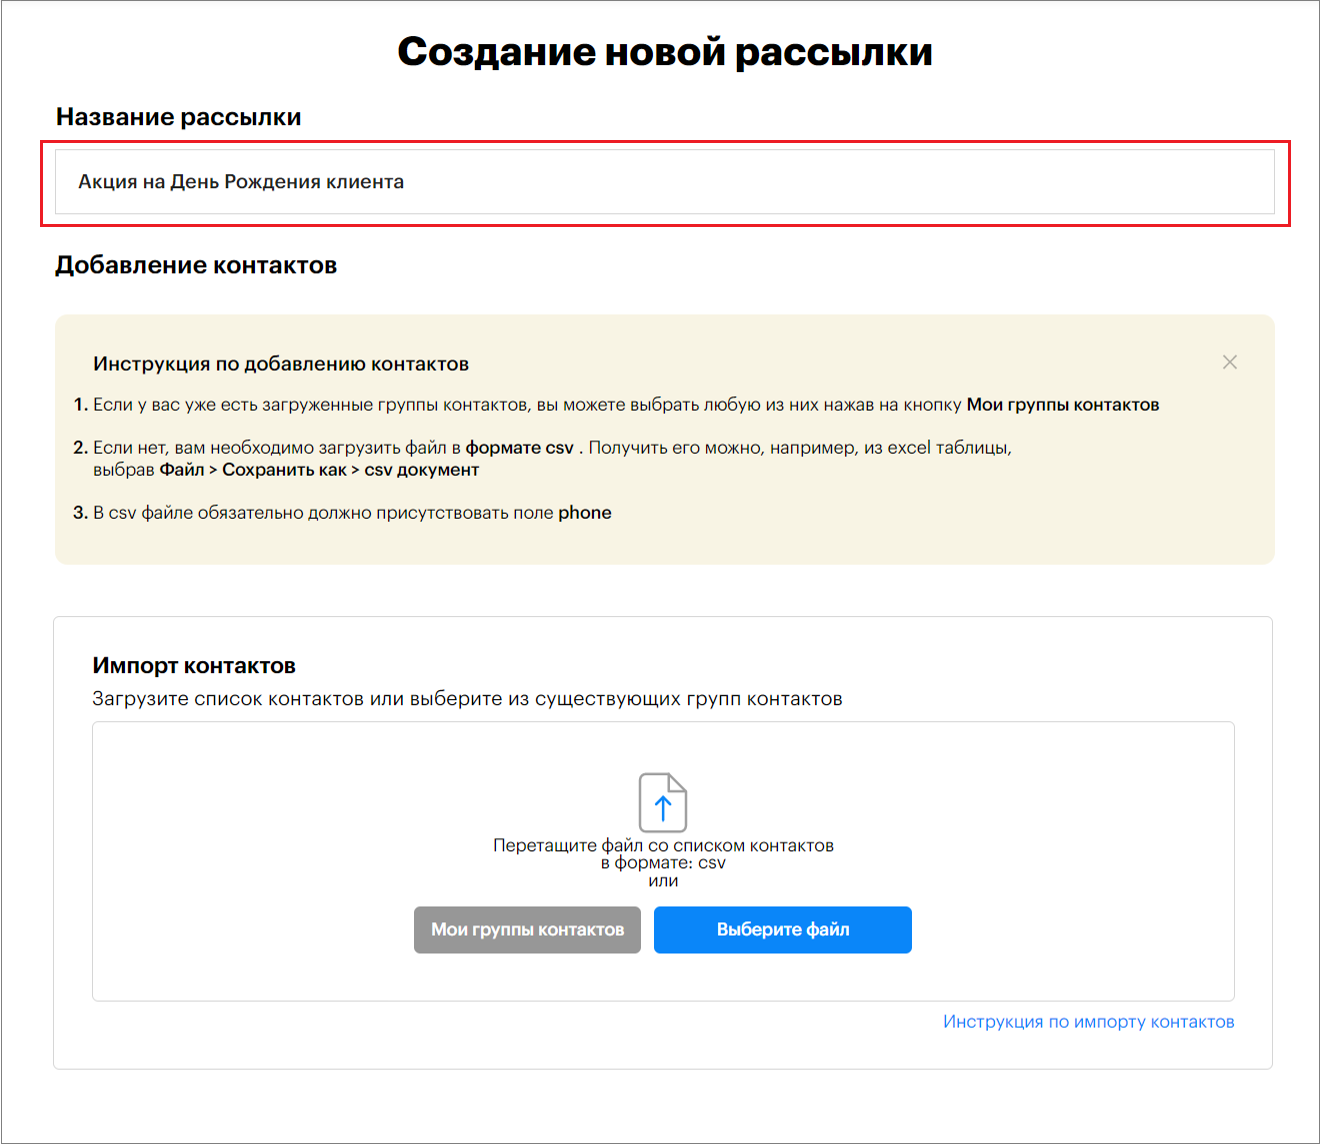
3. Add a Contact List.
The contact list must be in CSV format.
You can learn how to create a contact list in CSV format in the article “How to Create a Contact List in CSV Format”.
To do this:
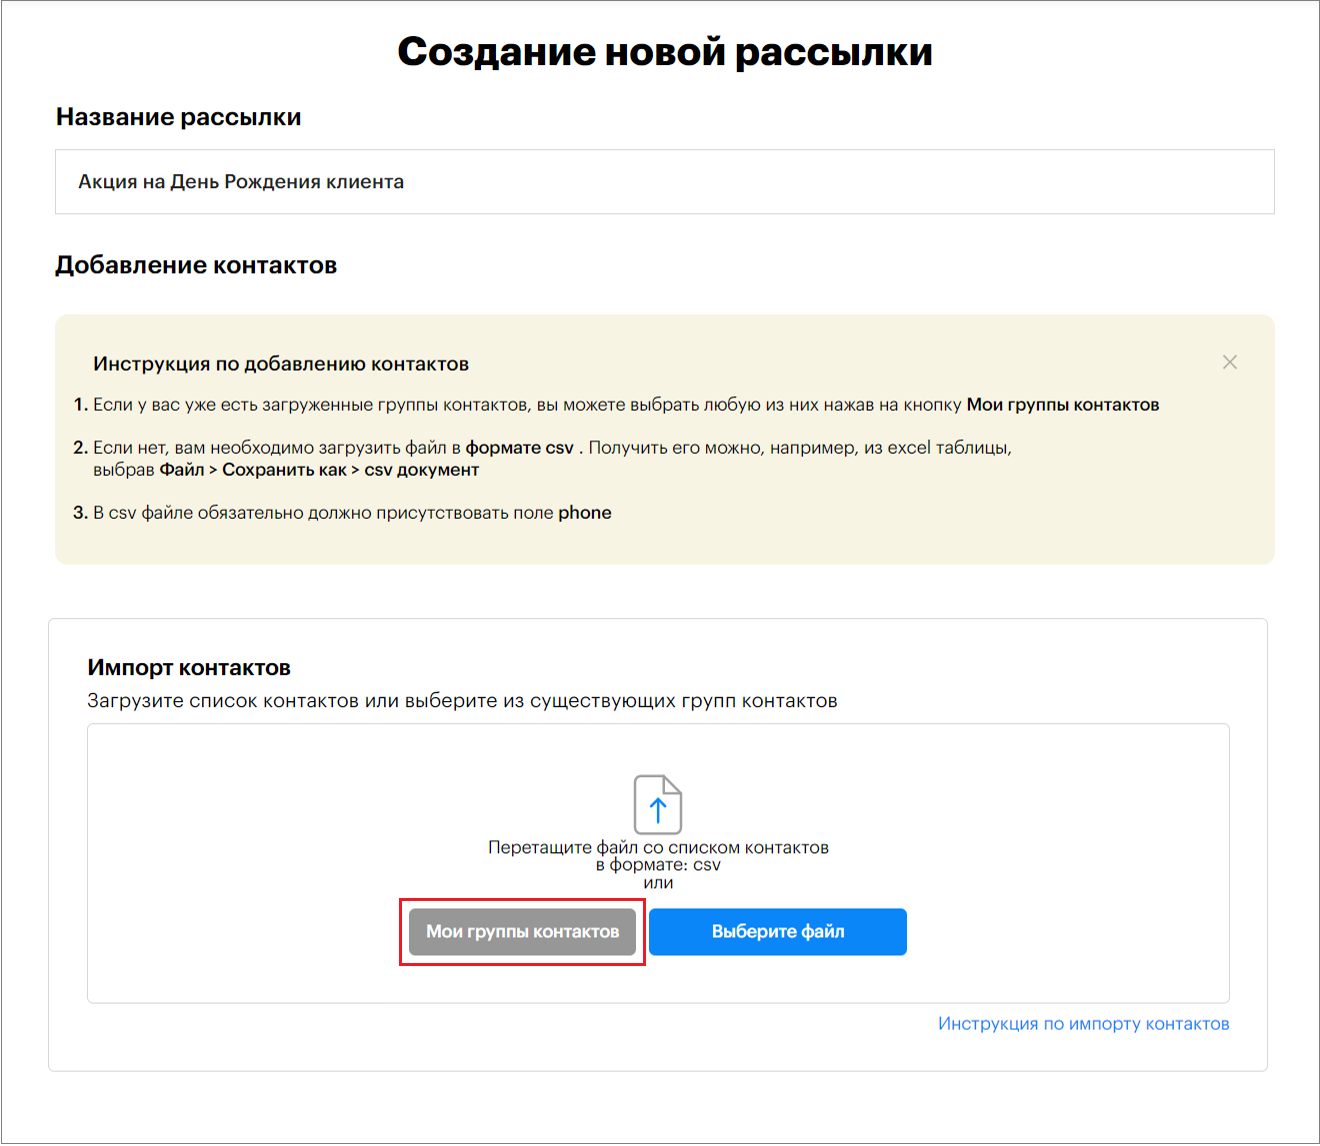
— click “My Contact Groups”
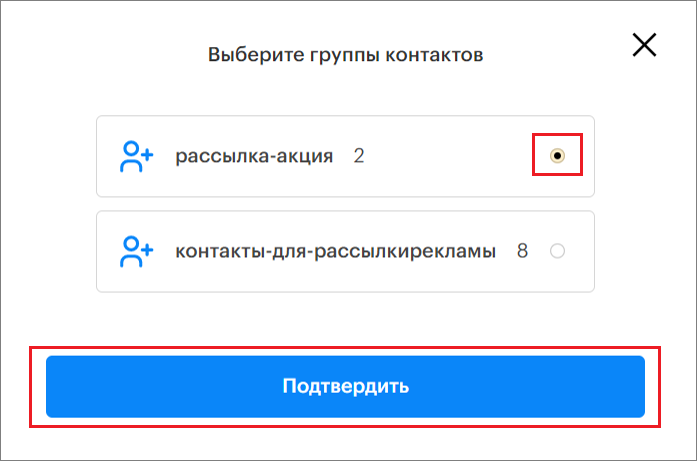
— select a contact group and click “Confirm”
— or click “Select File” and upload a contact list in CSV format
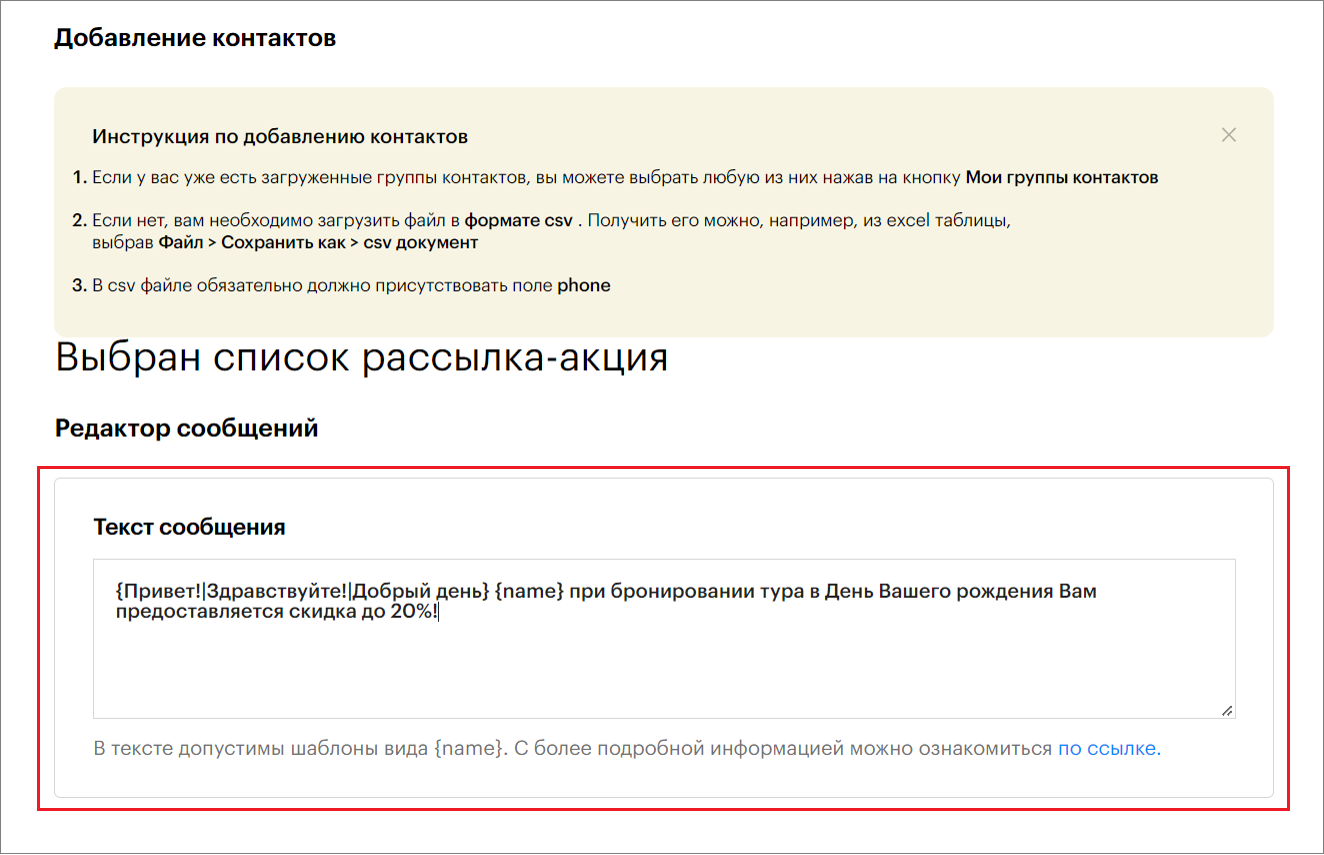
4. Enter the message text for the campaign.
If the contact list (CSV file) contains additional fields such as name, order, etc., you can insert them into the message text.
To do this, include them in curly braces in the message text, for example, {name} or {order}.
Certain words in the message text should be replaced; they are indicated in curly braces separated by a vertical bar, for example, {Hello!|Hi!|Good day}; {Already|Right now}, etc. Each time the campaign is sent, one word will be randomly selected—either Hello, Hi, or Good day. This helps make each message slightly different to avoid being banned on WhatsApp/Telegram.
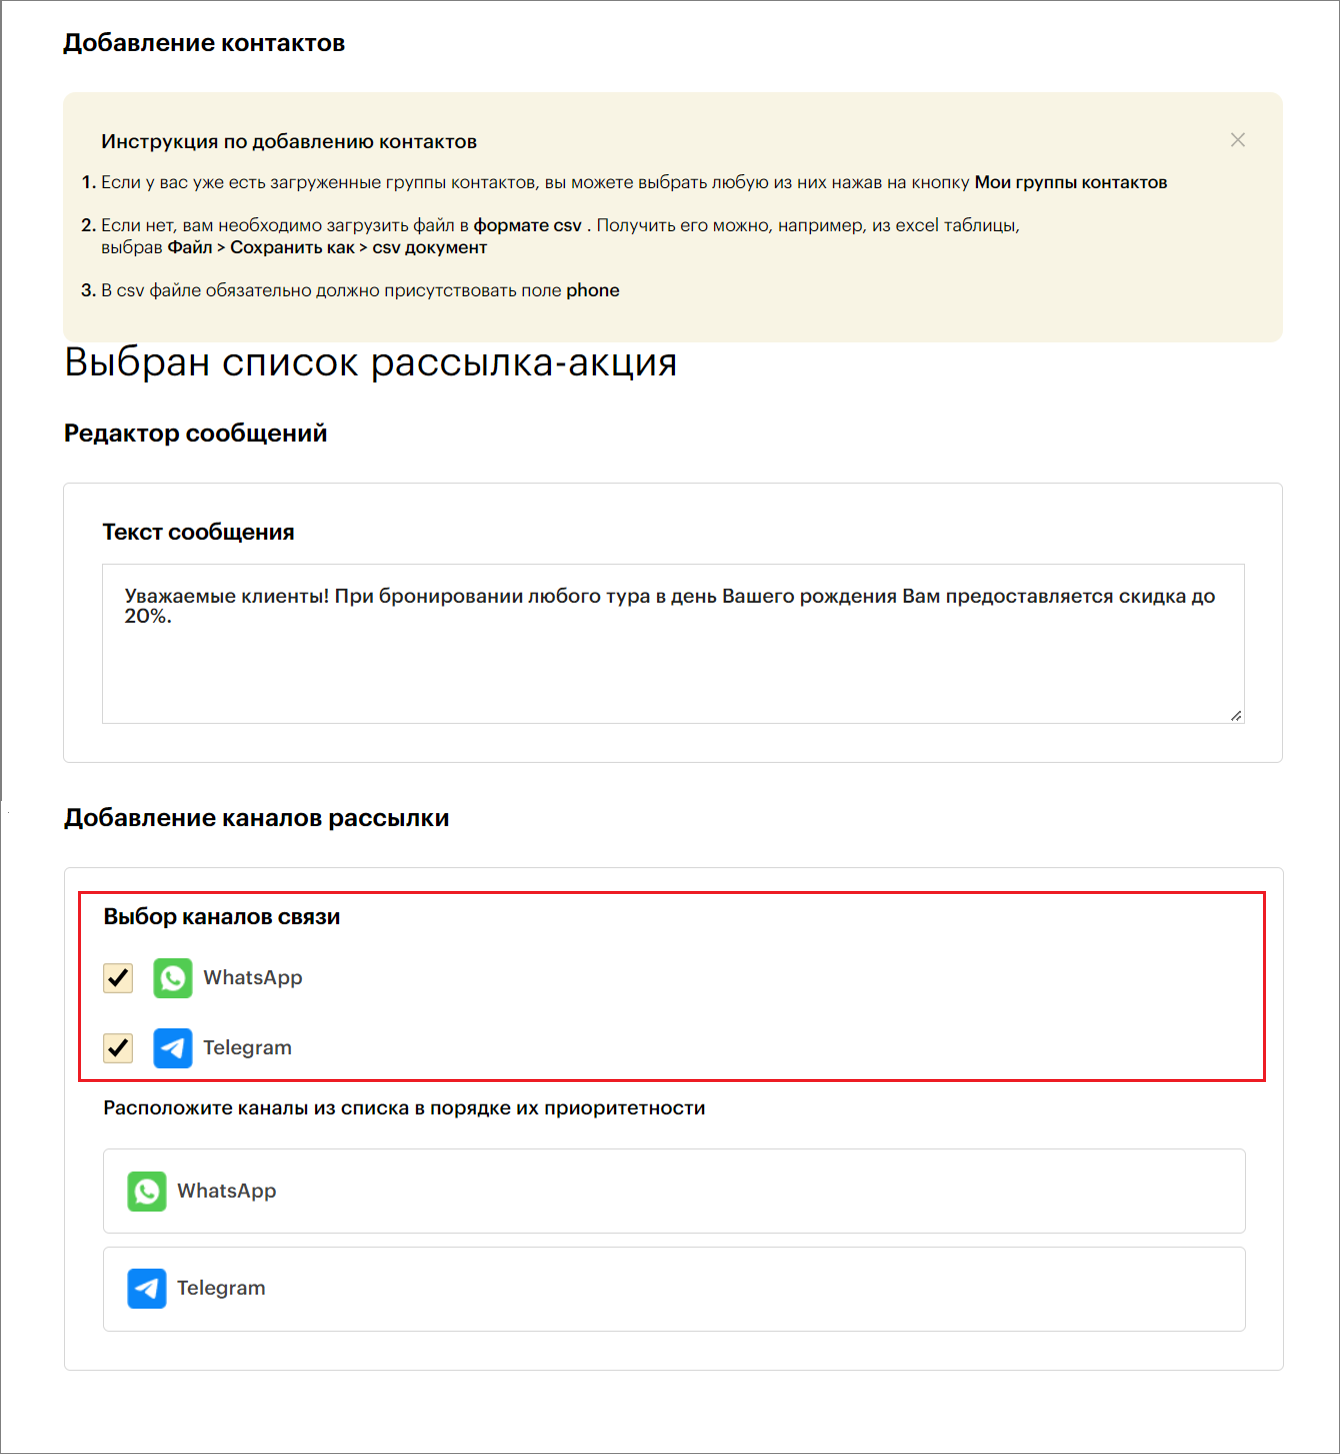
5. Select the communication channel through which the messages will be sent.
Only WhatsApp/Telegram channels connected to the Teletype panel will be displayed here.
6. Configure the Campaign Settings.
Campaign Settings:
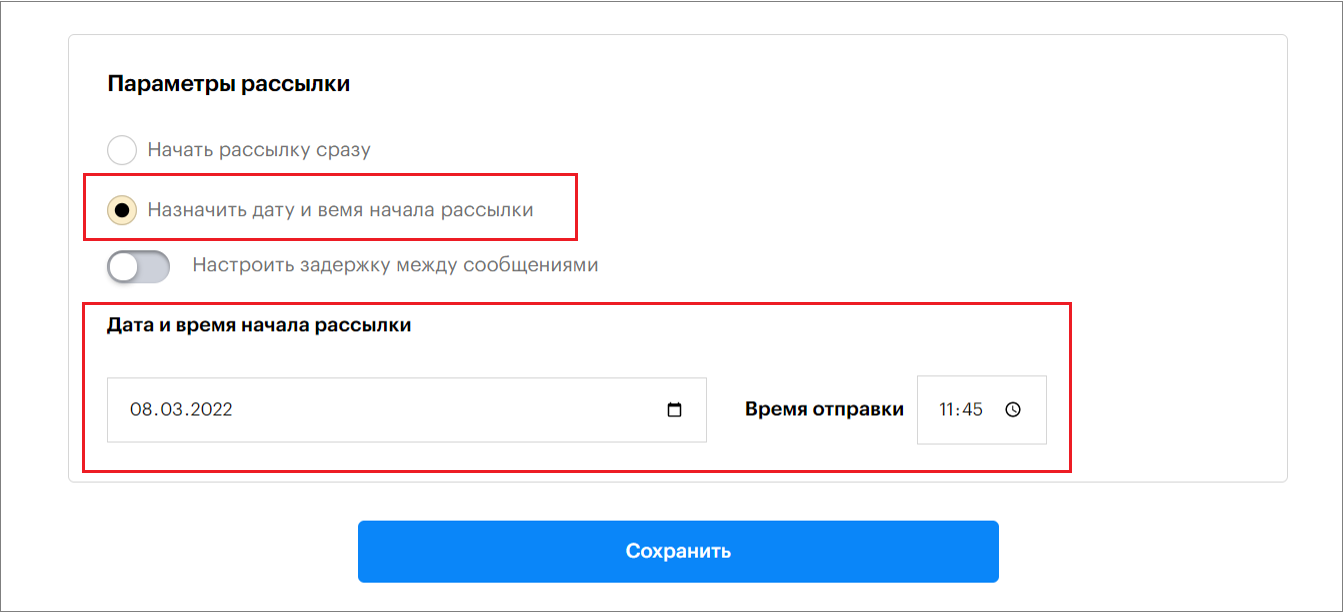
— You can start the campaign immediately by enabling the “Start Campaign Immediately” option.
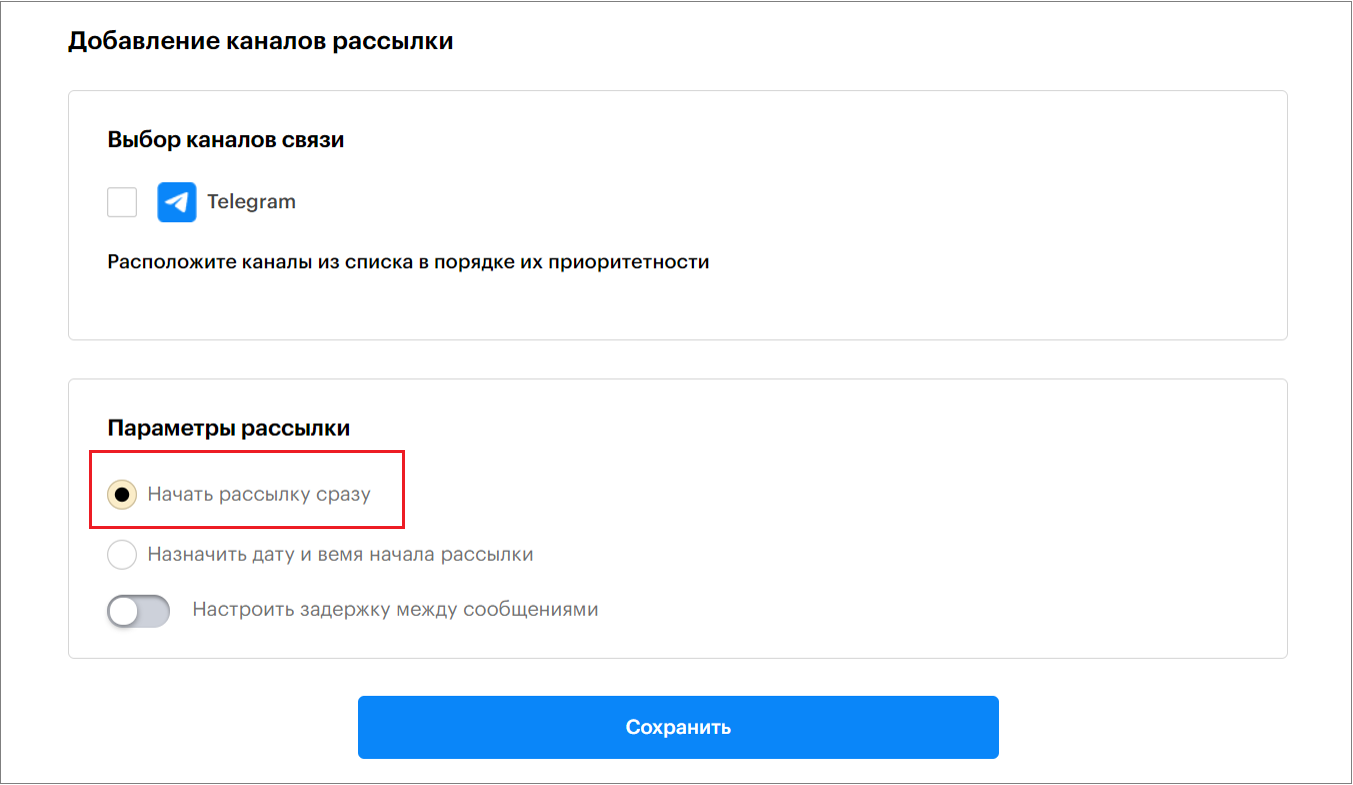
— Or schedule the campaign by date and time.
To do this, enable the “Set Campaign Start Date and Time” option and specify the start date and time.
— Set a delay between messages
Here you can specify the time interval in seconds between sending messages.
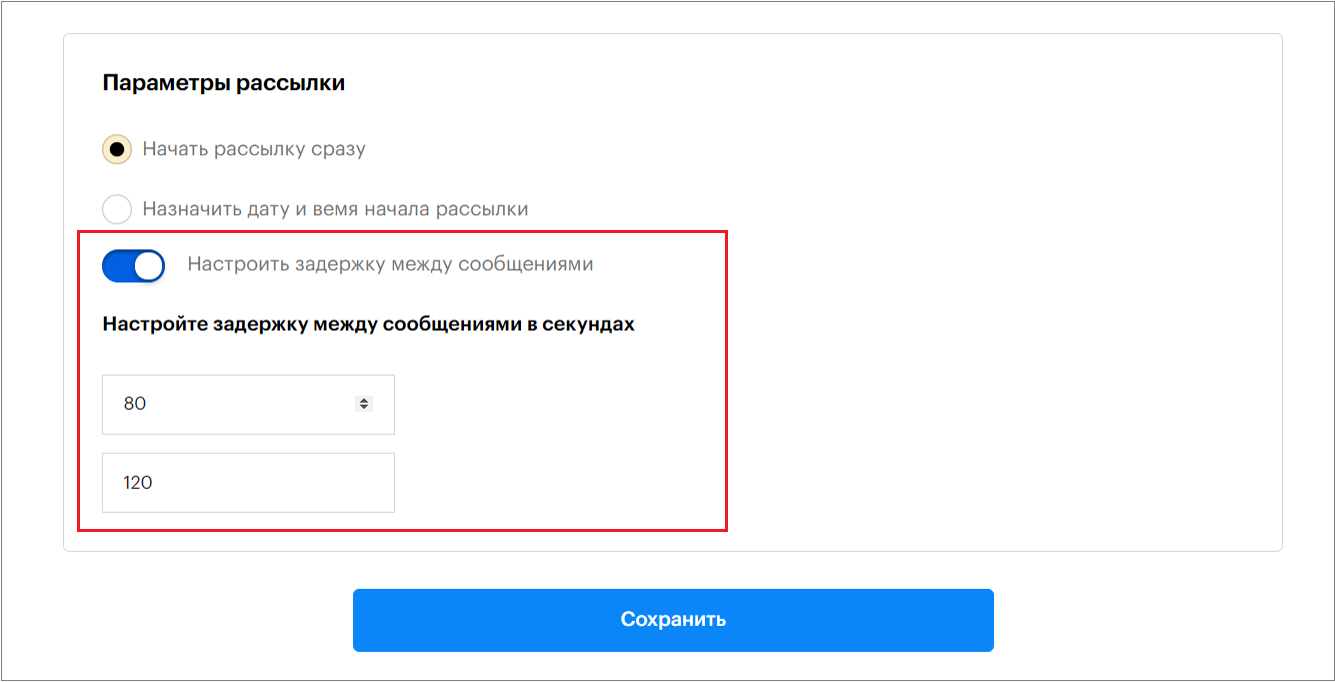
If you do not set this option, messages will be sent every 40-80 seconds.
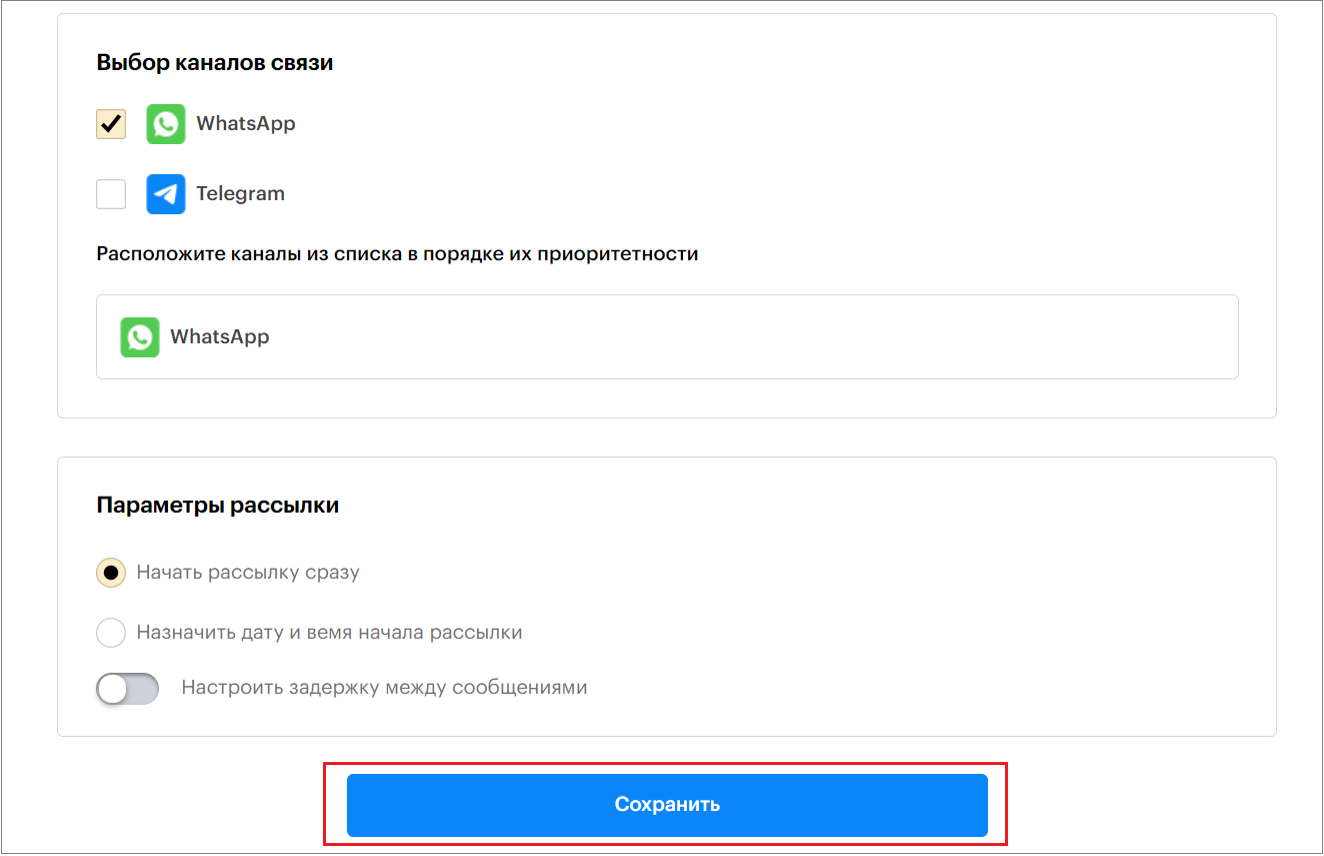
7. Then click “Save”.
0 из 5 звезд
| 5 Звезд | 0% | |
| 4 Звезд | 0% | |
| 3 Звезд | 0% | |
| 2 Звезд | 0% | |
| 1 Звезд | 0% |


