How can we help?
-
Getting Started
- Registration in the System
- Setting Up and Adding a New Project in Teletype App
- Removing the Teletype App Link
- Teletype App Affiliate Program
- What is the Teletype App?
- Terms in the Teletype App
- How to switch Teletype to English
- Switching the Panel to English
- Glossary Teletype App
- Registration in Teletype App via eLama
- Показать все статьи ( 2 ) Свернуть статьи
-
Adding Channels
- Connecting to Facebook
- Telegram bot
- Viber Bot
- VK Group
- Online Chat for Website
- Instagram Direct/Comments
- Button with Messengers
- Telegram by Phone Number
- Avito Personal Account
- VKontakte Personal Account
- Email Setup
- WhatsApp Business
- Connecting WhatsApp Without Authorization in the Panel via Link
- Connecting Telegram by Phone Number Without Authorization in the Panel via Link
- Connecting Max
- Connecting Max Bot
- SMS
- Показать все статьи ( 10 ) Свернуть статьи
-
Working with Dialogs
- Closing the Dialogue and the Answered Button
- Customer Information
- Working with Channel and Dialogue Filters
- Quick Reply Templates
- Message Read Status in WhatsApp and Viber
- Closing a Conversation in AmoCRM — Ending a Dialogue in the Teletype App
- Working with the Telegram Notifier
- Button ✉️ Take the next conversation
- Reassigning the Dialogue
- Hotkeys
- Sending Voice Messages on WhatsApp
- Categories for Dialogues in the Teletype App Panel
- Group Chats in WhatsApp
- Group Chats on Telegram by Number
- Tags
- Push Notifications
- Distribution of Requests
- Mass Actions
- Request Notifications
- Evaluation of Dialogues in Telegram and WhatsApp
- Personal Data
- Показать все статьи ( 13 ) Свернуть статьи
-
CRM Systems
-
Operators
-
Profile Editing
-
Additional Options
-
Online Chat Installation
- WordPress — Chat Code Installation
- Joomla — Chat Code Installation
- Bitrix — Chat Code Installation
- Opencart — Chat Code Installation
- WIX — Chat Code Installation
- MODx — Chat Code Installation
- Tilda — Installing Chat Code
- UMI.CMS — Chat Code Installation
- NetCat — Chat Code Installation
- PrestaShop — Chat Code Installation
- ImageCMS — Chat Code Installation
- PlatformaLP — Chat Code Installation
- LPmotor — Chat Code Installation
- A5.ru — Chat Code Installation
- Blogger — Chat Code Installation
- Canape CMS — Chat Code Installation
- CartEnergy — Chat Code Installation
- DIAFAN.CMS – Chat Code Installation
- DigiSt — Chat Code Installation
- Drupal — Chat Code Installation
- Flexbe — Chat Code Installation
- fo.ru — chat code installation
- Gophotoweb — Chat Code Installation
- io.ua — chat code installation
- IPBoard (Invision Power Board) — Chat Code Installation
- lact.ru — Chat Code Installation
- Magento — Chat Code Installation
- Показать все статьи ( 19 ) Свернуть статьи
-
Analytics
-
API
-
Billing
-
Telephony
-
Teletype Sender
-
Bot Builder
Connecting MicroSIP to Sipuni
Installing MicroSIP
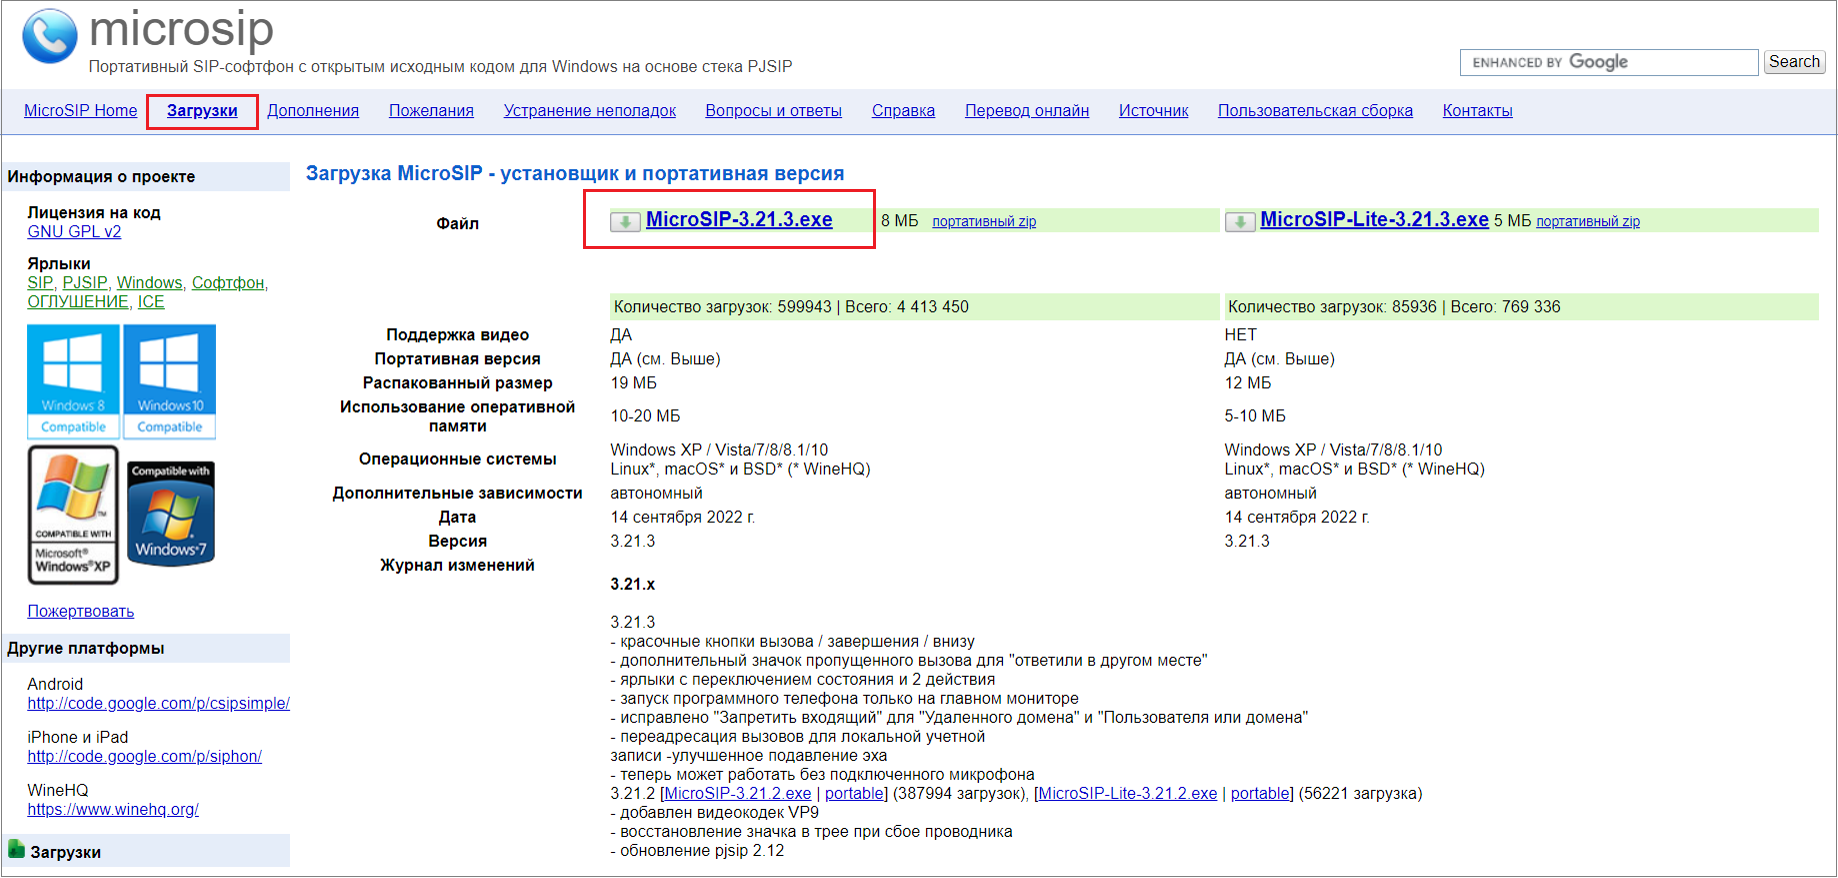
1. Go to the website https://www.microsip.org/downloads
2. Download MicroSIP-3.21.3.exe to your downloads folder
3. Open the downloaded program
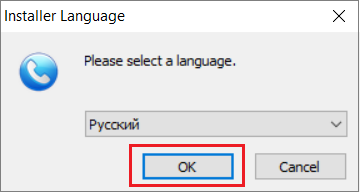
4. Select your language and click “Ok”
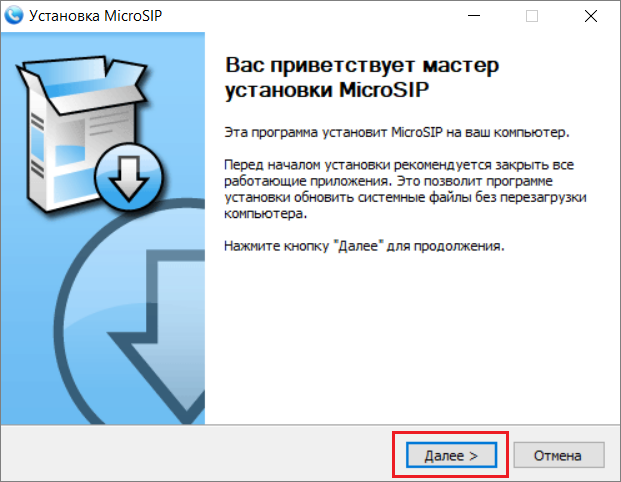
5. Click “Next”
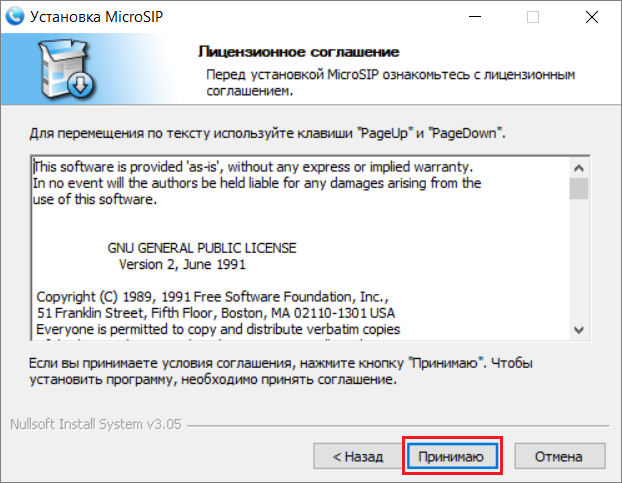
6. Click “I Accept”
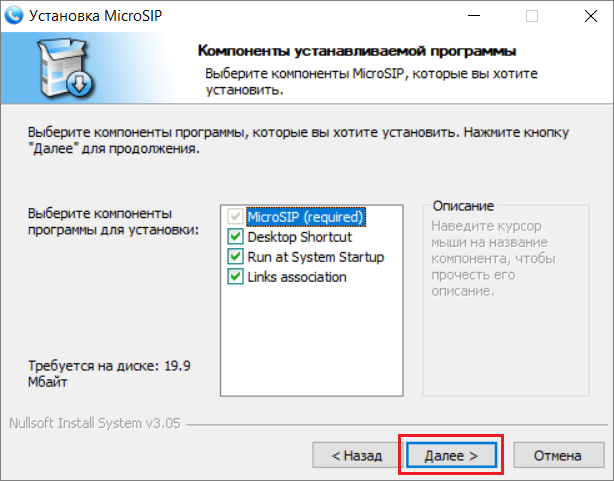
7. Select “Program Components” and click “Next”
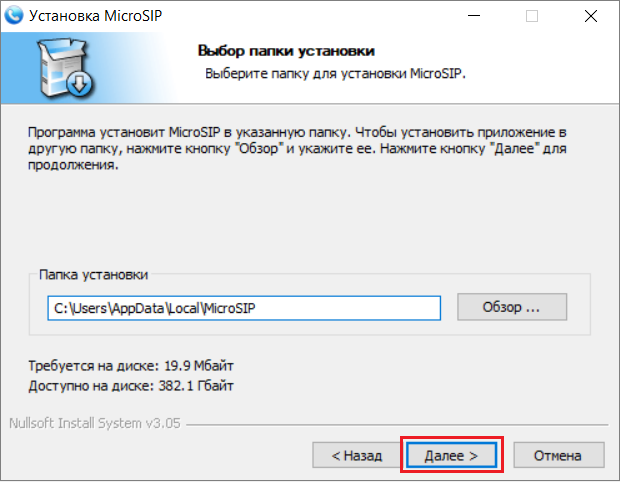
8. Choose the installation folder and click “Next”
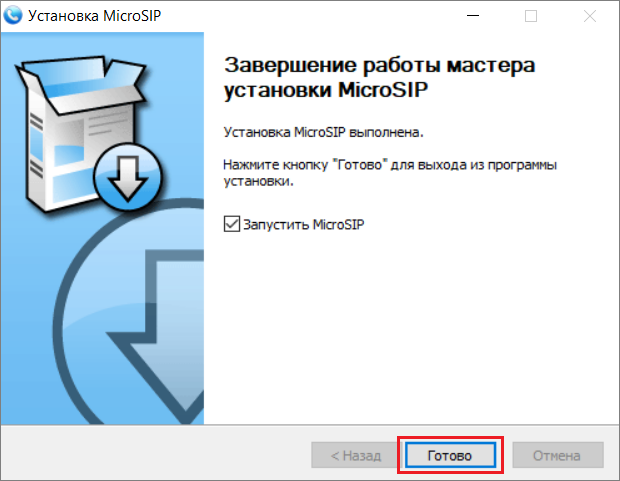
9. Click “Finish”
Connecting MicroSIP to Sipuni
- After installation, open the MicroSIP application and go to the menu
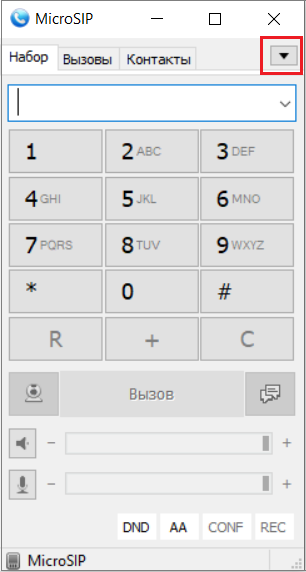
2. Click “Add Account”

3. Fill in the authorization details as shown and click “Save.”
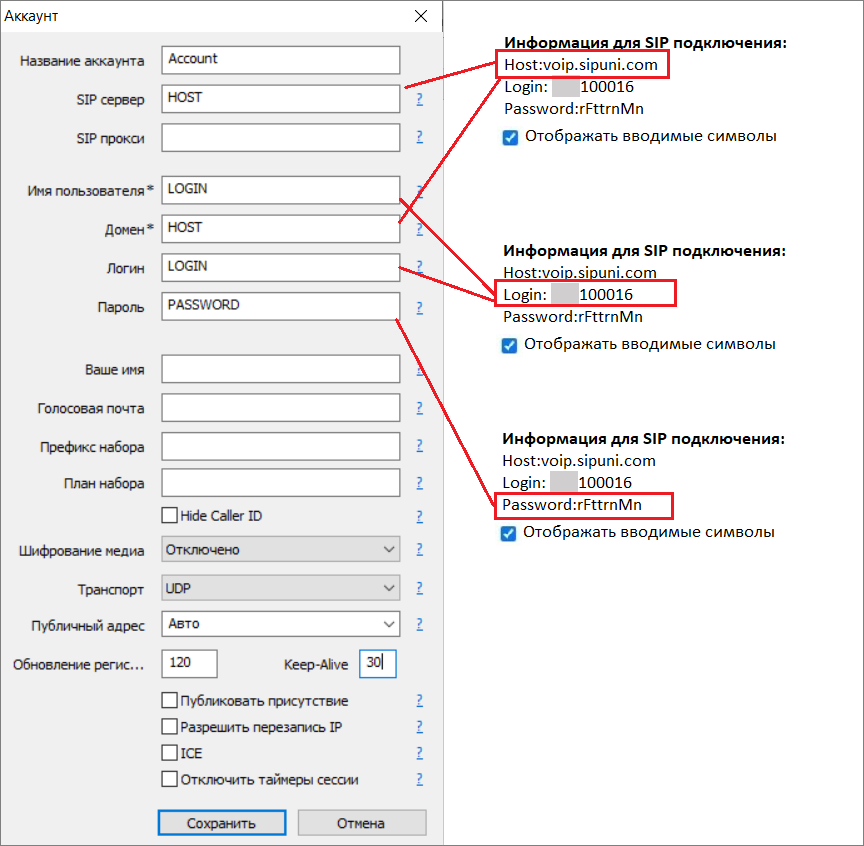
You can find the authorization details in your SIPUNI personal account.
To do this:
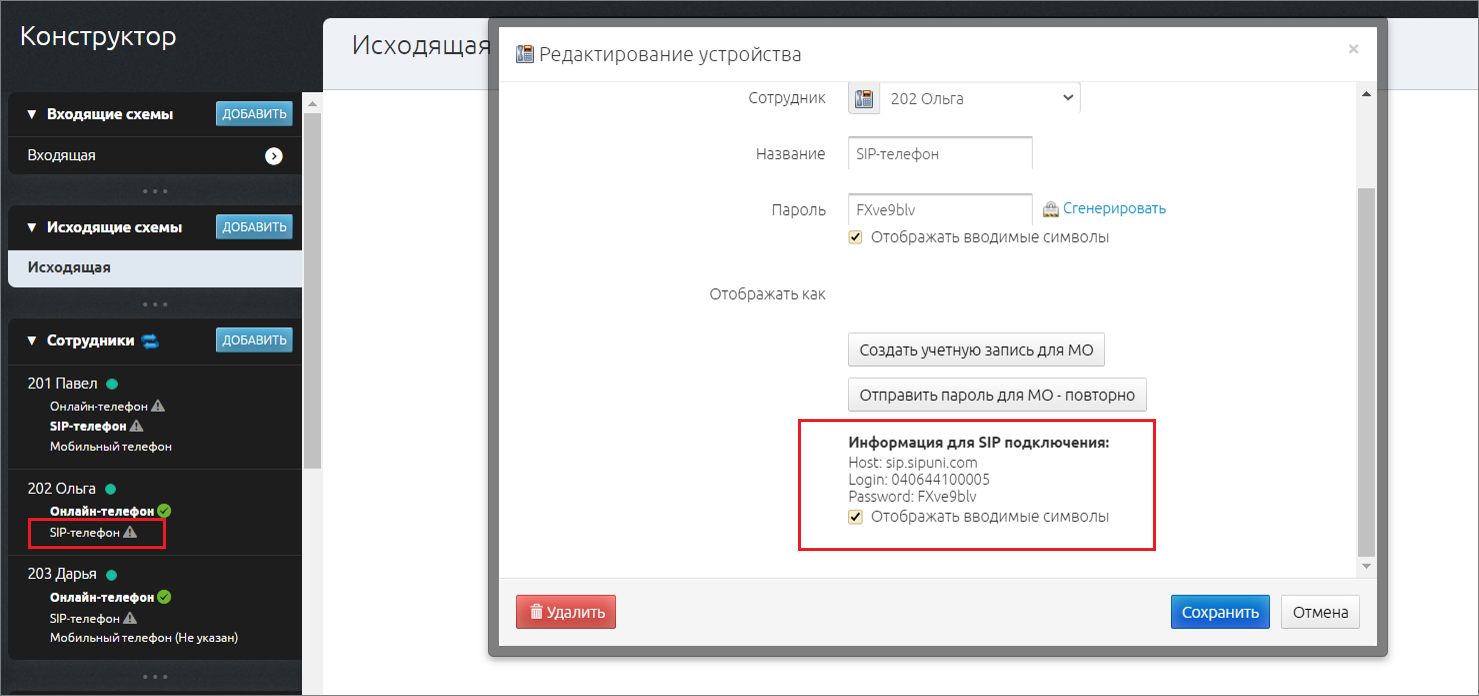
– go to the Constructor in your SIPUNI personal account
– select the employee’s account
– click SIP phone
– In the opened “Edit Device” window, get the information for SIP connection
To add a separate device, you need to:
– go to the “Constructor” menu
– click on the employee’s name
– click “Add Device”
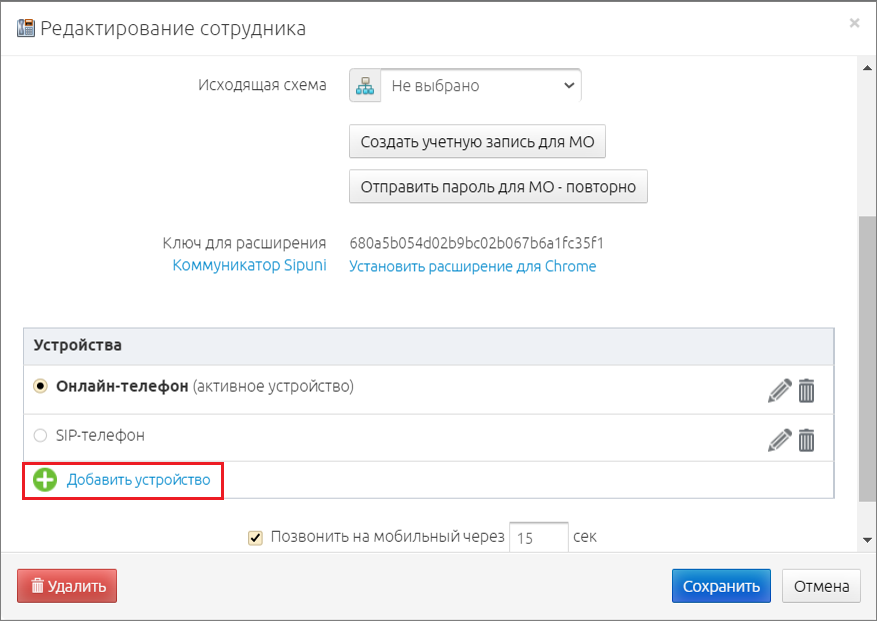
– select the usage type “Program on PC (MAC/PC)” and click “Save”
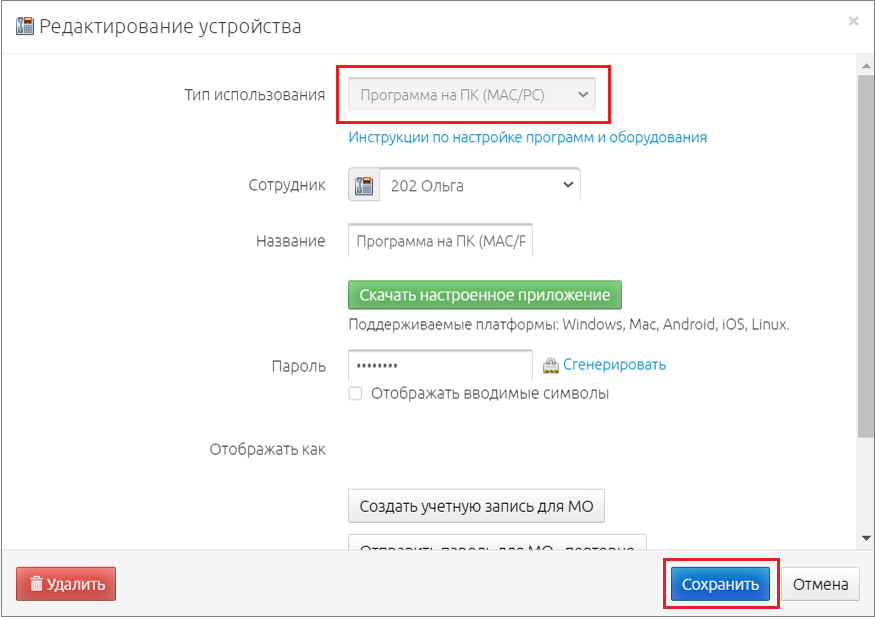
The setup details are located in the same window under the link “Information for SIP connection.”
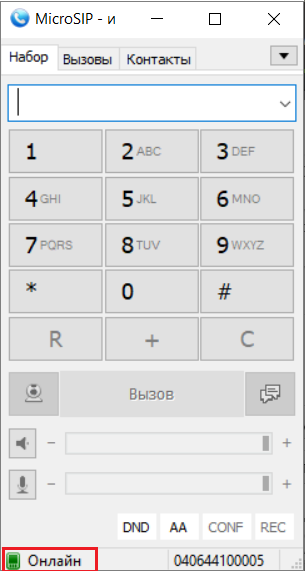
When the settings are entered correctly, the phone indicator lights up green.