How can we help?
Button with Messengers
Connection
- Go to the “Add Channel” section in the left menu of the Teletype panel or in the project settings.
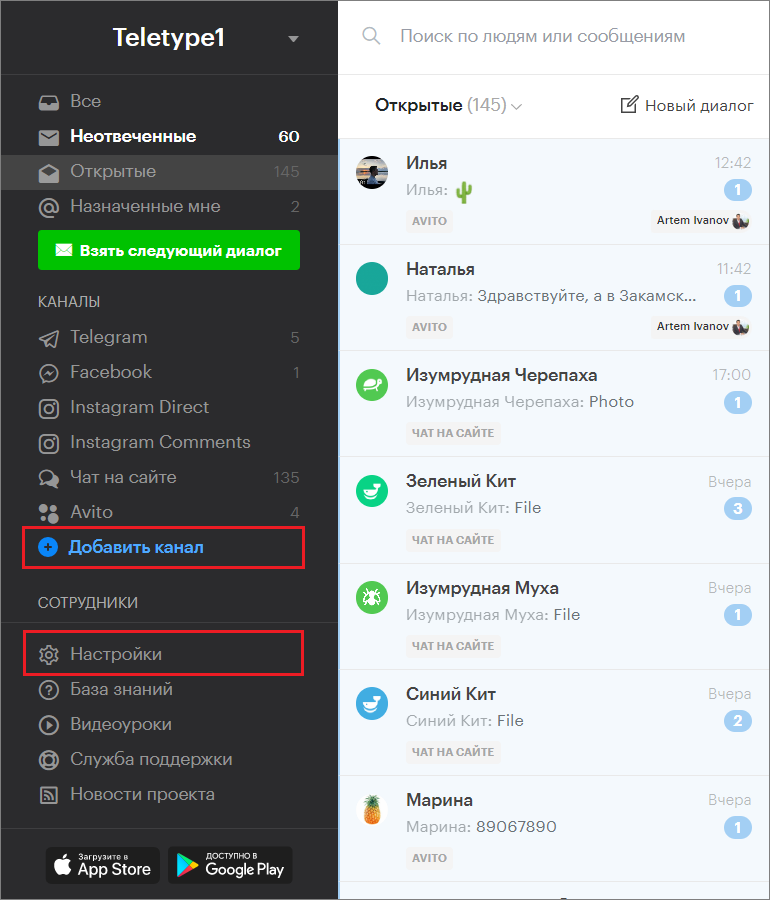
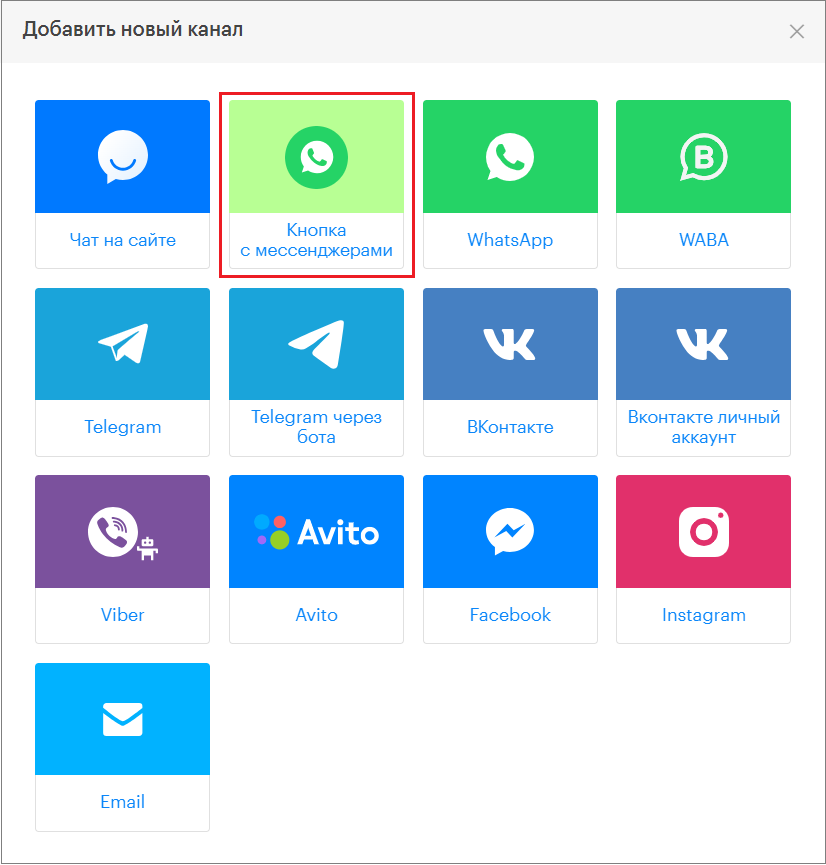
2. In the window that appears, select the “Button with Messengers” block.
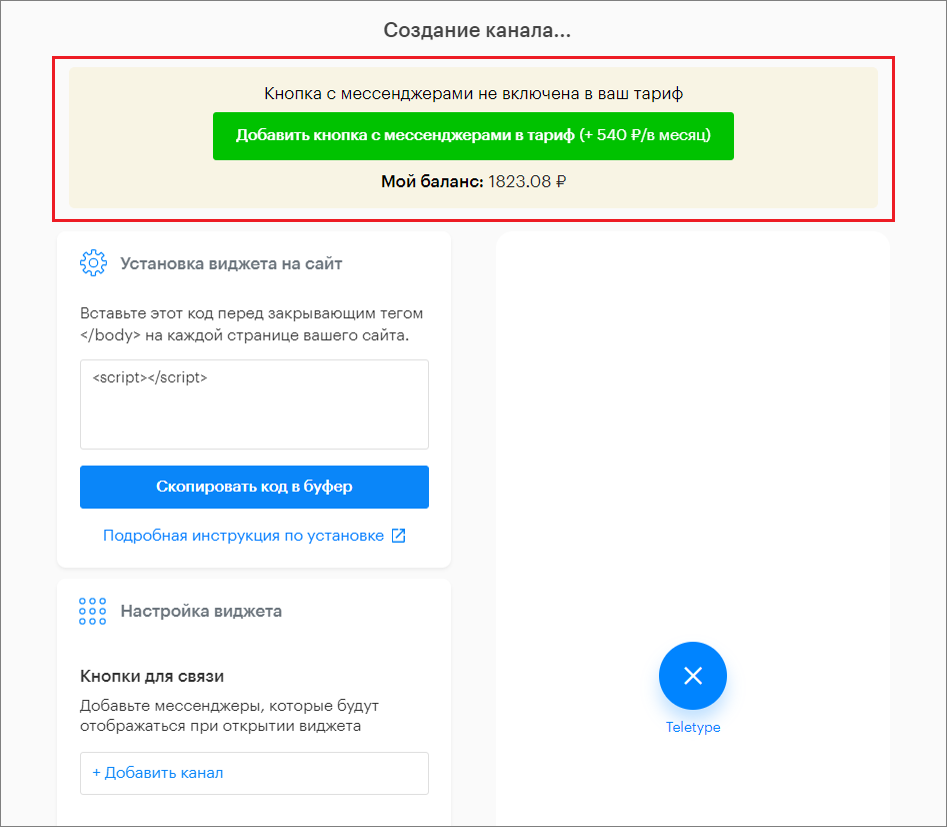
3. Click “Add Button with Messengers to Plan”.
4. Fill out the widget settings form. All changes will be displayed in the widget preview on the right side of the window.
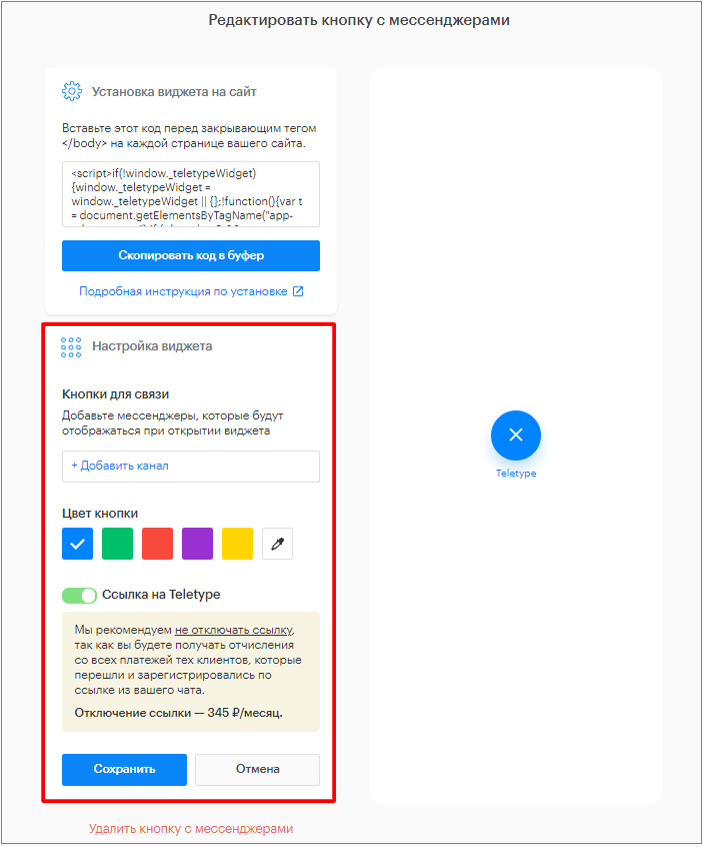
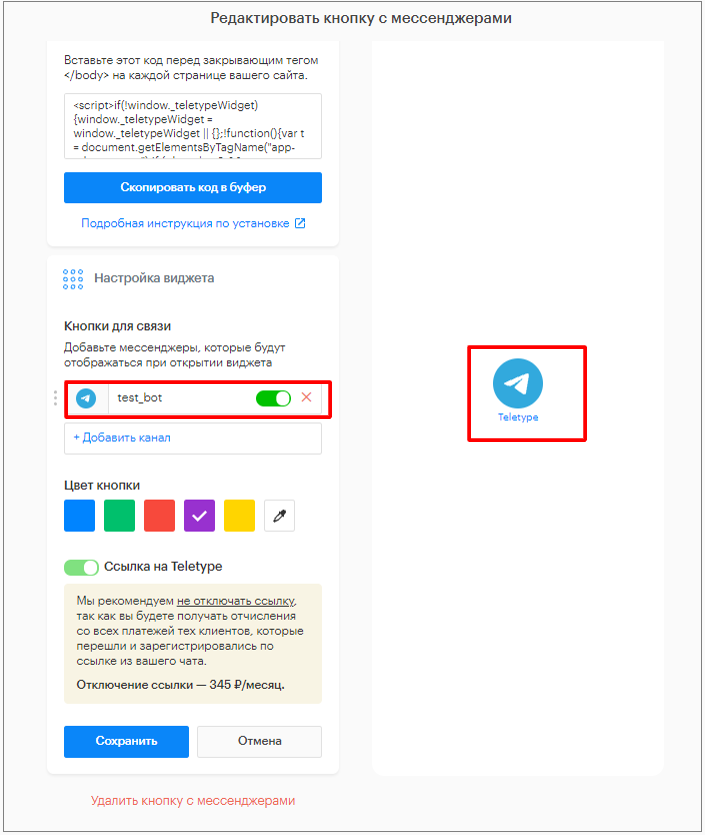
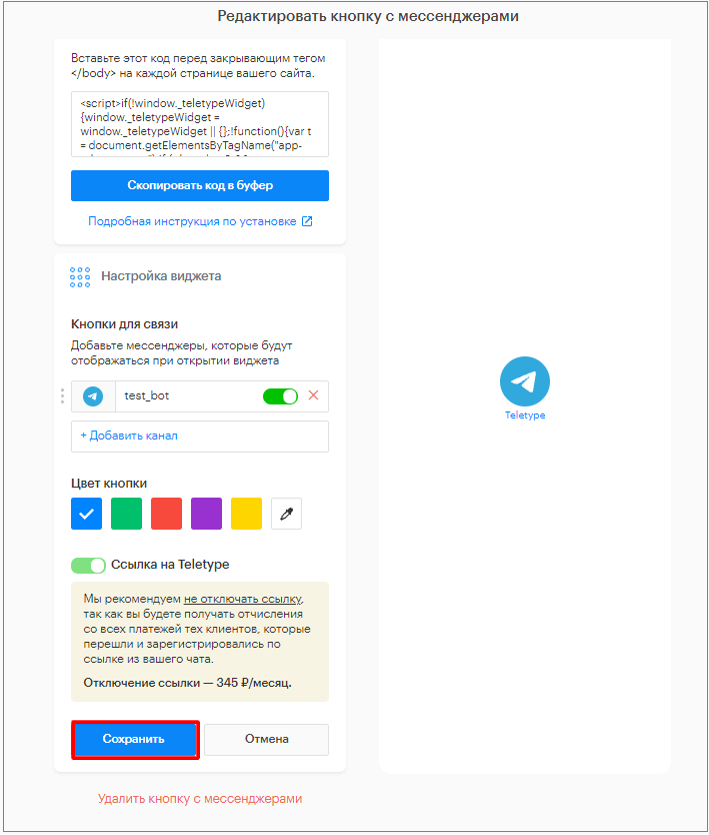
5. Click “Add Channel” in the “Communication Channels and Messengers” section.
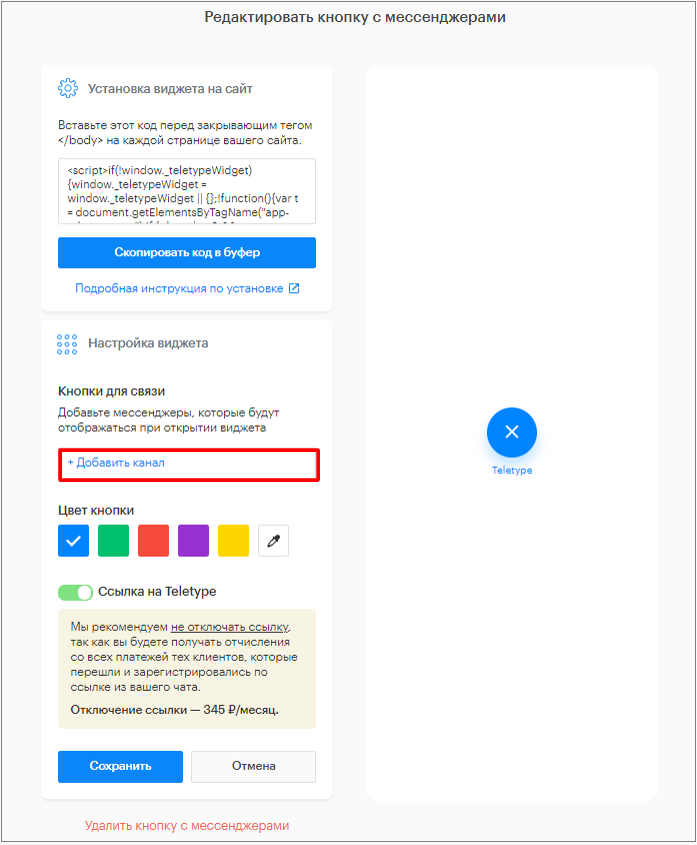
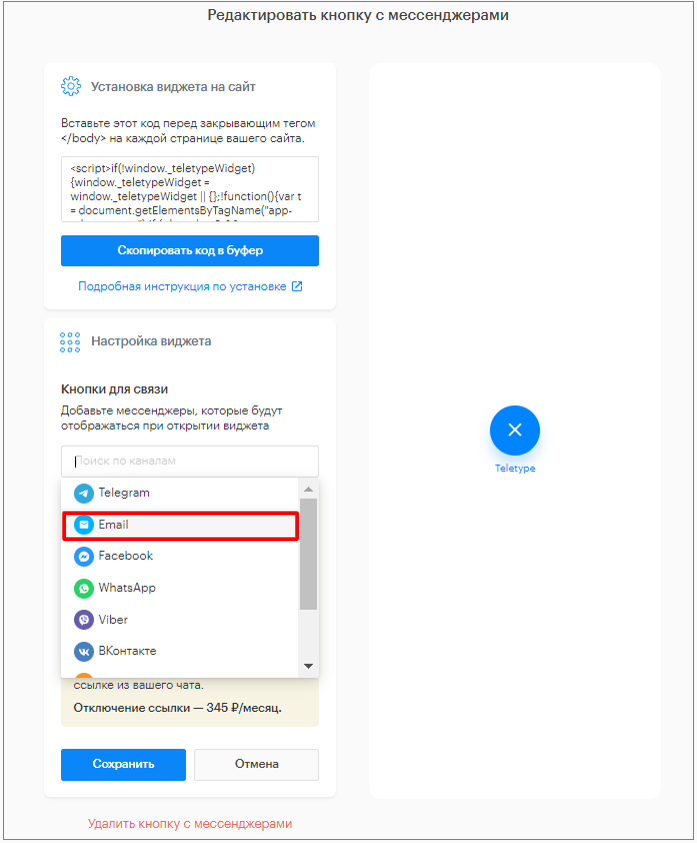
6. Select the channels you want to connect to the widget from the dropdown list.
How to fill in the authorization details for each channel:
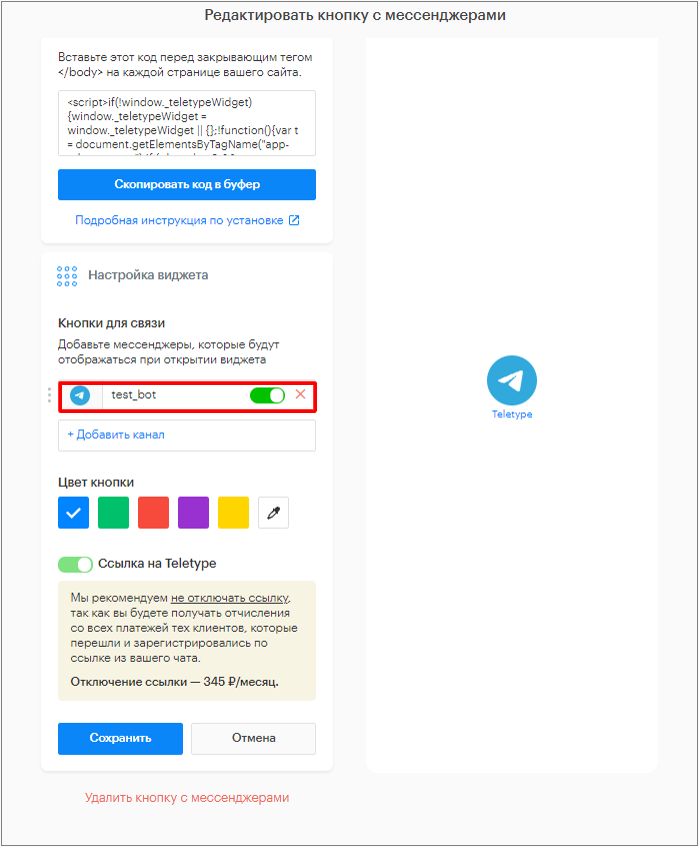
- For the “Telegram” channel, enter the Telegram account login.
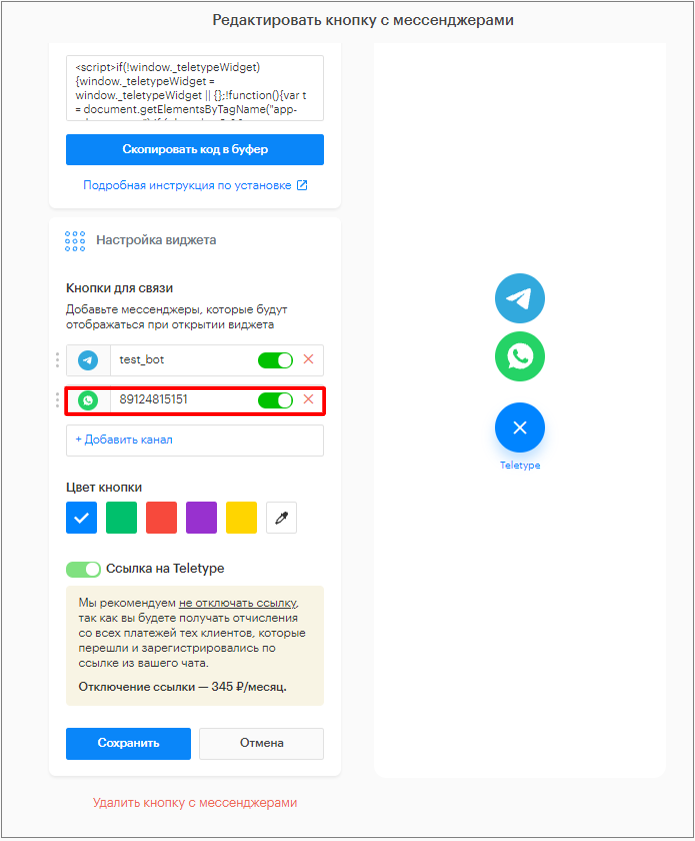
2. For the “WhatsApp” channel, enter the phone number of the WhatsApp account.
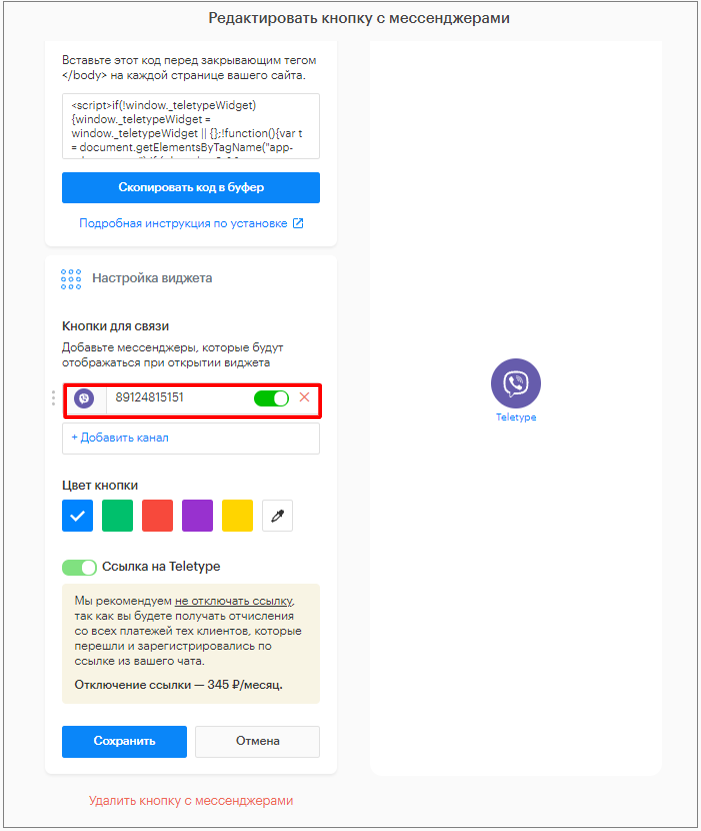
3. For the “Viber” channel, enter the phone number of the Viber account.
4. For the “Facebook” channel, enter the account login (phone number or email used during registration).

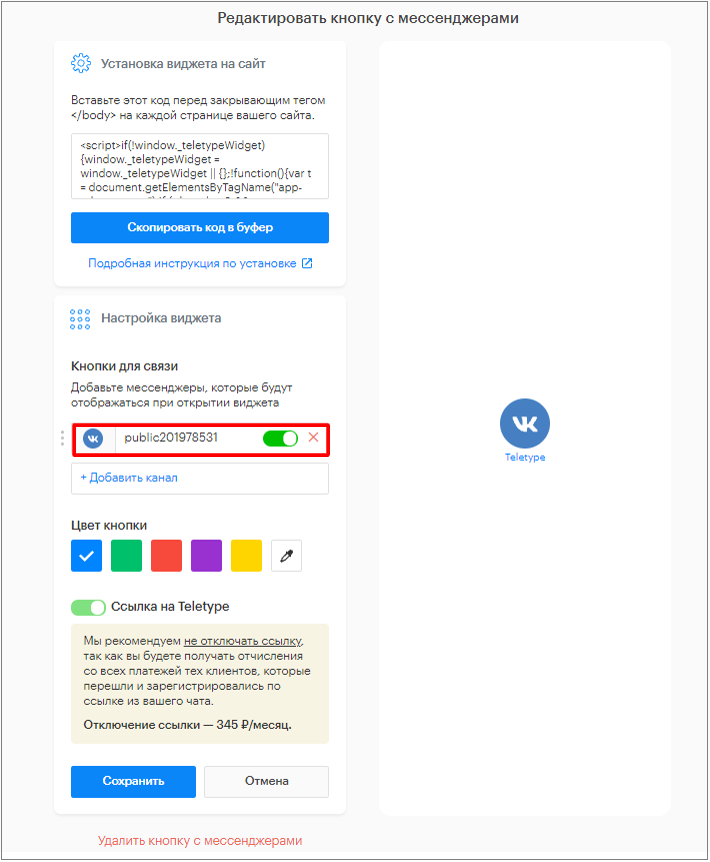
5. For the “Vkontakte” channel, enter the address of the Vkontakte group or community.
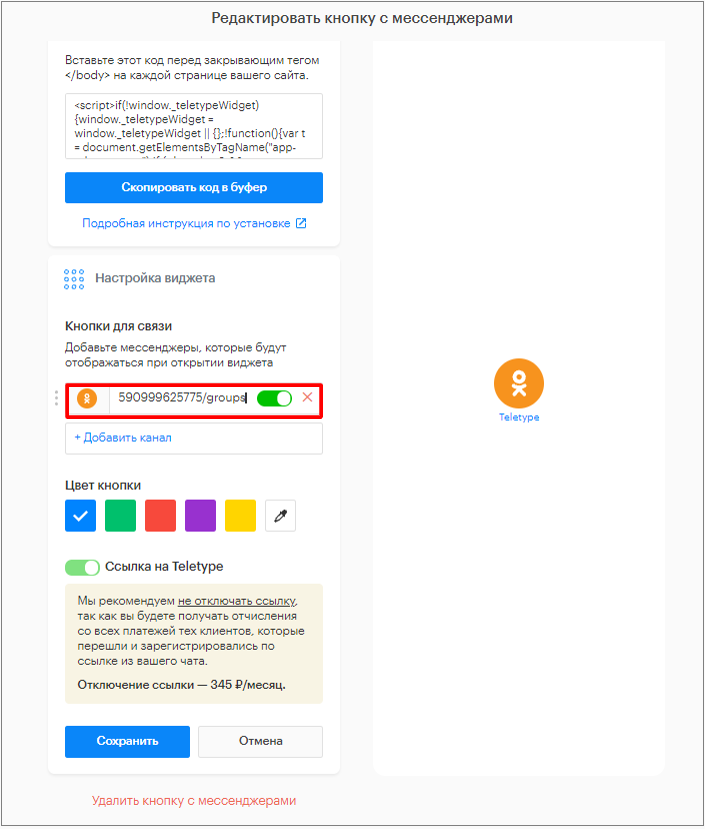
6. For the “Odnoklassniki” channel, enter the address of the group or community.
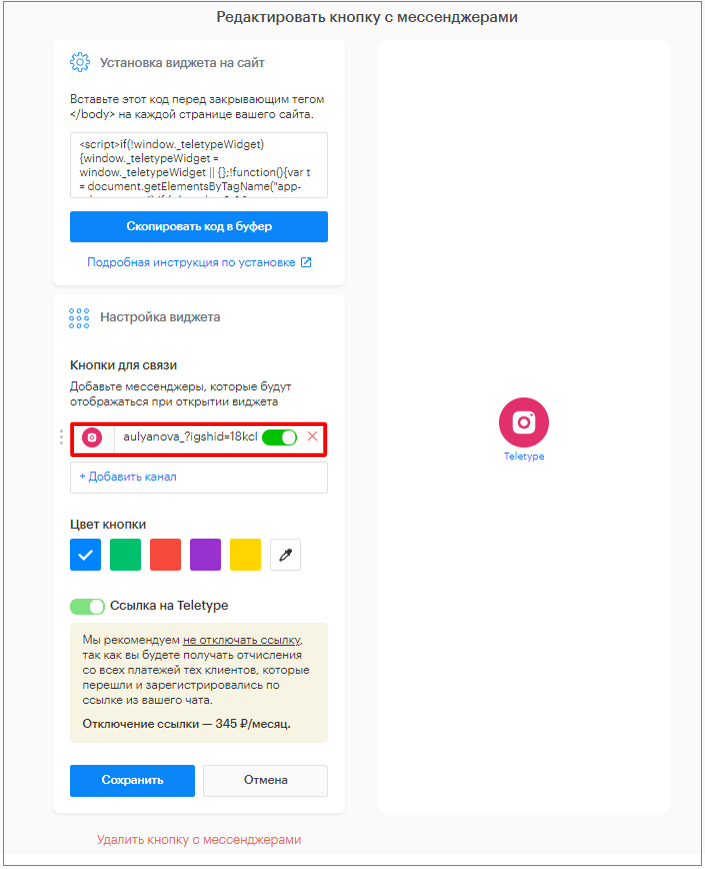
7. For the “Instagram” channel, enter the Instagram profile URL.
8. For the “Email” channel, enter the email address where messages will be received.

9. For the “Phone” channel, enter the phone number where calls will be received.
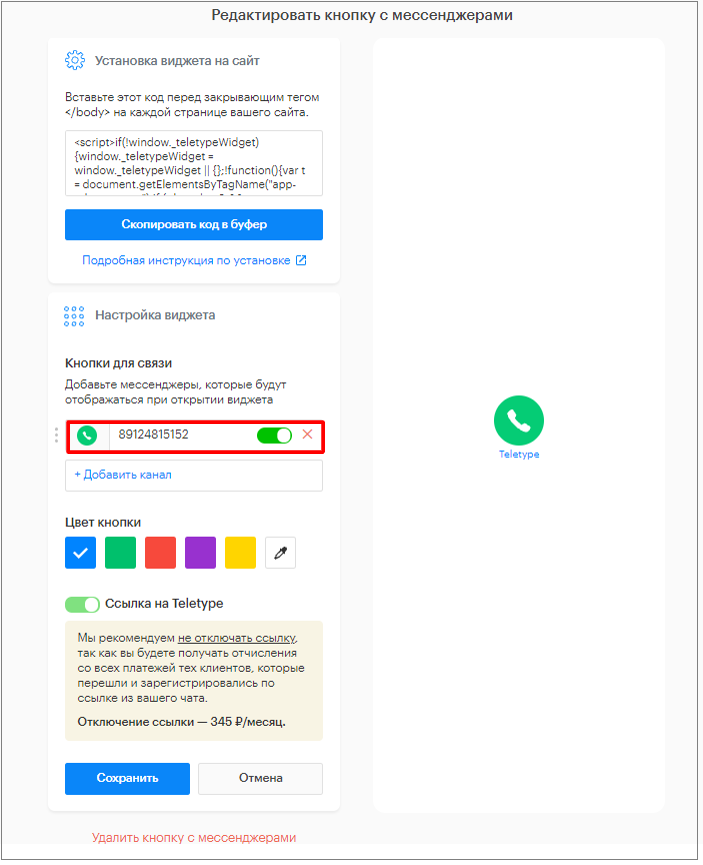
10. Change the widget button color (if needed).
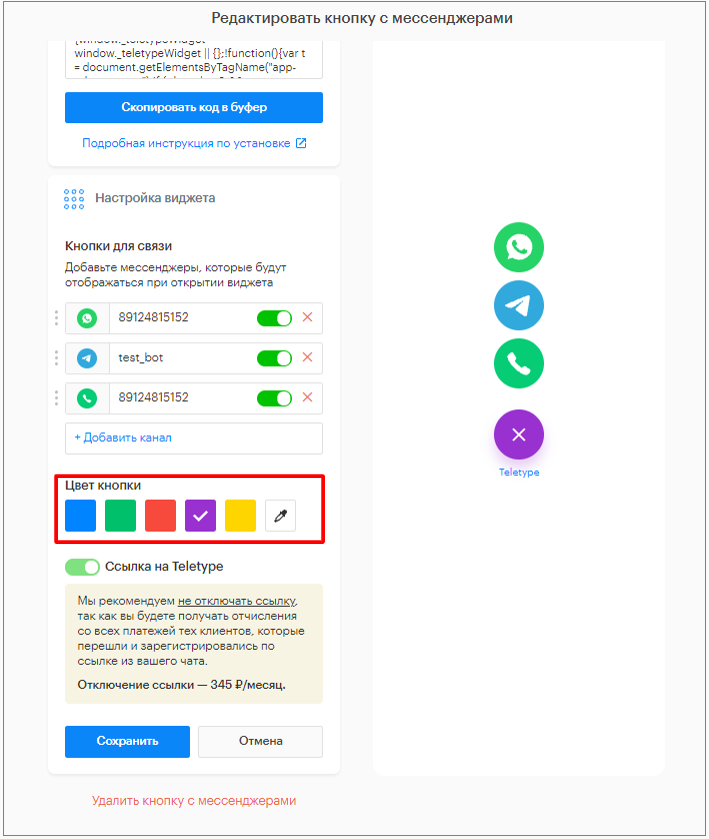
If only one channel is connected, the button will display the logo of the single connected channel.
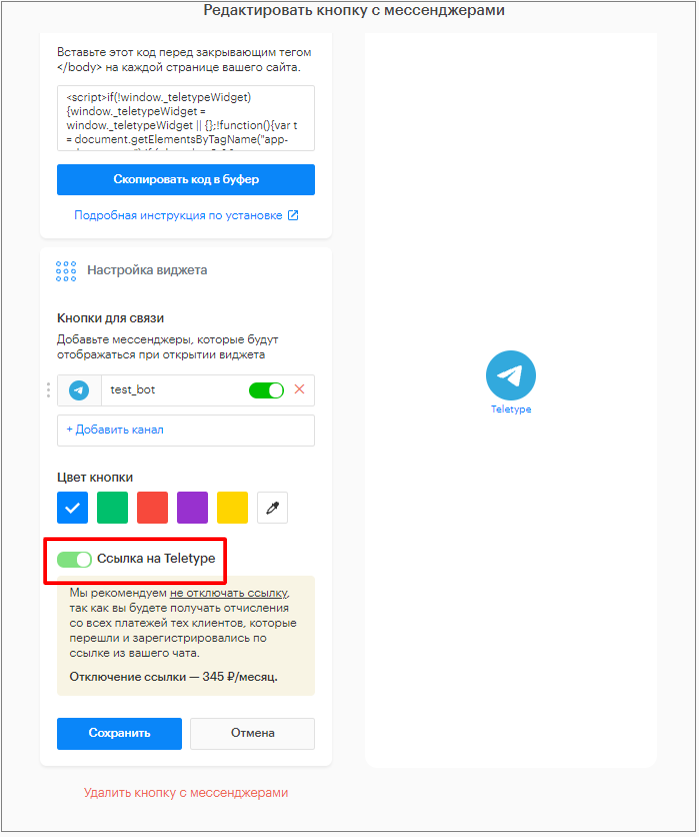
By default, the widget includes a link to Teletype. If necessary, this link can be hidden. Learn more about disabling the link.
11. Click “Save”.
Installing the widget on your website
- Click “Copy Code to Clipboard” to copy the widget installation code.
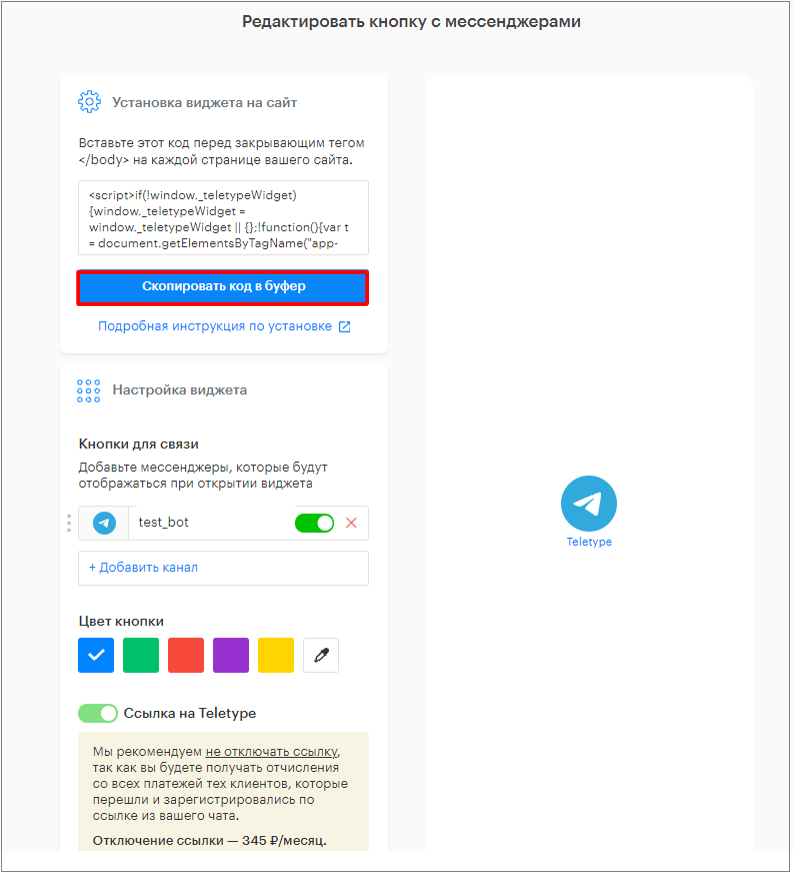
2. Paste the copied code before the closing </body> tag on every page of your website.
Important Information
You can place either the button with messengers or the online chat on your website, but not both widgets simultaneously.