How can we help?
Distribution of Requests
How to Set Up “Request Distribution”
Only the project owner and deputy owner can configure the auto-distribution mechanism.
To do this, you need to:
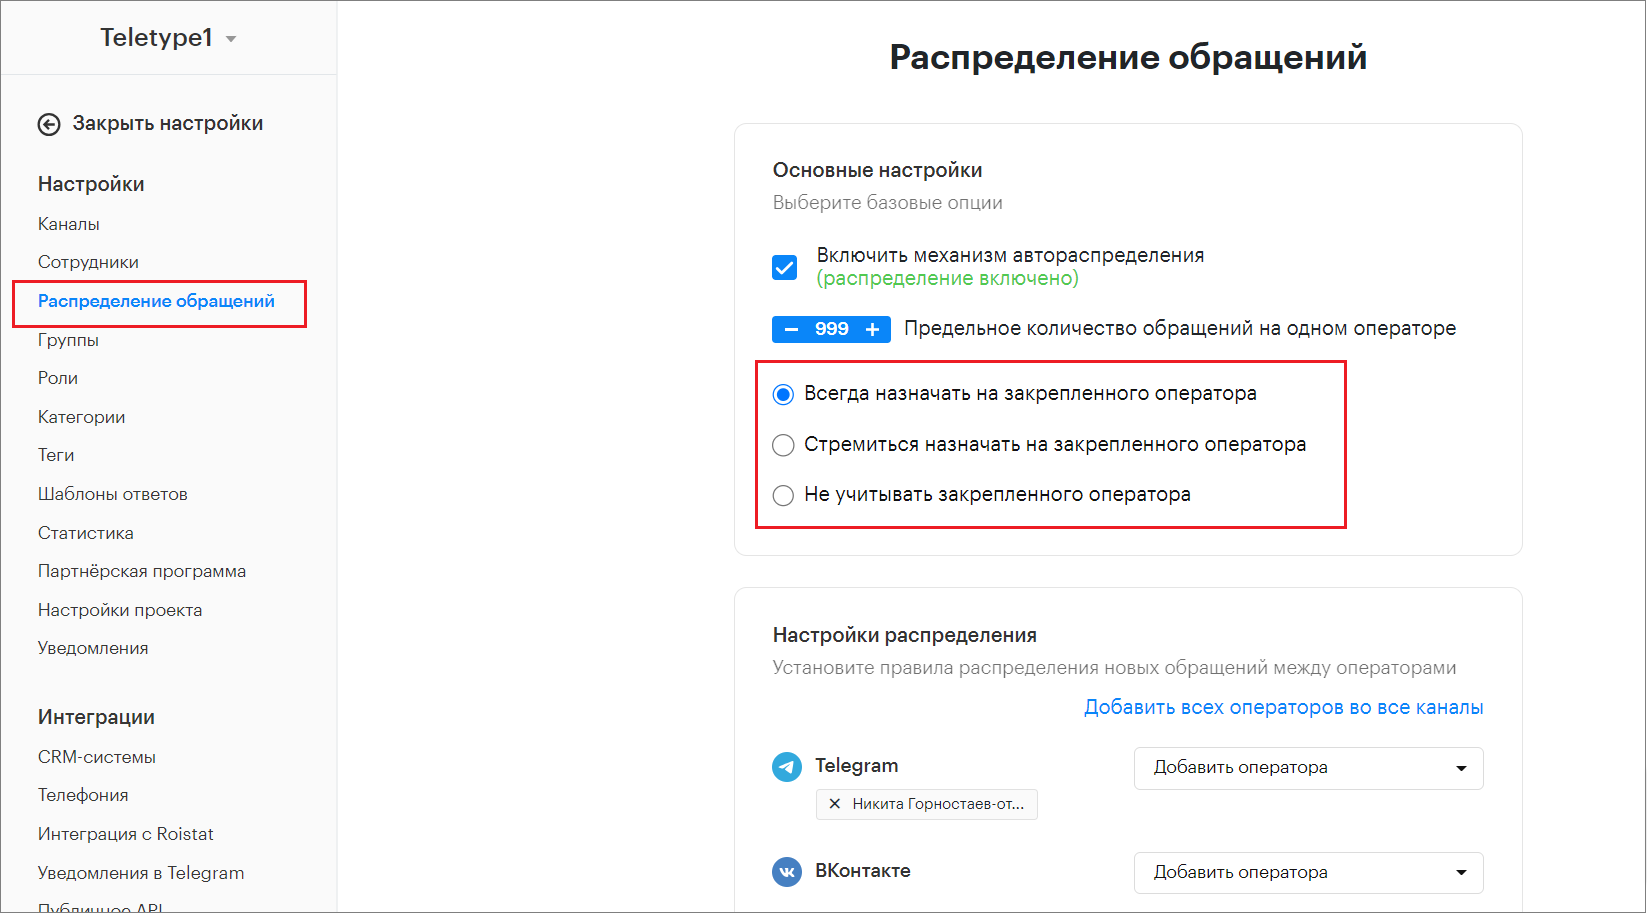
1. Go to the Teletype panel Settings
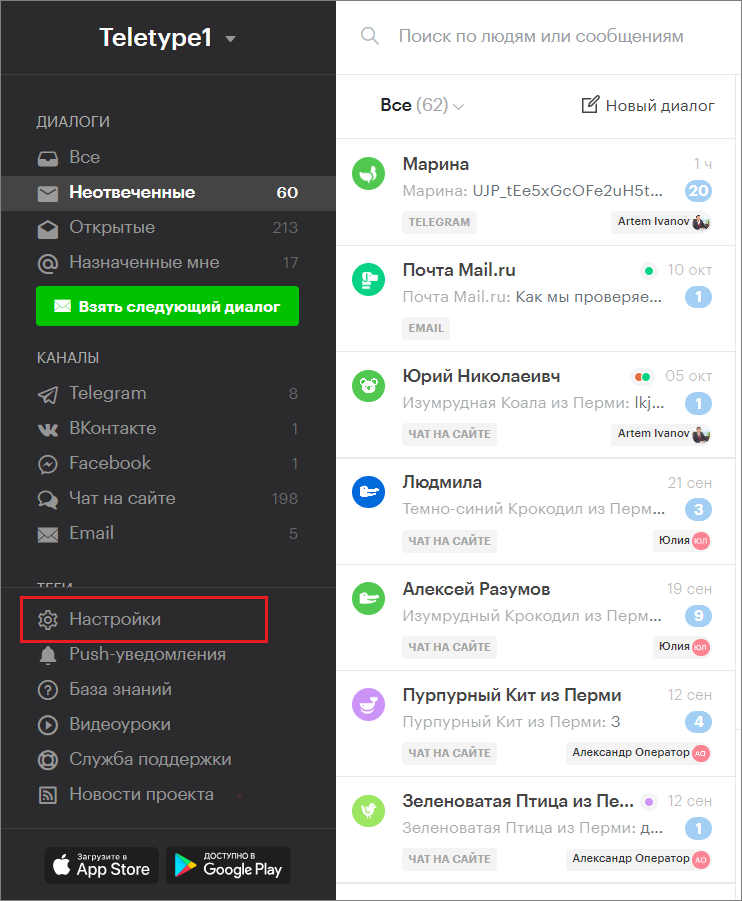
2. Click “Request Distribution”
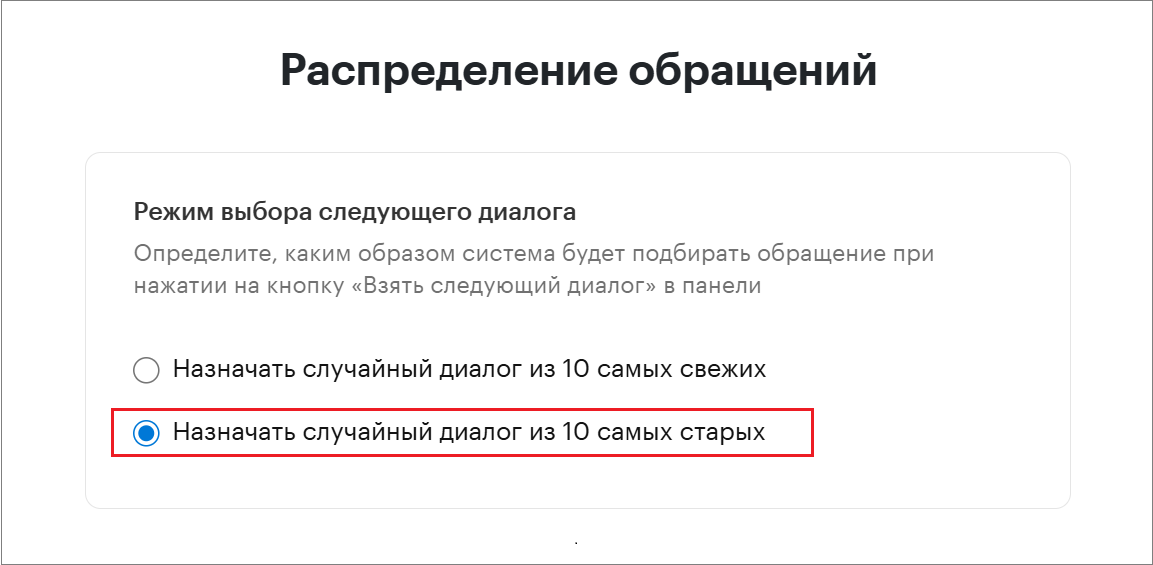
3. Configure the “Next Dialogue Selection Mode.”
Here you can set how the system will select a request when clicking the “Take Next Dialogue” button in the panel.
— Assign a random dialogue from the 10 newest
The system will assign requests from the 10 most recently created.
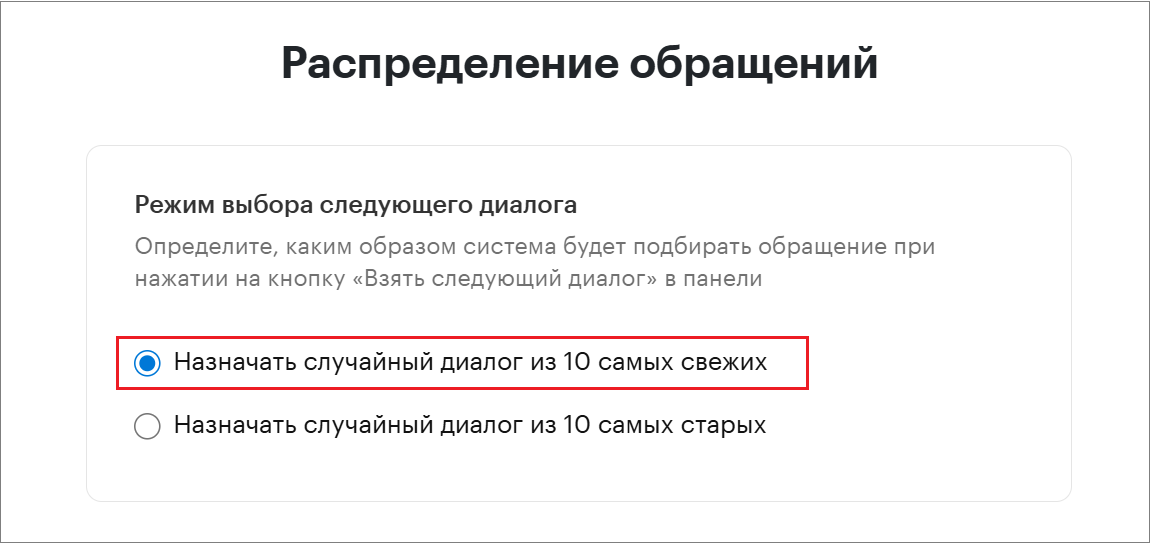
— Assign a random dialogue from the 10 oldest
The system will assign requests from the 10 oldest by creation date.
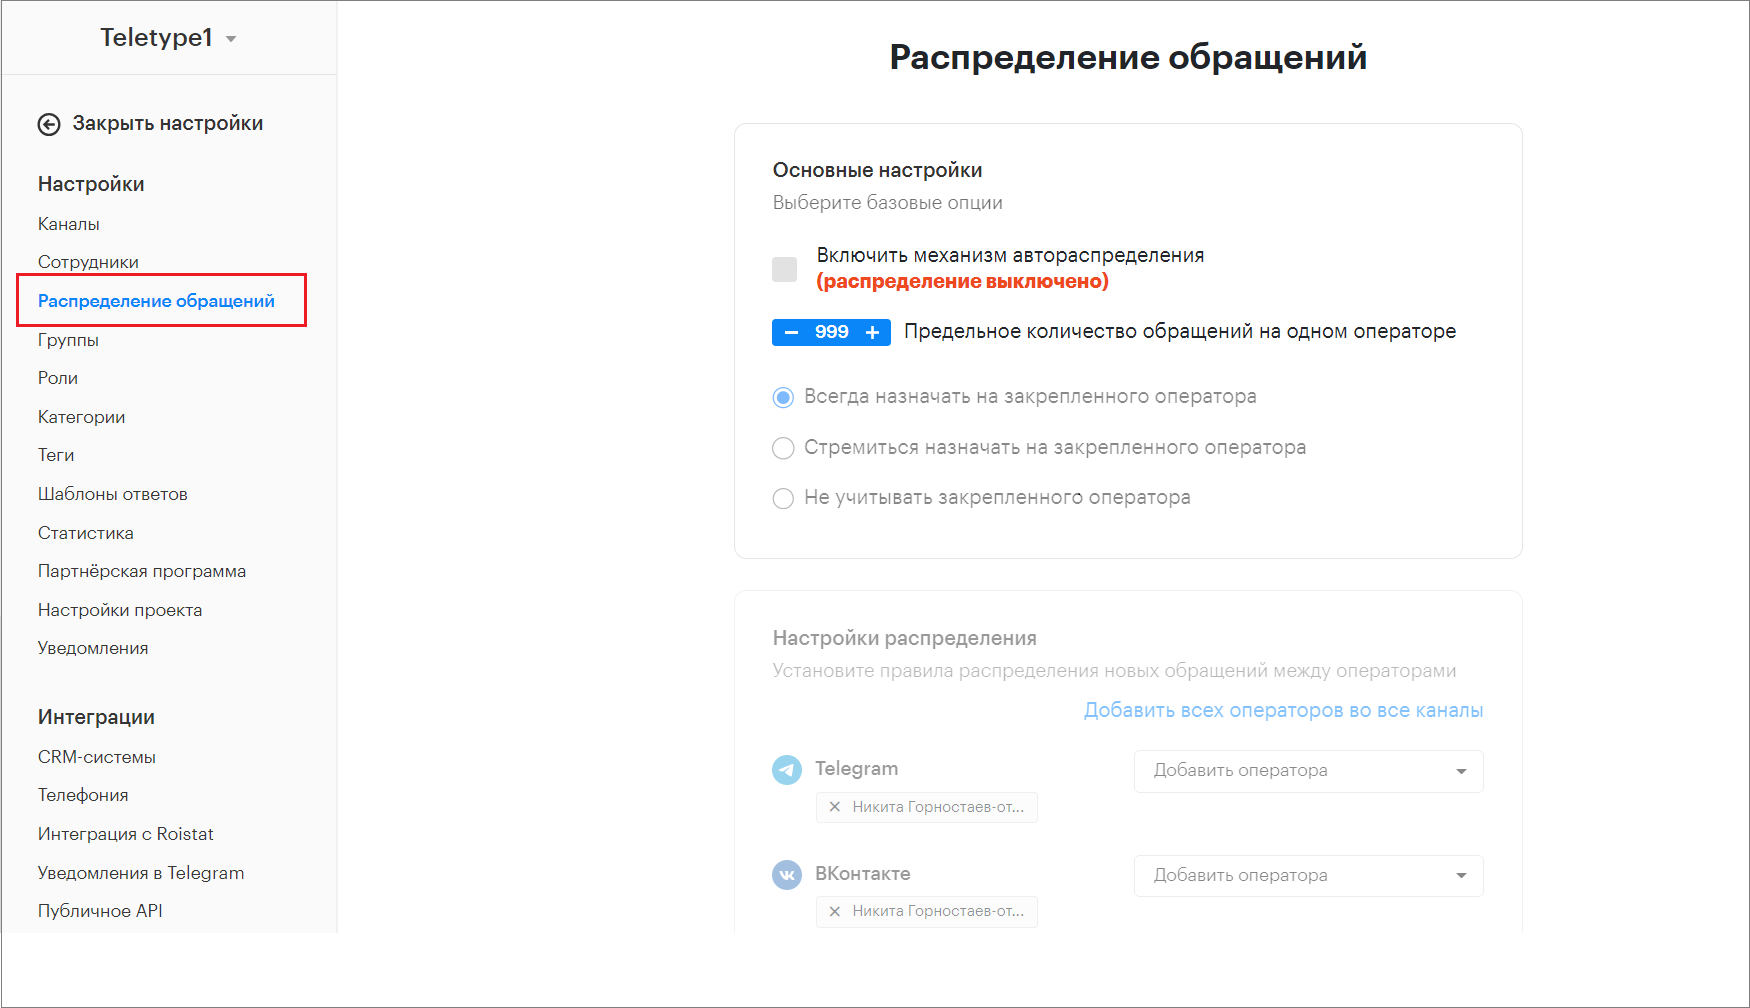
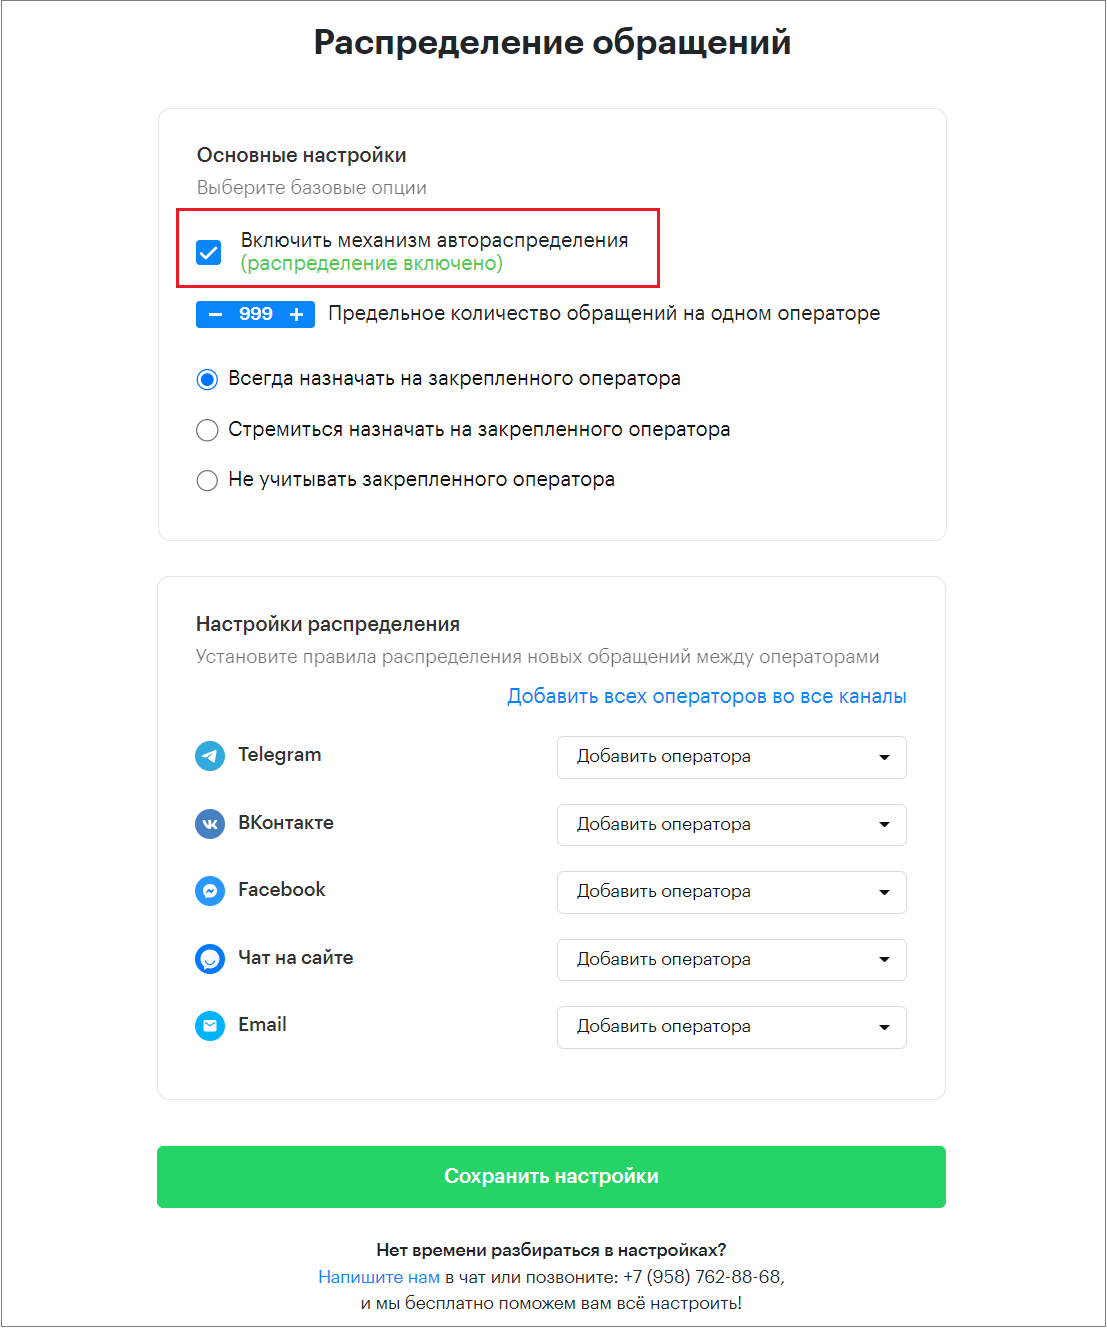
4. Enable the auto-distribution mechanism
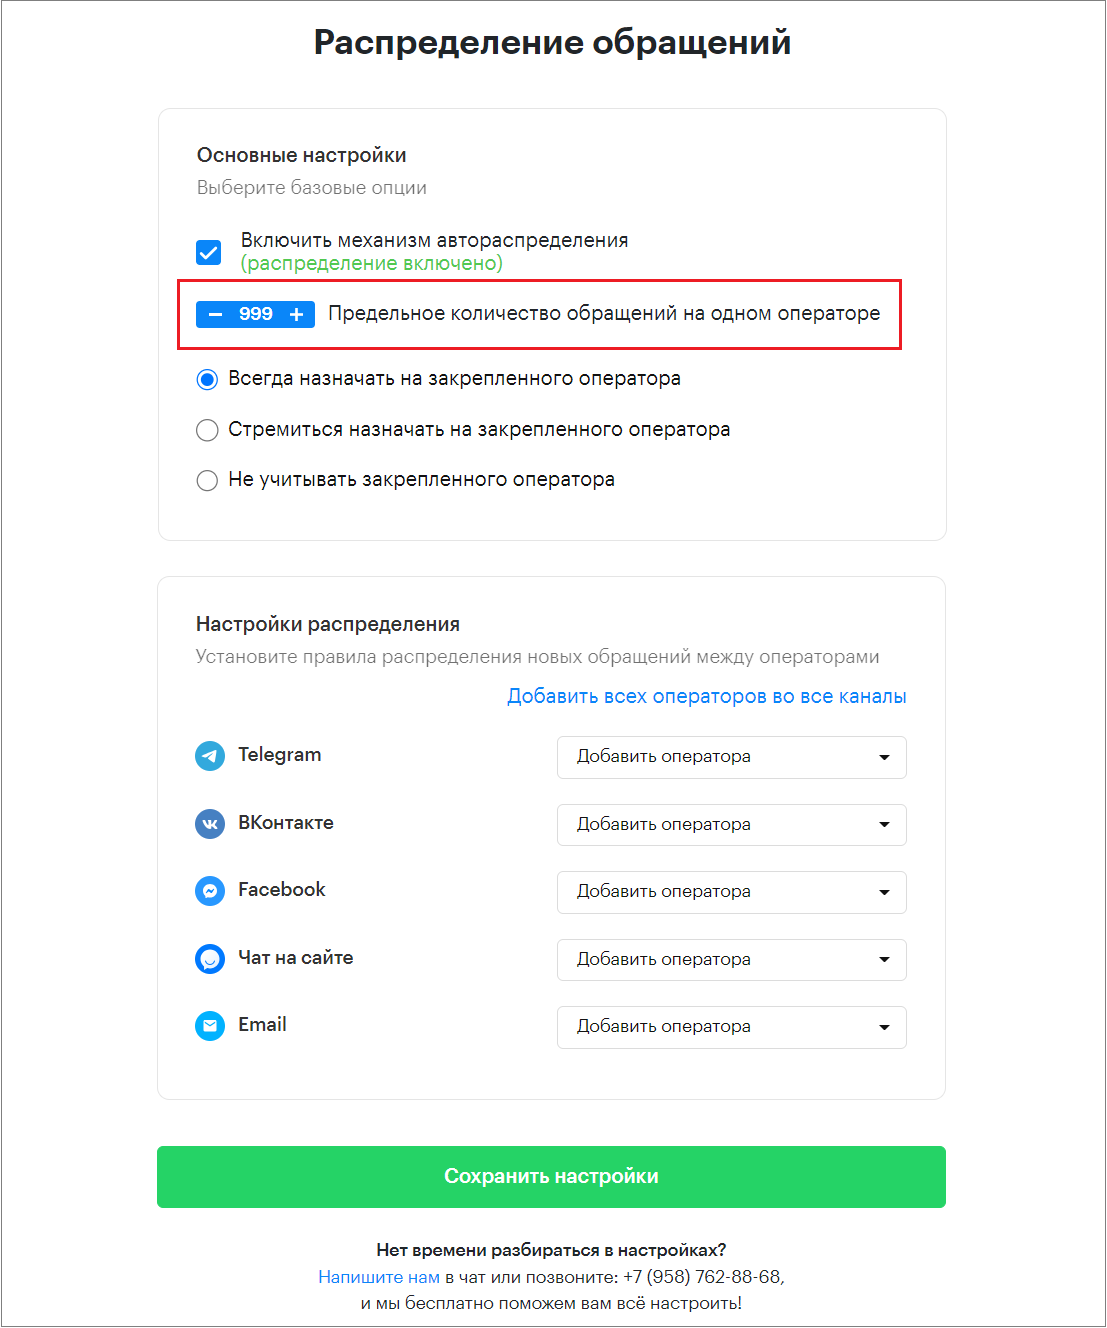
5. Set the maximum number of requests per operator
6. Choose the main settings:
- Always assign to the designated operator
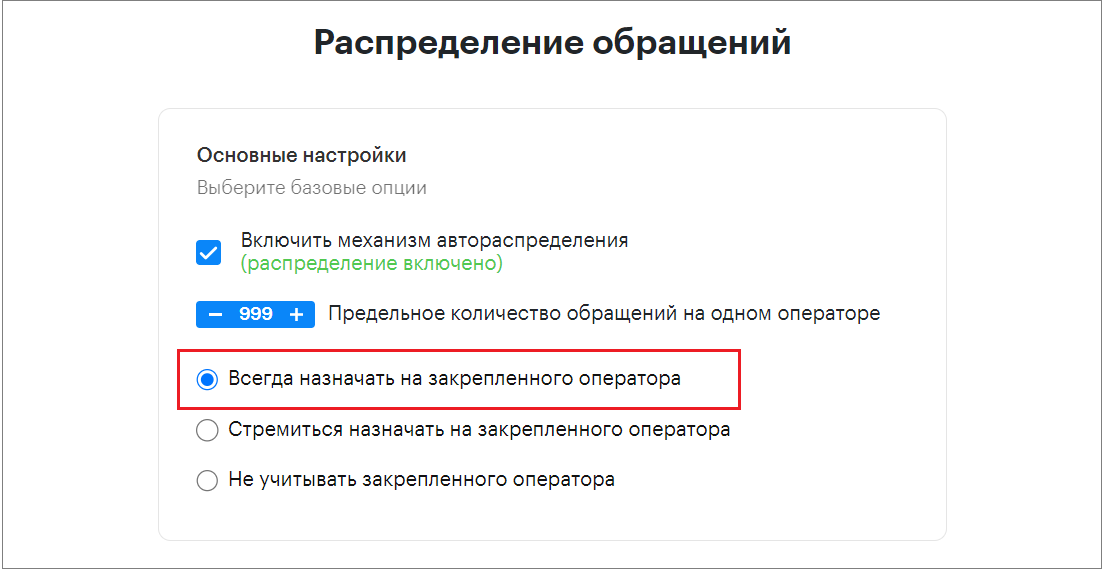
In this case, new client requests will always be assigned only to their designated operator.
2. Prefer assigning to the designated operator

With this setting, new client requests will be assigned to their designated operator only if that operator is online and has not reached the maximum number of requests.
Otherwise, the new client request will be assigned according to the auto-distribution settings, i.e., among operators responsible for the communication channel through which the client contacted.
3. Ignore the designated operator
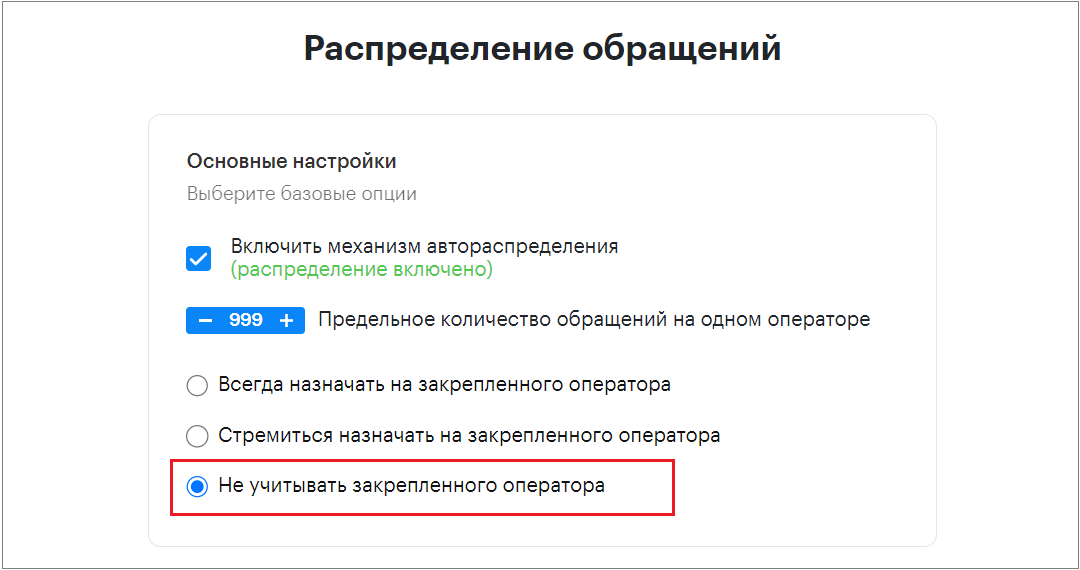
In this case, new requests will be distributed among operators according to the auto-distribution settings.
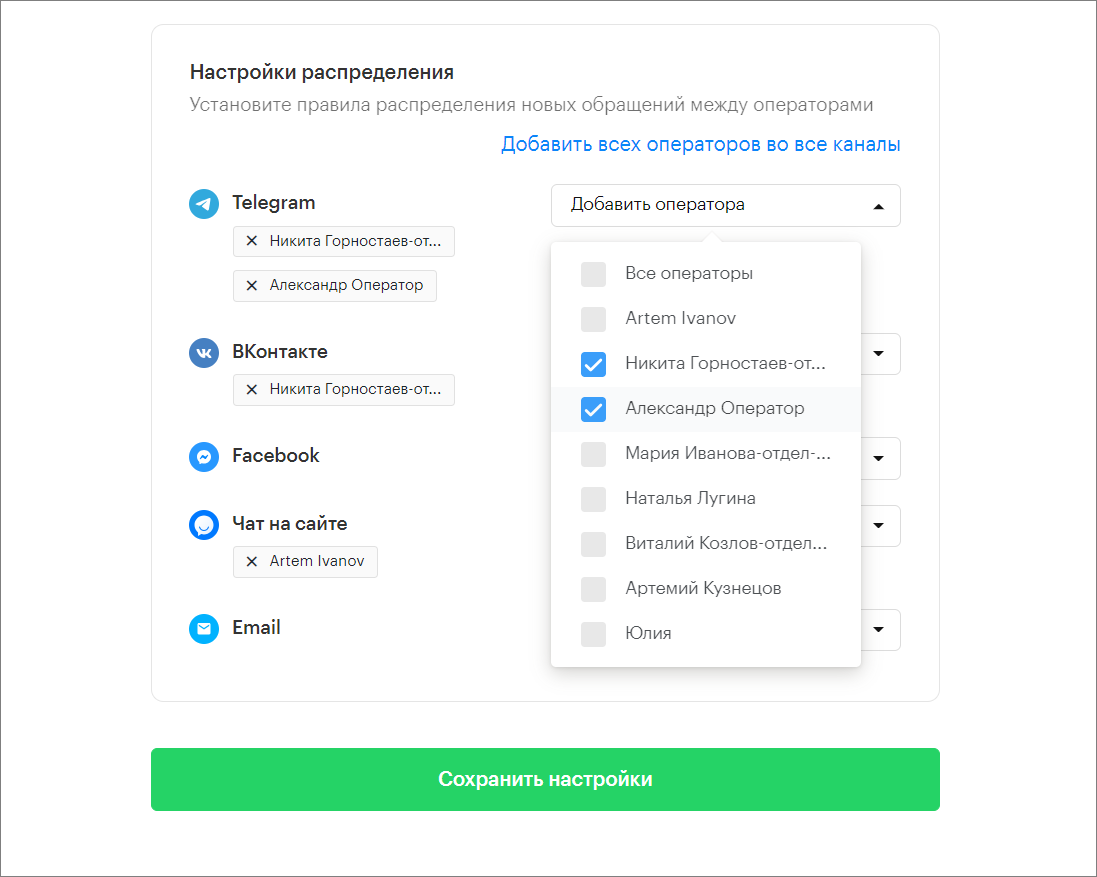
7. Configure the auto-distribution mechanism for new requests among operators
8. Click “Save Settings”

What is Auto-Distribution of Requests
The Teletype team presents the Automatic Request Distribution feature. This setting allows you to efficiently distribute client requests among operators.
You can configure auto-distribution based on parameters such as:
- Maximum number of requests per operator — allows setting the maximum number of open dialogues automatically assigned to an operator. Once the maximum is reached, new requests will not be assigned automatically, but the operator can still manually take on new requests.
- Assigning operators to specific channels — this setting lets you assign all or specific operators to each channel. For example, if you assign operator 1 to the Telegram channel and operator 2 to WhatsApp, new requests from Telegram will automatically be assigned to operator 1, and WhatsApp requests to operator 2.
- Designated operator for a specific client — allows assigning a responsible operator to a client for personalized service. For example, if each client in the company has their own personal manager.
If an operator is offline, set to “not online” status, or not paid, requests will not be assigned to them.
Important: if no operators are selected for channels, dialogues from those channels will not be distributed automatically.
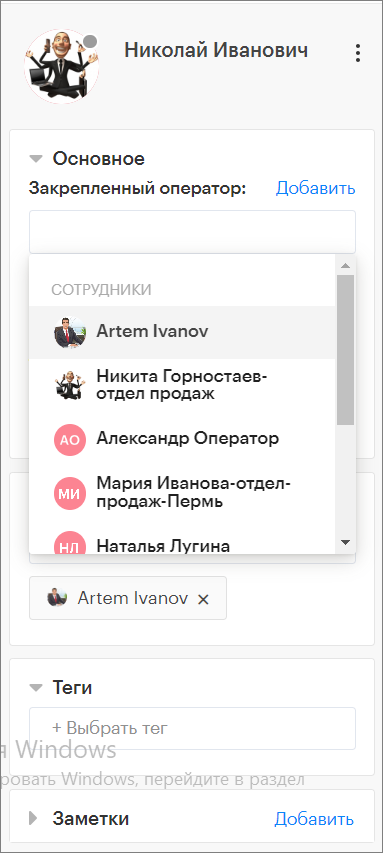
How to Add a Designated Operator?
Only the owner, deputy owner, or assistant owner of the project can add or remove a designated operator.
In the project settings under “Request Distribution,” select how new client requests will be assigned to the designated operator.
- Open the dialogue with the client
- In the client information block, under “Designated Operator,” click “Add”
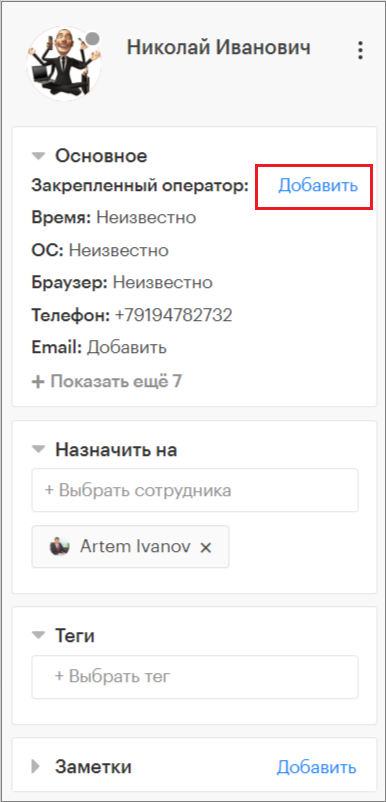
2. Click “+Select Employee”
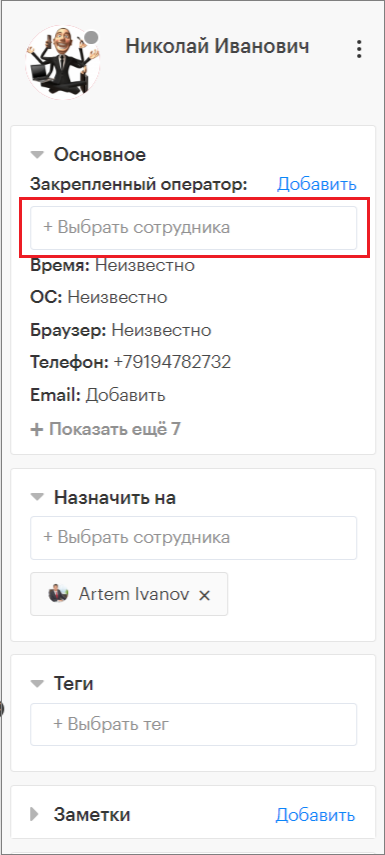
3. Select the operator from the dropdown list