How can we help?
-
Getting Started
- Registration in the System
- Setting Up and Adding a New Project in Teletype App
- Removing the Teletype App Link
- Teletype App Affiliate Program
- What is the Teletype App?
- Terms in the Teletype App
- How to switch Teletype to English
- Switching the Panel to English
- Glossary Teletype App
- Registration in Teletype App via eLama
- Показать все статьи ( 2 ) Свернуть статьи
-
Adding Channels
- Connecting to Facebook
- Telegram bot
- Viber Bot
- VK Group
- Online Chat for Website
- Instagram Direct/Comments
- Button with Messengers
- Telegram by Phone Number
- Avito Personal Account
- VKontakte Personal Account
- Email Setup
- WhatsApp Business
- Connecting WhatsApp Without Authorization in the Panel via Link
- Connecting Telegram by Phone Number Without Authorization in the Panel via Link
- Connecting Max
- Connecting Max Bot
- SMS
- Показать все статьи ( 10 ) Свернуть статьи
-
Working with Dialogs
- Closing the Dialogue and the Answered Button
- Customer Information
- Working with Channel and Dialogue Filters
- Quick Reply Templates
- Message Read Status in WhatsApp and Viber
- Closing a Conversation in AmoCRM — Ending a Dialogue in the Teletype App
- Working with the Telegram Notifier
- Button ✉️ Take the next conversation
- Reassigning the Dialogue
- Hotkeys
- Sending Voice Messages on WhatsApp
- Categories for Dialogues in the Teletype App Panel
- Group Chats in WhatsApp
- Group Chats on Telegram by Number
- Tags
- Push Notifications
- Distribution of Requests
- Mass Actions
- Request Notifications
- Evaluation of Dialogues in Telegram and WhatsApp
- Personal Data
- Показать все статьи ( 13 ) Свернуть статьи
-
CRM Systems
-
Operators
-
Profile Editing
-
Additional Options
-
Online Chat Installation
- WordPress — Chat Code Installation
- Joomla — Chat Code Installation
- Bitrix — Chat Code Installation
- Opencart — Chat Code Installation
- WIX — Chat Code Installation
- MODx — Chat Code Installation
- Tilda — Installing Chat Code
- UMI.CMS — Chat Code Installation
- NetCat — Chat Code Installation
- PrestaShop — Chat Code Installation
- ImageCMS — Chat Code Installation
- PlatformaLP — Chat Code Installation
- LPmotor — Chat Code Installation
- A5.ru — Chat Code Installation
- Blogger — Chat Code Installation
- Canape CMS — Chat Code Installation
- CartEnergy — Chat Code Installation
- DIAFAN.CMS – Chat Code Installation
- DigiSt — Chat Code Installation
- Drupal — Chat Code Installation
- Flexbe — Chat Code Installation
- fo.ru — chat code installation
- Gophotoweb — Chat Code Installation
- io.ua — chat code installation
- IPBoard (Invision Power Board) — Chat Code Installation
- lact.ru — Chat Code Installation
- Magento — Chat Code Installation
- Показать все статьи ( 19 ) Свернуть статьи
-
Analytics
-
API
-
Billing
-
Telephony
-
Teletype Sender
-
Bot Builder
Working with Groups
Working with Groups
Working with groups allows you to restrict operators’ access to conversations, i.e., to create groups that include specific communication channels and the operators responsible for them.
Operators in a group will only see the communication channels added to that group in their panel, and accordingly, only the conversations coming through those channels.
For example, if a company has several departments (sales, technical support, marketing, etc.), you can create a group for each department with its own communication channels and operators.

How to Create Groups in the Teletype Panel
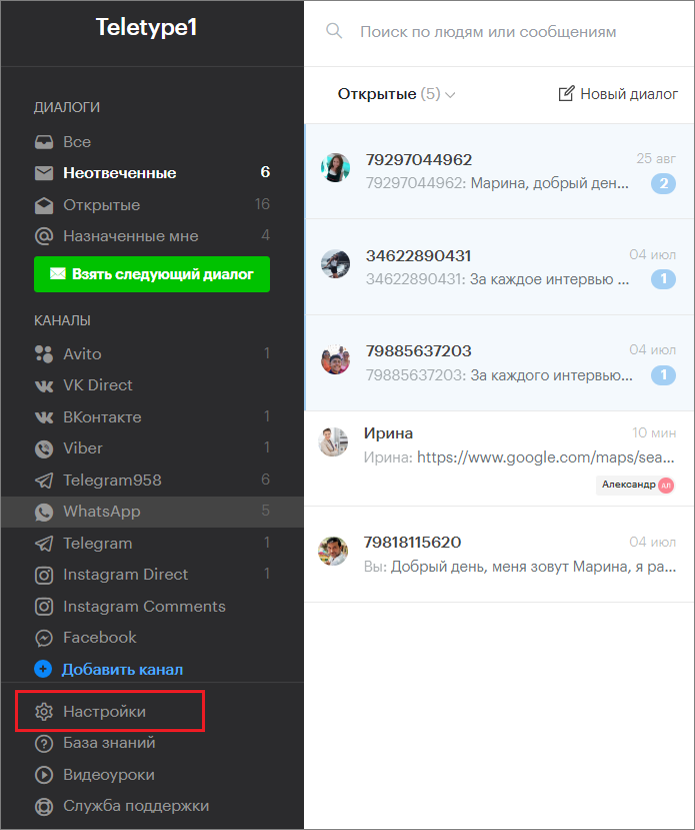
- Go to the project settings.
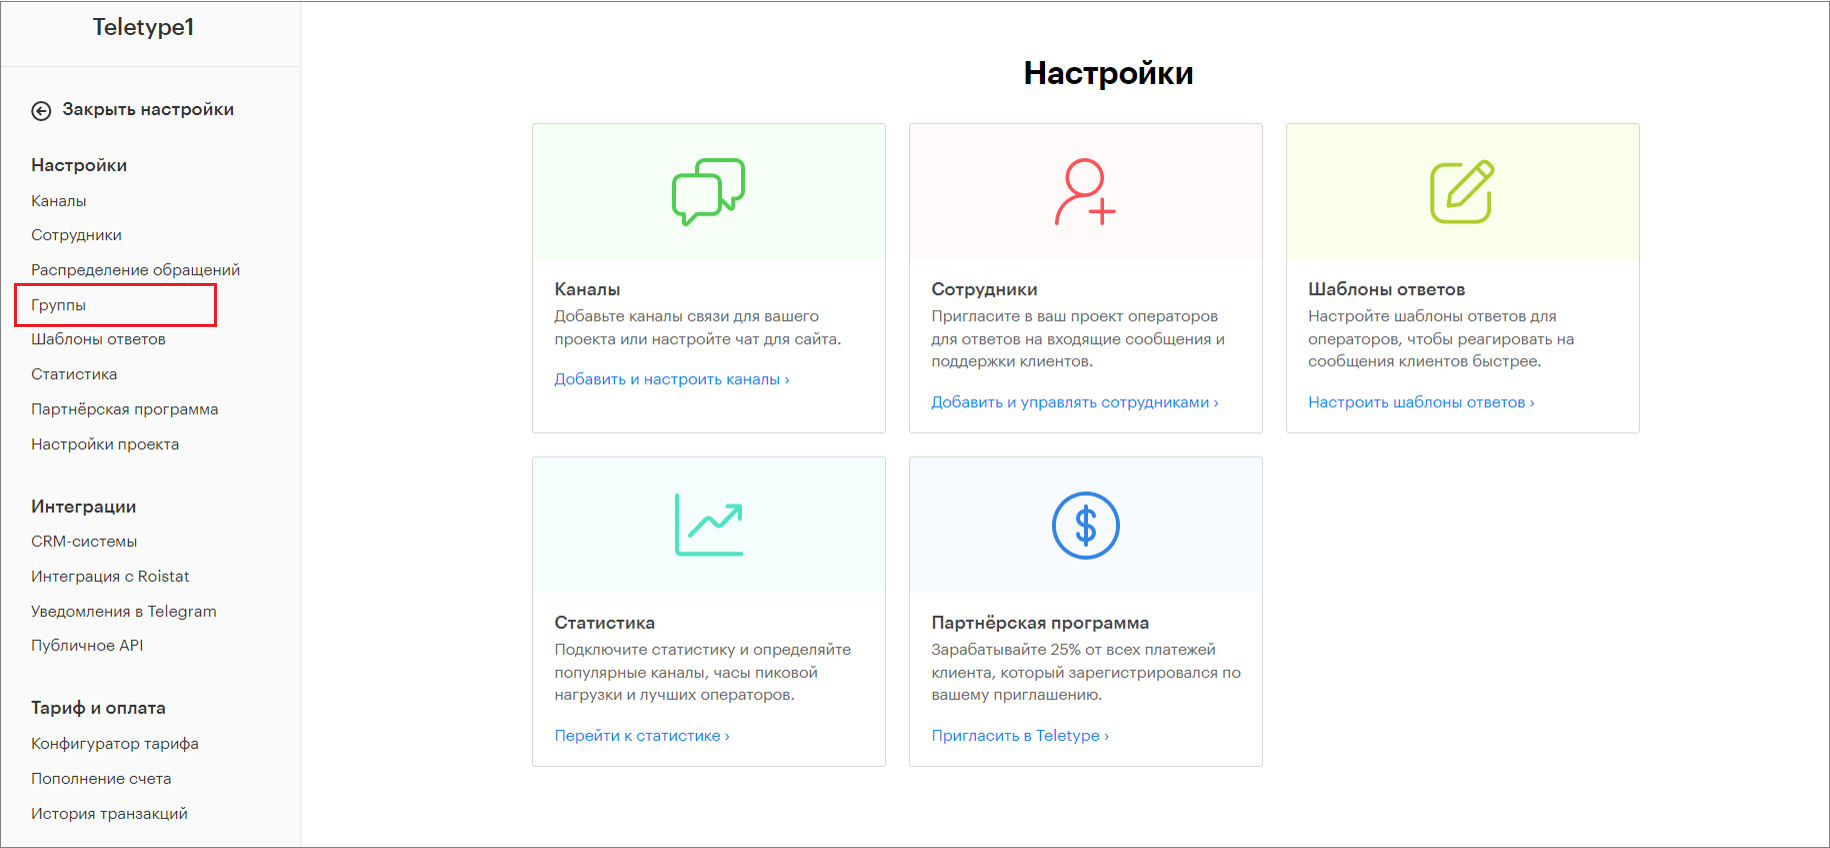
2. In the project settings, go to the Groups section.
3. Click “Add groups to the plan.”
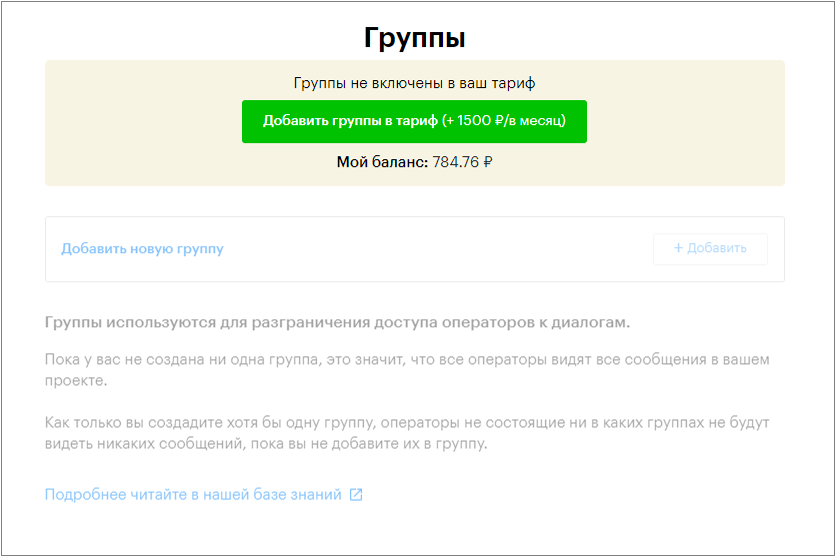
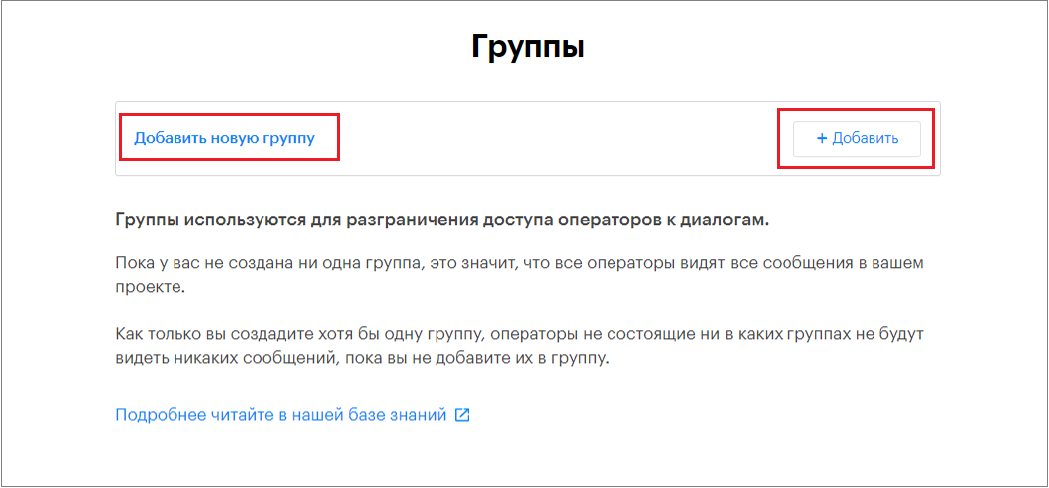
4. In the Groups section, click “Add” or “Add new group.”
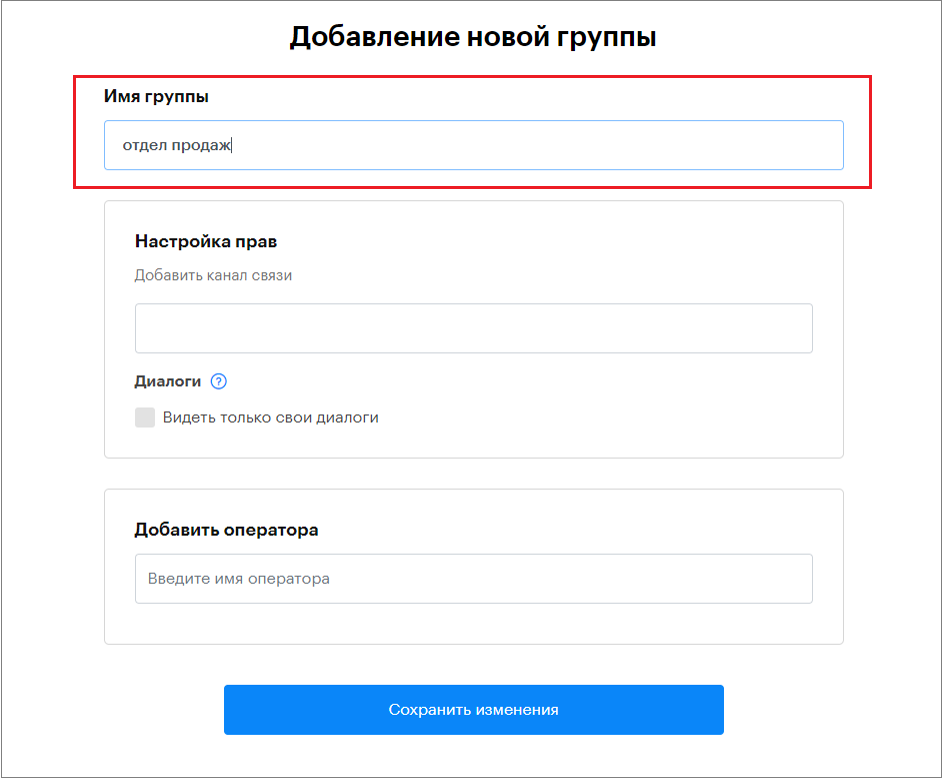
5. In the “Add new group” window that opens, enter the group name.
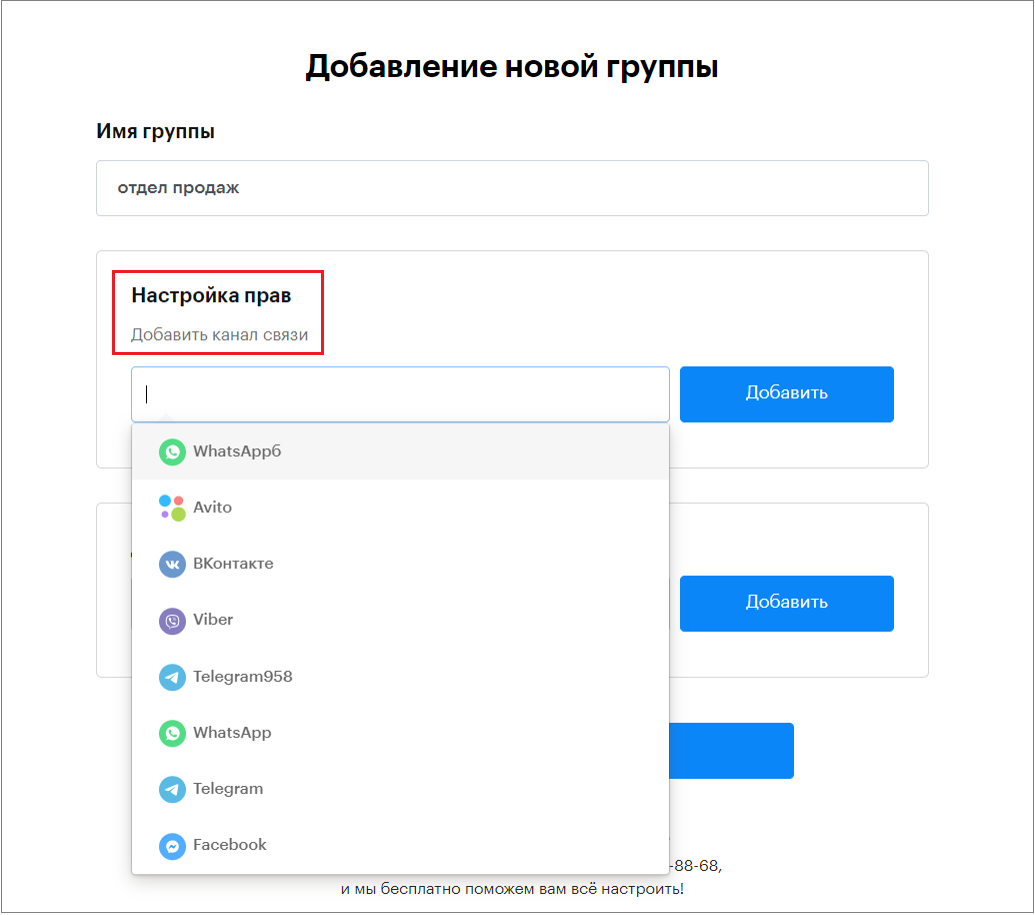
6. Then add communication channels for this group.
7. Add operators to this group.
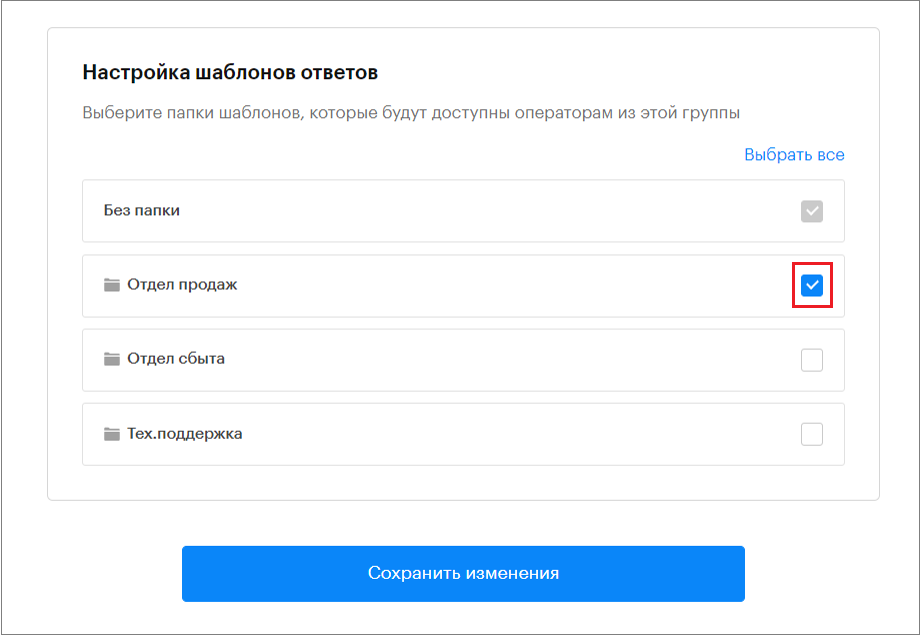
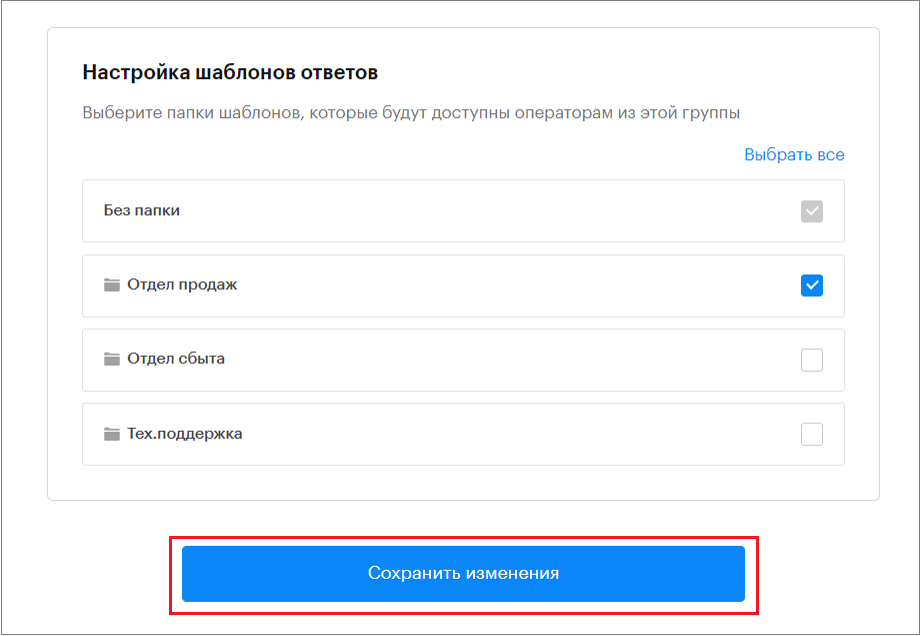
8. Select the Template Folder for this group.
9. Click “Save changes.”
10. The created group will appear in the list of groups.
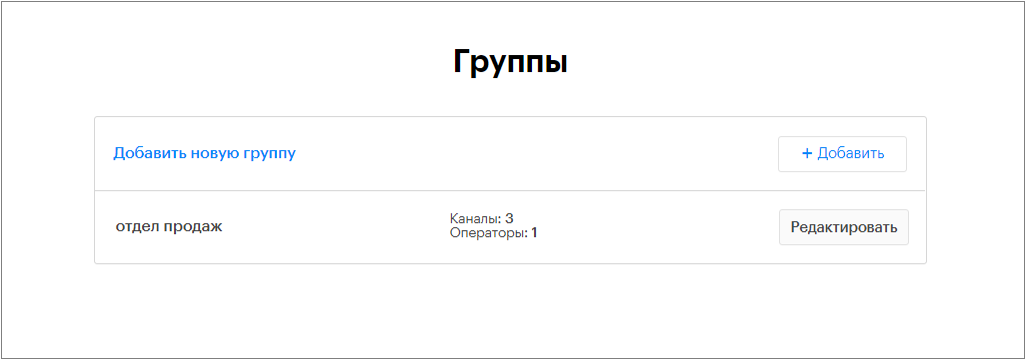
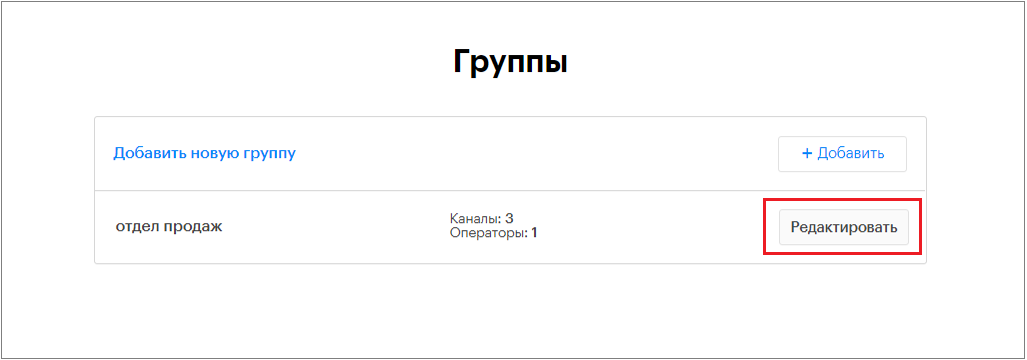
11. If necessary, you can edit the group.
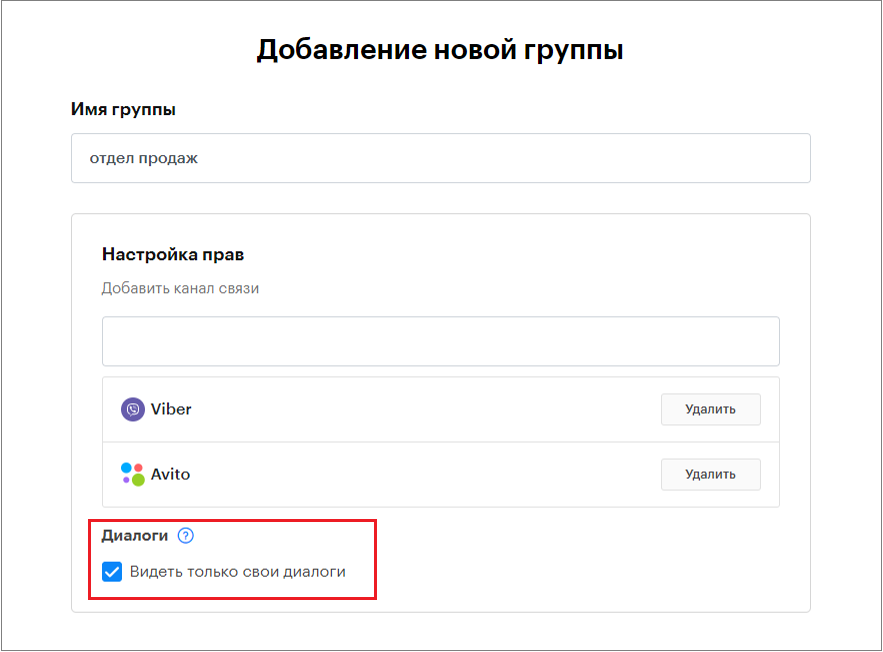
Restricting Conversation Visibility and Supervisor Role
In the “Permissions settings” section when creating a group, you can check the box “See only own conversations.”
After that, each operator within the group will only see conversations assigned to them and conversations not yet assigned to any operator.
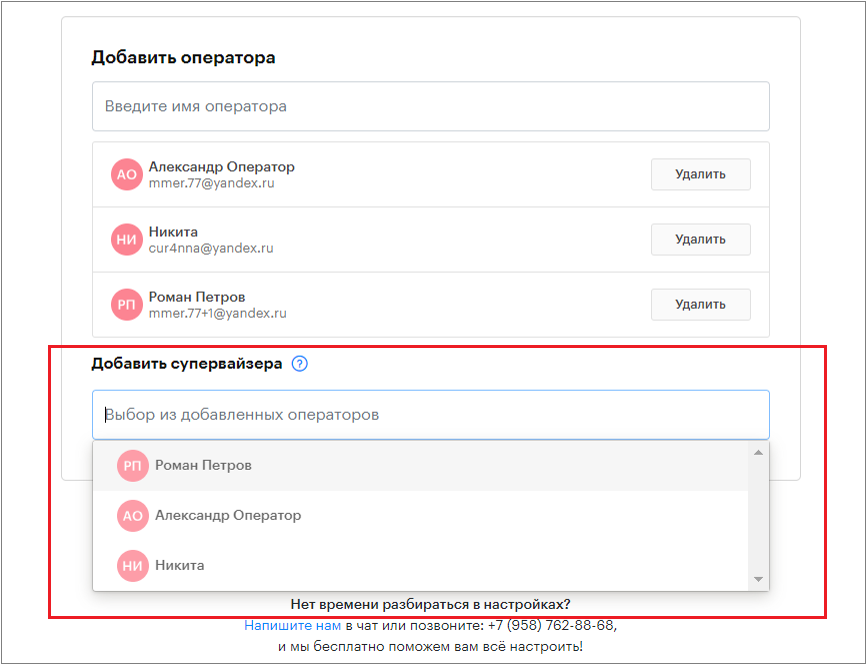
If the “See only own conversations” box is checked, the “Add supervisor” section becomes active.
Supervisors can be selected within the group from the list of operators. A supervisor will see all conversations within the group, including those assigned to other operators.


